Tag: Teide National Park

  • PR-TF 43 Garachico to Chinyero Hiking Guide: Lava, Forest and Big Ascent

    PR-TF 43 Garachico to Chinyero Hiking Guide: Lava, Forest and Big Ascent

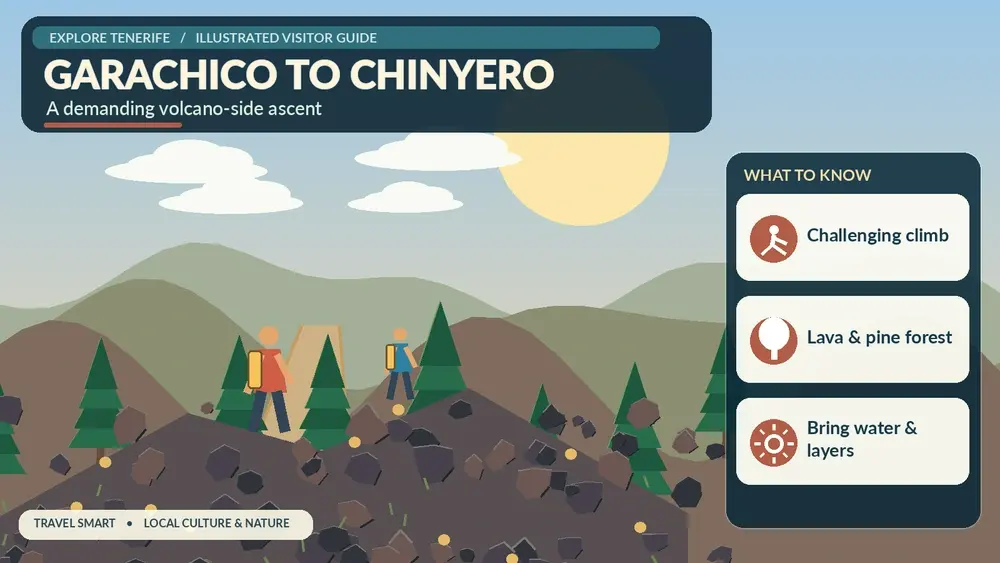
    PR-TF 43 is one of the strongest mountain-to-volcano hiking lines in northwest Tenerife. It begins almost at Atlantic level in historic Garachico and climbs through lava-shaped slopes, rural land and pine forest until the Chinyero volcanic landscape takes over. The headline number is not the distance but the ascent: roughly 1,680 metres in 17.7 kilometres, which makes this a serious full-day effort rather than a casual add-on to a sightseeing day.

    The technical figures below come from the current Turismo de Tenerife route information that I checked while preparing this guide. I still verify the live page before setting out, because status notices and temporary restrictions can change faster than an article.

    Quick route facts

    StartGarachico
    FinishCircular Chinyero
    TypeLinear
    Distance17.7 km
    Official duration7 hr
    DifficultyHigh
    Maximum altitude1,521 m
    Minimum altitude46 m
    Accumulated ascent1,680 m
    Accumulated descent287.52 m
    Protected areasAcantilados de La Culata Protected Landscape; Chinyero Special Nature Reserve
    PermitNo

    Why this route is worth understanding

    What makes this route unusual is the vertical story. Garachico is inseparable from the 1706 eruption of Trevejo, and the walk gradually leaves the coast behind before reaching the younger Chinyero landscape associated with Tenerife’s 1909 eruption. I would choose it when the goal is to understand how volcanic history and settlement geography fit together, not simply to collect another summit.

    For wider context I connect this route with Garachico guide Chinyero Volcano guide Arenas Negras trail Tenerife hiking permits and trail rules. I prefer building one coherent regional day rather than crossing the island between unrelated stops.

    How the route unfolds

    1. Garachico and the first sustained climb

    The route leaves one of Tenerife’s most attractive historic towns and immediately asks for respect. The early ascent is where I deliberately keep the pace slow, because the legs are still fresh and it is easy to spend energy too quickly. Looking back toward the coast gives a clear sense of how rapidly the route gains height.
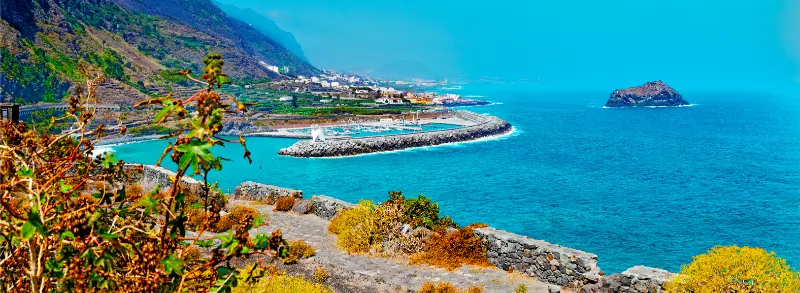
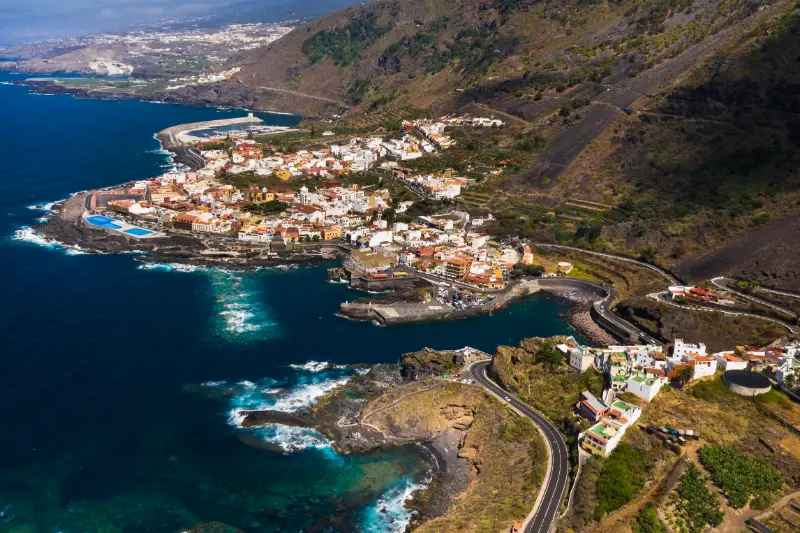
    The Garachico coastline and offshore Roque de Garachico

    2. San Juan del Reparo and old lava terrain

    The path climbs through the area of San Juan del Reparo and crosses terrain shaped by historical lava. This is not a smooth promenade: stone, uneven surfaces and steep gradients matter. I use this middle section to settle into a steady rhythm rather than chasing the official time.

    3. La Montañeta and Arenas Negras

    Higher up, the character becomes more rural and forested. The route approaches La Montañeta and the Arenas Negras area, where pines and volcanic soils replace the lower agricultural feel. My separate Arenas Negras guide is useful if I want a shorter alternative rather than committing to the entire PR-TF 43.

    4. The Chinyero volcanic landscape

    The final objective is the Chinyero area, where dark lava, pines and volcanic cones create one of Tenerife’s most distinctive hiking environments. I stay on the marked route because the reserve protects fragile terrain and because loose lava is much less stable than it can look from a distance.

    Difficulty: how I read the official grade

    The official difficulty label is useful, but I never use it alone. I combine it with distance, vertical gain or loss, altitude, exposure, trail surface and the amount of transport planning required. A short steep route can punish knees; a long descent can be exhausting; a high-altitude path can feel hard even when the gradient is moderate.

    I also compare the route with my recent activity rather than with what I managed on a holiday years ago. If I have not been hiking regularly, I choose a shorter alternative first and learn how my body reacts to Tenerife’s heat, altitude and volcanic footing.

    Navigation and route status

    I use the current official route sheet as the baseline, then save an offline map before leaving. Waymarks matter more than a downloaded user track because old GPX files can preserve shortcuts, outdated diversions or sections that have since closed. At a junction I stop, confirm the marker and only then continue; following another group is not navigation.

    Trail status can change after fire, heavy rain, maintenance or conservation work. I recheck the official page shortly before the hike. If a closure or prohibition is posted, I change plans rather than looking for a way around it. Tenerife has enough excellent alternatives that ignoring a closure is never necessary.

    Getting there and getting back

    Because the route is linear and finishes high in the Chinyero network rather than back in Garachico, I arrange the return before I start. A two-car shuttle, pre-arranged taxi or carefully checked bus plan is far safer than assuming transport will be easy after seven hours of climbing.

    When buses form part of the plan I check the current TITSA timetable on the day itself. Rural services can be infrequent, and missing one bus after a long hike can turn a good day into a logistical problem. If I drive, I park legally and keep forest gates, farm access and emergency routes clear.

    Weather and the best conditions

    The route crosses several climate zones. Garachico can feel warm while the upper forest is cool, cloudy or windy. I carry a light insulating layer even on a sunny coastal morning and I avoid using the coast forecast as a proxy for conditions around 1,500 metres.

    I check AEMET or another current mountain forecast rather than relying on the weather shown for a coastal resort. Calima, heat alerts, high wind, wildfire restrictions and rain are all valid reasons to change the route. Flexibility is one of the most useful pieces of hiking equipment I have.

    What I carry

    • Enough water for the route plus a reserve.
    • Food that is easy to eat while walking, including something salty on longer days.
    • Trail or hiking shoes with reliable grip.
    • Sun protection: hat, sunscreen and sunglasses.
    • A light windproof or insulating layer appropriate to the altitude.
    • Offline map, charged phone and power bank for long routes.
    • Small first-aid kit and any personal medication.

    I adjust quantities to heat, altitude and duration rather than copying one packing list for every Tenerife walk. A five-kilometre route with 600 metres of ascent can require more water and recovery time than a flatter ten-kilometre walk.

    Safety: the points I take seriously

    I manage descents as carefully as climbs. Loose volcanic gravel, polished stone and tired legs are a common combination on Tenerife. I shorten my stride on steep ground, leave space between hikers and never hurry because someone behind me is moving faster. If I use trekking poles, I use them because I am already comfortable with them, not because the route suddenly feels difficult.

    I stay away from cliff edges, ravine drops and unstable lava. I do not climb walls, cones or rock formations for photographs. During heat, calima, strong wind or heavy rain I shorten or cancel the walk. In an emergency the number in Spain is 112; I also tell someone where I am going and when I expect to finish.

    Who this route suits

    I think in terms of skills rather than labels such as “beginner” or “experienced”. The route is a good match only if everyone in the group is comfortable with its longest climb or descent, expected duration and surface. For families, I consider each child’s real walking experience and attention span rather than age alone.

    If anyone is uncertain, I choose an easier route and keep this one for another day. Tenerife’s trail network is broad enough that scaling down does not mean wasting the trip.

    Respecting the landscape

    Many of these routes cross protected areas, working rural land or both. I stay on the signed path, close gates if the local system requires it, keep noise low near homes and never pick plants or collect volcanic rock. I carry out all rubbish, including organic waste, because food scraps can attract animals and change behaviour.

    I also avoid creating social-media shortcuts. A line across loose lava or vegetation may look harmless when one person does it, but repeated footsteps can become a visible scar. The established route is part of the conservation system, not an obstacle to a better photograph.

    Photography without compromising safety

    I take photographs from stable, legal ground. Tenerife’s volcanic terrain creates strong foregrounds without needing to step beyond a barrier or onto a fragile slope. On exposed routes I secure loose items before taking out a phone or camera, especially in gusty wind.

    I prefer a few deliberate stops to constant filming while walking. That improves both safety and the quality of the images: I can look at the route, notice geology and vegetation, and avoid turning every junction into a distraction.

    How I would fit it into a Tenerife itinerary

    I make the hike the main event of the day. Beforehand I keep breakfast and transport simple; afterwards I choose a nearby town, viewpoint or relaxed meal rather than another major attraction. This gives me margin for a slower pace, weather delays and the possibility that the trail takes longer than the official estimate.

    For visitors staying far away, I would rather change accommodation for a night than add hours of driving before and after a demanding route. I compare accommodation around Garachico, Tenerife when the hike is one of the priorities of the trip.

    Pacing, food and recovery

    I eat before I am hungry and drink before I feel dehydrated. On long climbs I use small, regular snacks rather than a heavy meal. I also keep some food for the final hour; tiredness near the finish is exactly when concentration can drop.

    After the hike I change out of wet layers if necessary, rehydrate and eat something substantial before driving a long distance. If the route has involved more than a thousand metres of ascent or descent, I avoid planning another demanding activity that evening.

    Official information I check before leaving

    The route page I use is Turismo de Tenerife’s official route information. I look for current status notices, closures, permit requirements and manager advice. If the route enters a national park or another managed protected area, I also check the relevant Cabildo or Tenerife ON information where applicable.

    Common mistakes I avoid

    • Starting late because the route looks short on a map.
    • Using a beach forecast for a mountain or forest route.
    • Assuming a linear trail will have simple transport at the finish.
    • Following another hiking group instead of checking my own waymarks.
    • Underestimating long descent and knee fatigue.
    • Depending on mobile signal instead of saving maps offline.
    • Leaving the marked trail for a shortcut or photograph.
    • Ignoring a closure because an old blog or GPX shows the route as open.

    Frequently asked questions

    How long is the route?

    The current official sheet lists 17.7 km. I use the official duration only as a reference and add time for breaks, navigation, photography and the pace of the slowest person in the group.

    Do I need a permit?

    The current route information shown in the table above is my starting point, but a permit and an opening status are different things. A route can require no permit and still be temporarily closed. I always check the live status immediately before the hike.

    Can I hike it in ordinary trainers?

    I prefer trail or hiking shoes with useful grip. Tenerife routes can combine loose volcanic material, polished stone, forest soil and rough steps. Heavy boots are not mandatory for every trail, but smooth urban soles remove a useful margin of safety.

    What if the weather changes?

    I use a turnaround point and a backup plan. If wind, heat, rain, cloud or fatigue materially reduces my safety margin, I turn back or switch plans. Completing a named route is never more important than returning with enough daylight and energy.

    Is the official hiking time realistic?

    It is a planning benchmark, not a promise. Fitness, photography, heat, route-finding and group size can all change the time. On demanding routes I add generous margin and avoid booking a fixed activity immediately after the expected finish.

    Final thoughts

    I see PR-TF 43 as a route for hikers who specifically want a large vertical day. Its reward is the transition from historic coast to volcanic highland, but that same transition creates the main challenge: sustained ascent, changing weather and complicated finish logistics.

    The most useful approach is simple: check the official status, understand the vertical profile, plan the return before starting and keep enough margin to change the day when conditions are not right. That makes the route safer and usually more enjoyable.

  • PR-TF 59 Las Portelas–Masca Hiking Guide: Historic Teno Ridge Route

    PR-TF 59 Las Portelas–Masca Hiking Guide: Historic Teno Ridge Route

    PR-TF 59 Las Portelas – Masca is a historic ridge connection that shows the sharp climatic divide between humid northern Teno and the drier Masca side. I like this route because the landscape tells the geography lesson for me: the greener north and the drier Masca side can feel like different islands even though the walking distance is short.

    I use the current Turismo de Tenerife route sheet as my technical baseline because trail status, closures and management advice can change. The official sheet currently lists 3.7 km, 2 hr, low difficulty and no as the permit requirement. I still check the page again on the morning of the hike rather than assuming a saved article is enough.

    Quick route facts

    Official routePR-TF 59 Las Portelas – Masca
    StartLas Portelas
    FinishMasca
    TypeLinear
    Distance3.7 km
    Official duration2 hr
    DifficultyLow
    Maximum altitude912 m
    Minimum altitude657 m
    Accumulated ascent276.50 m
    Accumulated descent309.05 m
    Protected areaTeno Rural Park
    PermitNo

    The wet-to-dry transition

    PR-TF 59 sits near a climatic boundary. Cloud can cling to the Las Portelas side while Masca opens into warmer, drier air. I do not guarantee that contrast on every day, but when it happens the route becomes a compact lesson in Tenerife microclimates.

    The wider setting is Las Portelas to Masca. I plan the hike as part of that region, not as an isolated pin. Useful companion articles on this site include Masca guide Teno Rural Park guide Masca Road TF-436 guide Monte del Agua guide. That gives me backup options if cloud, wind, heat or a closure makes the original route a poor choice.

    How the route unfolds

    1. The departure from portela baja on village lanes and track

    At the beginning, the departure from Portela Baja on village lanes and track. I deliberately start slower than my normal walking pace while I check the waymarking and how the ground feels. Tenerife trails can change from lane to stone path to forest track in a short distance, and the first ten minutes are the best time to correct a navigation mistake.

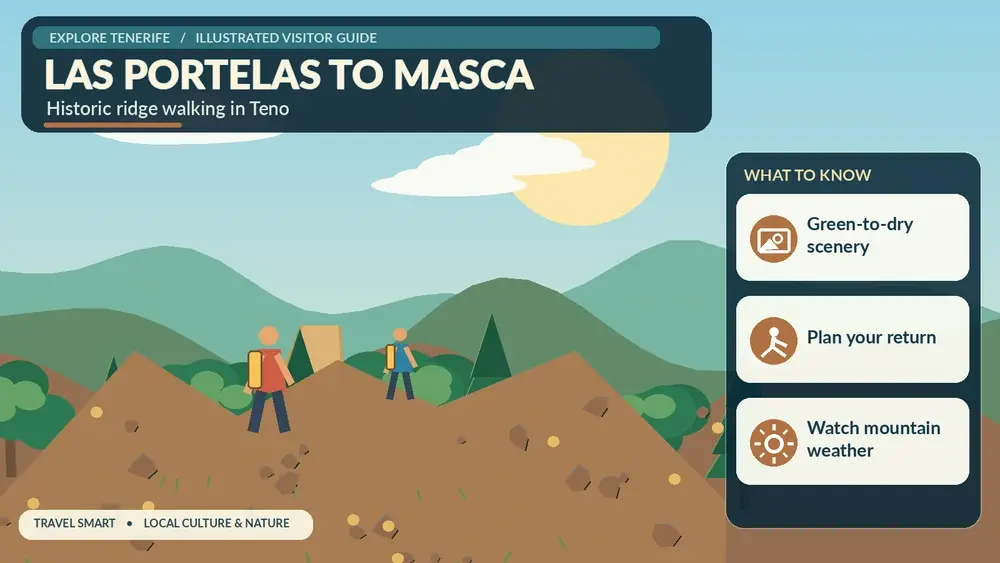
    Illustrated guide: PR-TF 59 Las Portelas–Masca Hiking, with practical visitor tips
    Illustrated guide: PR-TF 59 Las Portelas–Masca Hiking.

    2. The crossing of barranco las lubes and the climb toward the ridge

    Next, the crossing of Barranco Las Lubes and the climb toward the ridge. This is where I pay more attention to junctions. I do not follow another group automatically; people on the same path may be doing a different branch. I compare the painted PR marks, official map and the direction I saved before leaving.

    3. The high section where cloud and landscape can change within a short distance

    Higher or farther along, the high section where cloud and landscape can change within a short distance. The change in altitude usually becomes more obvious here through temperature, vegetation and views. I take a short food and water break before I feel tired rather than waiting until energy has already dropped.

    4. The descent into masca with increasingly dramatic ravine views

    For the final section, the descent into Masca with increasingly dramatic ravine views. I keep enough time and energy for the finish. A route is not complete when the best viewpoint is reached; it is complete when I am safely at the planned endpoint with transport still available.

    Navigation: what I trust

    I treat official waymarks and the current route description as primary. A phone map is useful, but downloaded user tracks can contain shortcuts, old closures or private crossings. Before setting out I save the official page, an offline map and the names of the start and finish in Spanish so I can ask for help clearly if needed.

    Masca Mountain Valley Tenerife

    At ambiguous junctions I stop rather than walking “just another ten minutes” in the hope that a marker appears. Ten wrong minutes downhill can become thirty tiring minutes when I have to climb back. This habit matters especially in laurel forest and cloud, where landmarks disappear quickly.

    Weather and microclimates

    Tenerife is small on a map but not climatically simple. I check the forecast for the actual altitude of the route, not only the nearest beach resort. North-facing forests can be cool and wet under trade-wind cloud while the south coast is sunny; exposed Teno ridges can be windy even when villages below feel calm.

    I also take calima seriously. Dust, heat and reduced visibility can turn an otherwise moderate route into a poor choice. After heavy rain, stone paths and steep descents deserve extra caution. When an official warning or closure is active, I change the plan instead of trying to “beat” the conditions.

    What I carry

    • Water with a reserve rather than the exact amount I expect to drink.
    • Food that is easy to eat in small portions while moving.
    • Closed hiking shoes or trail shoes with useful grip.
    • Sun protection even when the start is cloudy.
    • A light windproof or waterproof layer.
    • Offline map, charged phone and a small power bank on longer routes.
    • Basic first-aid items and any personal medication.

    I adjust the load to the route. A short two-hour trail does not need expedition gear, but a long day with major elevation deserves more water, insulation and contingency planning. I never let a light pack become an excuse to omit essentials.

    Transport and linear-route logistics

    This is a linear route, so I decide the return plan before starting. My preferred options are a verified bus connection, a pre-arranged taxi, two-car shuttle with experienced companions, or walking the route only when the return distance and daylight are realistic. I do not rely on finding a taxi signal at an isolated finish without checking coverage and local service first.

    TITSA timetables can change, and a route that looks easy on a map may involve infrequent rural services. I use my Tenerife bus guide for the system basics, then confirm the current timetable on the official operator site on the day of travel.

    Safety on stone paths, descents and exposed ground

    My main rule is to manage the descent as carefully as the climb. Loose gravel, polished stone and tired legs are a bad combination. I shorten my stride, keep space between hikers and never rush because someone behind me is faster. Trekking poles can help on long descents if I already know how to use them.

    I keep away from cliff edges and do not climb walls, roques or unstable volcanic features for photographs. If the signed route passes a road, I assume drivers may not expect hikers. I cross only where visibility is good and I do not stand in the carriageway while checking my phone.

    Nature and cultural landscape

    I try to read the route rather than treating it as exercise only. Tenerife paths often pass old terraces, water infrastructure, stone paving, pine forest, monteverde or volcanic terrain that records how people adapted to steep land. I leave walls, stones, plants and abandoned structures exactly as I find them.

    Protected status also affects behaviour. I stay on the route, do not pick flowers, do not stack stones and carry out every piece of rubbish. If I hike with a dog, I check the specific protected-area rules first rather than assuming the same rules apply everywhere on the island.

    Photography without slowing the route too much

    I prefer a few planned stops to constant phone checking. Wide views usually work best from signed viewpoints or safe open sections; forest scenes benefit from looking for layers, trunks and changing light rather than a single dramatic panorama. In cloud, I protect the phone or camera from moisture and keep moving if the temperature is dropping.

    I never step beyond a barrier or onto a fragile slope to remove foreground vegetation. The trail itself often gives a stronger sense of scale in the photograph, and keeping people on the path protects both the landscape and the image from becoming another invitation to trespass.

    Who I think this route suits

    The official difficulty grade is a starting point, not a guarantee. I compare it with distance, accumulated ascent and descent, exposure, altitude, surface and my recent activity level. A “low” difficulty route can still feel hard in heat; a “medium” route with large descent can punish knees; and a very high difficulty route needs specific endurance rather than general holiday fitness.

    For families I also consider whether every child is comfortable with the terrain and duration. I never use age alone as proof that a route is suitable. If the group is uncertain, I choose one of Tenerife’s shorter easy hikes and save the bigger trail for another day.

    My realistic day plan

    I eat before the start, arrive with water already filled and spend a few minutes confirming the first waymark. I walk the first third conservatively, take a short break before the main climb or descent, and keep the final third free of unnecessary detours. If I am ahead of schedule, I use the extra time for a safe viewpoint or café after the hike rather than extending onto an unsigned path.

    After finishing, I change out of wet clothing if needed, drink, eat something salty or substantial and only then decide whether another stop makes sense. Hiking days are better when the second half is flexible. A town walk or early dinner usually adds more than another rushed trail.

    Where I would stay

    For an early start I prefer a base in the same part of Tenerife rather than driving across the island before dawn. That reduces fatigue and makes it easier to react to local weather. I compare accommodation around Santiago del Teide, Tenerife when this trail is one of the main reasons for the trip.

    Official information I check before leaving

    The route page I use is Turismo de Tenerife’s official PR-TF 59 Las Portelas – Masca page. I check it again for status notices and then look at current Cabildo or Tenerife ON information if the route crosses a managed protected area. A blog article is useful for planning, but live access information always wins.

    Masca Valley Panoramic View Tenerife

    Common mistakes I avoid

    • Starting late because the distance looks short.
    • Using a coastal forecast for a mountain or forest route.
    • Assuming a linear trail will have easy transport at the finish.
    • Following another hiking group instead of reading my own waymarks.
    • Underestimating descent and knee fatigue.
    • Leaving the signed path for a photo or shortcut.
    • Depending on mobile signal instead of saving the route offline.
    • Ignoring a closure because an older GPX still shows the path.

    Frequently asked questions

    How long is PR-TF 59 Las Portelas – Masca?

    The current official route sheet lists 3.7 km and an estimated 2 hr. I use that time only as a planning reference and add margin for photographs, navigation, weather and the pace of the slowest person in the group.

    Do I need a permit?

    The current official route sheet lists no general hiking permit for this route. I still check for temporary closures, fire restrictions and protected-area notices before setting out.

    Can I do it in ordinary trainers?

    I prefer trail or hiking shoes with grip. Tenerife paths can include loose volcanic gravel, wet forest soil, stone paving and steep steps in the same outing. Footwear does not need to be heavy, but smooth soles make the route less forgiving.

    What if the weather turns?

    I use a predefined turnaround point and a local Plan B. If visibility, heat, rain or wind makes the route materially less safe, I turn back or switch plans. Finishing a particular trail is never more important than keeping enough margin to return safely.

    Masca Village And Gorge Tenerife

    Final thoughts

    I like this route because the landscape tells the geography lesson for me: the greener north and the drier Masca side can feel like different islands even though the walking distance is short.

    What I value most is not ticking off another PR number. It is understanding a different layer of Tenerife—forest, old roads, volcanic relief, rural settlements or the transition from mountain to coast. With current route information, sensible pacing and a flexible finish, this hike can add far more to a trip than a rushed list of viewpoints.

  • PR-TF 35 La Caldera–Mamio Hiking Guide: Easy Forest Loop in La Orotava

    PR-TF 35 La Caldera–Mamio Hiking Guide: Easy Forest Loop in La Orotava

    PR-TF 35 La Caldera – Mamio – La Caldera is a gentle forest route that mixes broad forestry track, cultivated slopes and Canarian pine without committing to a high-altitude Teide day. This is one of the routes I choose when I want forest atmosphere without the scale, exposure or logistics of a summit hike.

    I use the current Turismo de Tenerife route sheet as my technical baseline because trail status, closures and management advice can change. The official sheet currently lists 5.7 km, 2 hr 30 min, low difficulty and no as the permit requirement. I still check the page again on the morning of the hike rather than assuming a saved article is enough.

    Quick route facts

    Official route PR-TF 35 La Caldera – Mamio – La Caldera
    Start La Caldera recreation area
    Finish La Caldera recreation area
    Type Circular
    Distance 5.7 km
    Official duration 2 hr 30 min
    Difficulty Low
    Maximum altitude 1,200 m
    Minimum altitude 1,000 m
    Accumulated ascent 215.10 m
    Accumulated descent 215.10 m
    Protected area Corona Forestal Natural Park
    Permit No

    Why I like this route

    PR-TF 35 gives me a useful middle ground between a paved viewpoint and a serious mountain objective. The route starts high enough to feel cool and forested, but it never asks me to manage extreme altitude. The gentle forestry track at the beginning also gives me time to settle into the day before the path becomes more varied around Mamio and the cultivated slopes.

    The wider setting is La Orotava and the upper Orotava Valley. I plan the hike as part of that region, not as an isolated pin. Useful companion articles on this site include Orotava Valley guide Corona Forestal guide La Orotava travel guide GR-131 La Caldera to El Portillo guide. That gives me backup options if cloud, wind, heat or a closure makes the original route a poor choice.

    How the route unfolds

    1. The easy departure from la caldera on the mamio forest track

    At the beginning, the easy departure from La Caldera on the Mamio forest track. I deliberately start slower than my normal walking pace while I check the waymarking and how the ground feels. Tenerife trails can change from lane to stone path to forest track in a short distance, and the first ten minutes are the best time to correct a navigation mistake.

    2. The casa del agua area, where several signed routes meet

    Next, the Casa del Agua area, where several signed routes meet. This is where I pay more attention to junctions. I do not follow another group automatically; people on the same path may be doing a different branch. I compare the painted PR marks, official map and the direction I saved before leaving.

    3. The descent toward mamio through a more agricultural landscape

    Higher or farther along, the descent toward Mamio through a more agricultural landscape. The change in altitude usually becomes more obvious here through temperature, vegetation and views. I take a short food and water break before I feel tired rather than waiting until energy has already dropped.

    4. The climb beside barranco de los llanos and the return through forest

    For the final section, the climb beside Barranco de Los Llanos and the return through forest. I keep enough time and energy for the finish. A route is not complete when the best viewpoint is reached; it is complete when I am safely at the planned endpoint with transport still available.

    Navigation: what I trust

    I treat official waymarks and the current route description as primary. A phone map is useful, but downloaded user tracks can contain shortcuts, old closures or private crossings. Before setting out I save the official page, an offline map and the names of the start and finish in Spanish so I can ask for help clearly if needed.

    At ambiguous junctions I stop rather than walking “just another ten minutes” in the hope that a marker appears. Ten wrong minutes downhill can become thirty tiring minutes when I have to climb back. This habit matters especially in laurel forest and cloud, where landmarks disappear quickly.

    Weather and microclimates

    Tenerife is small on a map but not climatically simple. I check the forecast for the actual altitude of the route, not only the nearest beach resort. North-facing forests can be cool and wet under trade-wind cloud while the south coast is sunny; exposed Teno ridges can be windy even when villages below feel calm.

    I also take calima seriously. Dust, heat and reduced visibility can turn an otherwise moderate route into a poor choice. After heavy rain, stone paths and steep descents deserve extra caution. When an official warning or closure is active, I change the plan instead of trying to “beat” the conditions.

    What I carry

    • Water with a reserve rather than the exact amount I expect to drink.
    • Food that is easy to eat in small portions while moving.
    • Closed hiking shoes or trail shoes with useful grip.
    • Sun protection even when the start is cloudy.
    • A light windproof or waterproof layer.
    • Offline map, charged phone and a small power bank on longer routes.
    • Basic first-aid items and any personal medication.

    I adjust the load to the route. A short two-hour trail does not need expedition gear, but a long day with major elevation deserves more water, insulation and contingency planning. I never let a light pack become an excuse to omit essentials.

    Transport and linear-route logistics

    Because this route is circular, logistics are simpler: I can normally return to the same parking or bus area. That does not mean parking is guaranteed. I avoid blocking rural entrances or forest gates and I arrive with a backup place to park legally if the obvious spaces are full.

    TITSA timetables can change, and a route that looks easy on a map may involve infrequent rural services. I use my Tenerife bus guide for the system basics, then confirm the current timetable on the official operator site on the day of travel.

    Safety on stone paths, descents and exposed ground

    My main rule is to manage the descent as carefully as the climb. Loose gravel, polished stone and tired legs are a bad combination. I shorten my stride, keep space between hikers and never rush because someone behind me is faster. Trekking poles can help on long descents if I already know how to use them.

    I keep away from cliff edges and do not climb walls, roques or unstable volcanic features for photographs. If the signed route passes a road, I assume drivers may not expect hikers. I cross only where visibility is good and I do not stand in the carriageway while checking my phone.

    Nature and cultural landscape

    I try to read the route rather than treating it as exercise only. Tenerife paths often pass old terraces, water infrastructure, stone paving, pine forest, monteverde or volcanic terrain that records how people adapted to steep land. I leave walls, stones, plants and abandoned structures exactly as I find them.

    Protected status also affects behaviour. I stay on the route, do not pick flowers, do not stack stones and carry out every piece of rubbish. If I hike with a dog, I check the specific protected-area rules first rather than assuming the same rules apply everywhere on the island.

    Photography without slowing the route too much

    I prefer a few planned stops to constant phone checking. Wide views usually work best from signed viewpoints or safe open sections; forest scenes benefit from looking for layers, trunks and changing light rather than a single dramatic panorama. In cloud, I protect the phone or camera from moisture and keep moving if the temperature is dropping.

    I never step beyond a barrier or onto a fragile slope to remove foreground vegetation. The trail itself often gives a stronger sense of scale in the photograph, and keeping people on the path protects both the landscape and the image from becoming another invitation to trespass.

    Who I think this route suits

    The official difficulty grade is a starting point, not a guarantee. I compare it with distance, accumulated ascent and descent, exposure, altitude, surface and my recent activity level. A “low” difficulty route can still feel hard in heat; a “medium” route with large descent can punish knees; and a very high difficulty route needs specific endurance rather than general holiday fitness.

    For families I also consider whether every child is comfortable with the terrain and duration. I never use age alone as proof that a route is suitable. If the group is uncertain, I choose one of Tenerife’s shorter easy hikes and save the bigger trail for another day.

    My realistic day plan

    I eat before the start, arrive with water already filled and spend a few minutes confirming the first waymark. I walk the first third conservatively, take a short break before the main climb or descent, and keep the final third free of unnecessary detours. If I am ahead of schedule, I use the extra time for a safe viewpoint or café after the hike rather than extending onto an unsigned path.

    After finishing, I change out of wet clothing if needed, drink, eat something salty or substantial and only then decide whether another stop makes sense. Hiking days are better when the second half is flexible. A town walk or early dinner usually adds more than another rushed trail.

    Where I would stay

    For an early start I prefer a base in the same part of Tenerife rather than driving across the island before dawn. That reduces fatigue and makes it easier to react to local weather. I compare accommodation around La Orotava, Tenerife when this trail is one of the main reasons for the trip.

    Official information I check before leaving

    The route page I use is Turismo de Tenerife’s official PR-TF 35 La Caldera – Mamio – La Caldera page. I check it again for status notices and then look at current Cabildo or Tenerife ON information if the route crosses a managed protected area. A blog article is useful for planning, but live access information always wins.

    Common mistakes I avoid

    • Starting late because the distance looks short.
    • Using a coastal forecast for a mountain or forest route.
    • Assuming a linear trail will have easy transport at the finish.
    • Following another hiking group instead of reading my own waymarks.
    • Underestimating descent and knee fatigue.
    • Leaving the signed path for a photo or shortcut.
    • Depending on mobile signal instead of saving the route offline.
    • Ignoring a closure because an older GPX still shows the path.

    Frequently asked questions

    How long is PR-TF 35 La Caldera – Mamio – La Caldera?

    The current official route sheet lists 5.7 km and an estimated 2 hr 30 min. I use that time only as a planning reference and add margin for photographs, navigation, weather and the pace of the slowest person in the group.

    Do I need a permit?

    The current official route sheet lists no general hiking permit for this route. I still check for temporary closures, fire restrictions and protected-area notices before setting out.

    Can I do it in ordinary trainers?

    I prefer trail or hiking shoes with grip. Tenerife paths can include loose volcanic gravel, wet forest soil, stone paving and steep steps in the same outing. Footwear does not need to be heavy, but smooth soles make the route less forgiving.

    What if the weather turns?

    I use a predefined turnaround point and a local Plan B. If visibility, heat, rain or wind makes the route materially less safe, I turn back or switch plans. Finishing a particular trail is never more important than keeping enough margin to return safely.

    Final thoughts

    This is one of the routes I choose when I want forest atmosphere without the scale, exposure or logistics of a summit hike.

    What I value most is not ticking off another PR number. It is understanding a different layer of Tenerife—forest, old roads, volcanic relief, rural settlements or the transition from mountain to coast. With current route information, sensible pacing and a flexible finish, this hike can add far more to a trip than a rushed list of viewpoints.

  • Mirador de Garachico Guide: Volcanic History and North Tenerife Panorama

    Mirador de Garachico Guide: Volcanic History and North Tenerife Panorama

    Mirador de Garachico is a viewpoint I would include when I want to understand this part of Tenerife rather than simply collect another photo stop. It sits in San Juan del Reparo above Garachico, on or close to the road between Icod de los Vinos and Guía de Isora, and the official or municipal tourism information highlights a broad panorama over Garachico, the Atlantic coast and the ravine-like channels through which lava descended during the 1706 eruption.

    Few viewpoints explain Garachico’s history as directly: the height makes it easier to see how volcanic terrain, cliffs and settlement fit together. I plan the stop as part of Garachico, San Juan del Reparo and the TF-436/TF-82 mountain roads, not as a reason to cross the whole island for ten minutes. That keeps the day realistic and leaves time to respond to cloud, traffic and changing light.

    Quick planning facts

    ViewpointMirador de Garachico
    AreaSan Juan del Reparo above Garachico
    Road / positionthe road between Icod de los Vinos and Guía de Isora
    Landscapearound 460 metres above the north coast according to the municipal tourism description
    Main viewsa broad panorama over Garachico, the Atlantic coast and the ravine-like channels through which lava descended during the 1706 eruption
    ParkingI use only designated or clearly legal parking because the road is also a working mountain connection
    BusI check current TITSA options rather than assuming a stop directly at the viewpoint
    Accessibilityconditions can change with the venue and road, so I verify before relying on step-free access

    Why I would stop here

    The best Tenerife viewpoints do more than provide a wide angle. They explain the island. At Mirador de Garachico, I can compare elevation, vegetation, roads, towns and volcanic shapes in one frame. That makes the stop useful before visiting the places below because I arrive with a clearer mental map rather than following turn-by-turn navigation without understanding the landscape.

    I normally stay longer than the few minutes suggested by a quick road itinerary. Ten minutes is enough to photograph the view, but twenty to forty minutes gives cloud and light time to change. On Tenerife, a ridge hidden at arrival can appear suddenly, while a clear panorama can disappear behind cloud just as quickly.

    What I can see

    The main panorama includes a broad panorama over Garachico, the Atlantic coast and the ravine-like channels through which lava descended during the 1706 eruption. I look for layers instead of trying to identify every landmark immediately: foreground vegetation or rock, middle-distance towns and ridges, then the highest peaks or distant coast. This approach makes the view easier to understand and usually creates better photographs than zooming straight toward the most famous feature.

    Visibility is never guaranteed. Trade-wind cloud can cover the north and northeast, haze can soften the south, and calima can reduce long-distance contrast across the island. I treat a cloudy visit as a different landscape rather than automatically a failed one, but if the entire purpose of the stop is photography I check current weather, webcams where available and mountain conditions before driving up.

    Getting there

    Mirador de Garachico is associated with the road between Icod de los Vinos and Guía de Isora. Tenerife road distances can be misleading because bends, elevation and slower local traffic matter more than kilometres. I add margin to the navigation estimate and avoid scheduling a fixed attraction immediately after the viewpoint. On narrow or mountain roads I keep attention on driving and let passengers enjoy the scenery until I am safely parked.

    Garachico Coast Aerial View Tenerife

    I use only designated or clearly legal parking because the road is also a working mountain connection. Even when parking is provided, I do not stop outside marked or obviously legal areas if the car park is full. Blocking a mountain road, farm entrance or bus movement for a photograph creates unnecessary risk. If the stop is busy, I either wait briefly or continue to another planned viewpoint.

    Public transport and no-car planning

    I check current titsa options rather than assuming a stop directly at the viewpoint. Where a bus stop exists, I still check the current TITSA timetable and the direction of the stop before relying on it. Mountain and rural services can be much less frequent than resort routes, and a missed connection can turn a short stop into a long wait.

    If there is no convenient stop, I do not improvise by walking along a road without a pavement. For a no-car trip, I would rather choose viewpoints connected to established trails or frequent bus corridors. The goal is not to prove that every place is possible without a car; it is to build a safe route around the places that genuinely work.

    Accessibility

    Conditions can change with the venue and road, so i verify before relying on step-free access. I treat this as a starting point, not a guarantee for every traveller. Gradients, kerbs, the distance from parking to the rail, toilet availability and the surface itself can determine whether a viewpoint is comfortable for someone using a wheelchair, walker or cane.

    Before travelling specifically for accessibility, I verify current conditions with the official site or local authority. Temporary works, parked vehicles or a closed terrace can change a visit even when the permanent infrastructure is described as adapted.

    Using the view to read Garachico’s volcanic history

    The 1706 eruption is central to Garachico’s story, but the useful part of this stop is spatial understanding. From above, I can better imagine lava descending from higher ground toward a coastal settlement and changing its harbour and urban geography. I avoid turning a destructive historical event into spectacle; the point is to connect the physical terrain with what happened to people, trade and the town.

    Best time of day

    I choose timing according to the direction of the view rather than repeating a generic “sunset is best” rule. Morning can bring cleaner air and quieter roads; afternoon can warm colours on ridges; sunset may be dramatic but can also put key features into silhouette. For valley and mountain viewpoints, cloud development is often more important than the clock.

    If photography matters, I would rather visit twice on a longer stay than wait hours for perfect light on a single day. Tenerife has strong microclimates. A disappointing first stop does not mean the viewpoint is overrated; it may simply mean the air mass and cloud level were wrong at that moment.

    Photography tips that actually help

    I start with a wide composition to show scale, then use a moderate zoom for layers of ridges, towns or volcanic cones. A polarising filter can sometimes help with glare, but it can also create uneven skies with very wide lenses, so I use it carefully. On a phone, I avoid excessive digital zoom and instead make several clean compositions that I can crop later.

    Garachico’s volcanic shoreline and offshore rock seen from the viewpoint

    I keep the camera strap secure in strong wind and never cross a barrier to remove a foreground object. A railing or pine branch can become part of the composition. The best photograph is not worth standing on an unstable edge, stepping into the road or damaging vegetation.

    Weather, wind and cloud

    Conditions at around 460 metres above the north coast according to the municipal tourism description can differ sharply from the coast. I carry a light layer even when the beach is warm, and in winter I add something more substantial if the route climbs high. Wind is often the most noticeable factor because a temperature that seems mild can feel cold after several minutes in an exposed position.

    Cloud is equally important. Northern slopes frequently interact with the trade-wind layer, producing the famous sea of clouds at some elevations while covering lower valleys at others. In the south and east, haze or calima can be the bigger issue. I check the forecast for the actual elevation rather than using only a resort forecast.

    How long I would stay

    For a simple road stop I allow twenty to forty minutes. That is enough to park without rushing, read any interpretation, take photographs and actually look at the landscape. If there is a café, short trail or historical element, I extend the stop to an hour or more.

    I do not build a day around visiting ten viewpoints. After the third or fourth, the landscapes begin to blur together. My preference is two or three contrasting stops linked to towns, a walk, a meal or a museum. That produces stronger memories and much less driving.

    How I combine it with the rest of the day

    I would pair Mirador de Garachico with Garachico, San Juan del Reparo and the TF-436/TF-82 mountain roads. The important thing is geographical logic: I continue in the same area instead of zigzagging across Tenerife because another attraction looked close on a map.

    Garachico Coast And Natural Pools Tenerife

    If the weather changes, the viewpoint becomes the flexible part of the itinerary. I can shorten it, move it later or replace it with a town stop. This is one reason I like viewpoints: they add a high-value experience without requiring a fixed entrance slot.

    Food, toilets and practical stops

    I never assume a viewpoint has toilets, drinking water or an open café unless current information specifically confirms it. I use facilities in the nearest town before a long mountain section and carry water in the car. If a café is part of the site, I still check opening hours rather than treating it as guaranteed.

    For food, I prefer to connect the stop with a local town or market rather than eating only at roadside places. This turns the view into part of a broader regional day and spreads visitor spending more naturally across the communities I pass through.

    Safety at viewpoints

    Barriers, marked paths and parking rules are part of the experience, not obstacles to a photograph. I stay behind rails, keep children close near drops, and do not sit on walls above cliffs. Strong wind can affect balance and can also pull hats, phones or loose objects from my hands.

    I am especially careful when leaving a parking area. Some viewpoints sit on roads where traffic accelerates immediately after a bend. I look both ways, avoid standing in the carriageway and wait for a safe gap rather than trying to photograph from the road itself.

    Responsible visiting

    I take all rubbish away, keep noise low and avoid trampling vegetation to create a private photo spot. At rural viewpoints I also respect houses, farms and access tracks nearby. A viewpoint may be on a tourist map, but the surrounding area is often part of someone’s everyday working landscape.

    Drone use deserves extra caution because protected areas, airports, wildlife and local restrictions can make a seemingly empty viewpoint unsuitable or illegal for flying. I check current Spanish aviation rules and protected-area restrictions before bringing a drone into the plan.

    Common mistakes I would avoid

    • Driving across the island only for a five-minute stop.
    • Using a coastal weather forecast for a high-elevation viewpoint.
    • Parking on the road when the designated area is full.
    • Assuming a visible beach or trail is automatically safe or accessible.
    • Crossing barriers for an unobstructed photograph.
    • Trying to visit too many viewpoints in one day.

    Is Mirador de Garachico worth it?

    For me, yes when it fits the route. The value comes from context: Few viewpoints explain Garachico’s history as directly: the height makes it easier to see how volcanic terrain, cliffs and settlement fit together. I would not make a long cross-island detour solely to tick it off, but as part of Garachico, San Juan del Reparo and the TF-436/TF-82 mountain roads it adds perspective that a beach, town street or hiking trail cannot provide on its own.

    Garachico Historic Town Tenerife

    My final rule is to let conditions decide the length of the stop. If the view is clear and the light is changing, I stay. If cloud closes in completely or parking is chaotic, I move on without forcing the experience. Tenerife rewards flexible travel more than rigid checklists.

    Final planning checklist

    Before I leave, I check the road, weather at the correct elevation, daylight, any local closures and the next stop in the route. I carry water, sun protection and a layer, download the map in case coverage drops and keep enough fuel for mountain driving. That small amount of preparation lets me enjoy Mirador de Garachico as a landscape experience rather than another logistical problem.

  • Mirador de El Boquerón Guide: Valle Guerra, Tegueste and Anaga Views

    Mirador de El Boquerón Guide: Valle Guerra, Tegueste and Anaga Views

    Mirador de El Boquerón is a viewpoint I would include when I want to understand this part of Tenerife rather than simply collect another photo stop. It sits in San Cristóbal de La Laguna municipality, on or close to TF-156 around kilometre 2, and the official or municipal tourism information highlights Valle Guerra, Mesa de Tejina, Tejina, Tegueste, the Anaga massif, Punta del Hidalgo and its lighthouse.

    Recent volcanic features such as La Calderita and Valle Molina add a geological layer to what first looks like a purely agricultural panorama. I plan the stop as part of Tegueste, Valle Guerra and the Tacoronte-Acentejo wine area, not as a reason to cross the whole island for ten minutes. That keeps the day realistic and leaves time to respond to cloud, traffic and changing light.

    Quick planning facts

    ViewpointMirador de El Boquerón
    AreaSan Cristóbal de La Laguna municipality
    Road / positionTF-156 around kilometre 2
    Landscapethe agricultural northeast above Valle Guerra
    Main viewsValle Guerra, Mesa de Tejina, Tejina, Tegueste, the Anaga massif, Punta del Hidalgo and its lighthouse
    Parkingparking is available
    Busofficial tourism information does not list a bus stop at the viewpoint
    Accessibilityofficial tourism information lists adapted access

    Why I would stop here

    The best Tenerife viewpoints do more than provide a wide angle. They explain the island. At Mirador de El Boquerón, I can compare elevation, vegetation, roads, towns and volcanic shapes in one frame. That makes the stop useful before visiting the places below because I arrive with a clearer mental map rather than following turn-by-turn navigation without understanding the landscape.

    I normally stay longer than the few minutes suggested by a quick road itinerary. Ten minutes is enough to photograph the view, but twenty to forty minutes gives cloud and light time to change. On Tenerife, a ridge hidden at arrival can appear suddenly, while a clear panorama can disappear behind cloud just as quickly.

    What I can see

    The main panorama includes Valle Guerra, Mesa de Tejina, Tejina, Tegueste, the Anaga massif, Punta del Hidalgo and its lighthouse. I look for layers instead of trying to identify every landmark immediately: foreground vegetation or rock, middle-distance towns and ridges, then the highest peaks or distant coast. This approach makes the view easier to understand and usually creates better photographs than zooming straight toward the most famous feature.

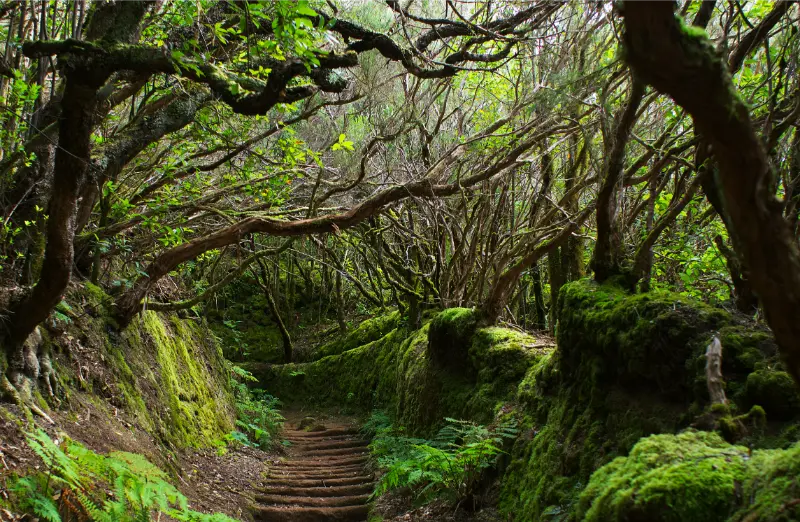
    Anaga Laurel Forest Tenerife

    Visibility is never guaranteed. Trade-wind cloud can cover the north and northeast, haze can soften the south, and calima can reduce long-distance contrast across the island. I treat a cloudy visit as a different landscape rather than automatically a failed one, but if the entire purpose of the stop is photography I check current weather, webcams where available and mountain conditions before driving up.

    Getting there

    Mirador de El Boquerón is associated with TF-156 around kilometre 2. Tenerife road distances can be misleading because bends, elevation and slower local traffic matter more than kilometres. I add margin to the navigation estimate and avoid scheduling a fixed attraction immediately after the viewpoint. On narrow or mountain roads I keep attention on driving and let passengers enjoy the scenery until I am safely parked.

    Parking is available. Even when parking is provided, I do not stop outside marked or obviously legal areas if the car park is full. Blocking a mountain road, farm entrance or bus movement for a photograph creates unnecessary risk. If the stop is busy, I either wait briefly or continue to another planned viewpoint.

    Public transport and no-car planning

    Official tourism information does not list a bus stop at the viewpoint. Where a bus stop exists, I still check the current TITSA timetable and the direction of the stop before relying on it. Mountain and rural services can be much less frequent than resort routes, and a missed connection can turn a short stop into a long wait.

    If there is no convenient stop, I do not improvise by walking along a road without a pavement. For a no-car trip, I would rather choose viewpoints connected to established trails or frequent bus corridors. The goal is not to prove that every place is possible without a car; it is to build a safe route around the places that genuinely work.

    Accessibility

    Official tourism information lists adapted access. I treat this as a starting point, not a guarantee for every traveller. Gradients, kerbs, the distance from parking to the rail, toilet availability and the surface itself can determine whether a viewpoint is comfortable for someone using a wheelchair, walker or cane.

    Before travelling specifically for accessibility, I verify current conditions with the official site or local authority. Temporary works, parked vehicles or a closed terrace can change a visit even when the permanent infrastructure is described as adapted.

    Look beyond the scenery to the working landscape

    I do not treat the fields below as decorative background. The northeast has long been shaped by agriculture, and the mosaic of plots, villages and roads is part of the reason the panorama is interesting. I look for differences in elevation, crop patterns and settlement density. If I continue toward a market or winery, the viewpoint gives context to the produce I see later in the day.

    Best time of day

    I choose timing according to the direction of the view rather than repeating a generic “sunset is best” rule. Morning can bring cleaner air and quieter roads; afternoon can warm colours on ridges; sunset may be dramatic but can also put key features into silhouette. For valley and mountain viewpoints, cloud development is often more important than the clock.

    If photography matters, I would rather visit twice on a longer stay than wait hours for perfect light on a single day. Tenerife has strong microclimates. A disappointing first stop does not mean the viewpoint is overrated; it may simply mean the air mass and cloud level were wrong at that moment.

    Photography tips that actually help

    I start with a wide composition to show scale, then use a moderate zoom for layers of ridges, towns or volcanic cones. A polarising filter can sometimes help with glare, but it can also create uneven skies with very wide lenses, so I use it carefully. On a phone, I avoid excessive digital zoom and instead make several clean compositions that I can crop later.

    I keep the camera strap secure in strong wind and never cross a barrier to remove a foreground object. A railing or pine branch can become part of the composition. The best photograph is not worth standing on an unstable edge, stepping into the road or damaging vegetation.

    Weather, wind and cloud

    Conditions at the agricultural northeast above Valle Guerra can differ sharply from the coast. I carry a light layer even when the beach is warm, and in winter I add something more substantial if the route climbs high. Wind is often the most noticeable factor because a temperature that seems mild can feel cold after several minutes in an exposed position.

    Cloud is equally important. Northern slopes frequently interact with the trade-wind layer, producing the famous sea of clouds at some elevations while covering lower valleys at others. In the south and east, haze or calima can be the bigger issue. I check the forecast for the actual elevation rather than using only a resort forecast.

    How long I would stay

    For a simple road stop I allow twenty to forty minutes. That is enough to park without rushing, read any interpretation, take photographs and actually look at the landscape. If there is a café, short trail or historical element, I extend the stop to an hour or more.

    Anaga Laurel Forest Trail Tenerife

    I do not build a day around visiting ten viewpoints. After the third or fourth, the landscapes begin to blur together. My preference is two or three contrasting stops linked to towns, a walk, a meal or a museum. That produces stronger memories and much less driving.

    How I combine it with the rest of the day

    I would pair Mirador de El Boquerón with Tegueste, Valle Guerra and the Tacoronte-Acentejo wine area. The important thing is geographical logic: I continue in the same area instead of zigzagging across Tenerife because another attraction looked close on a map.

    If the weather changes, the viewpoint becomes the flexible part of the itinerary. I can shorten it, move it later or replace it with a town stop. This is one reason I like viewpoints: they add a high-value experience without requiring a fixed entrance slot.

    Food, toilets and practical stops

    I never assume a viewpoint has toilets, drinking water or an open café unless current information specifically confirms it. I use facilities in the nearest town before a long mountain section and carry water in the car. If a café is part of the site, I still check opening hours rather than treating it as guaranteed.

    For food, I prefer to connect the stop with a local town or market rather than eating only at roadside places. This turns the view into part of a broader regional day and spreads visitor spending more naturally across the communities I pass through.

    Safety at viewpoints

    Barriers, marked paths and parking rules are part of the experience, not obstacles to a photograph. I stay behind rails, keep children close near drops, and do not sit on walls above cliffs. Strong wind can affect balance and can also pull hats, phones or loose objects from my hands.

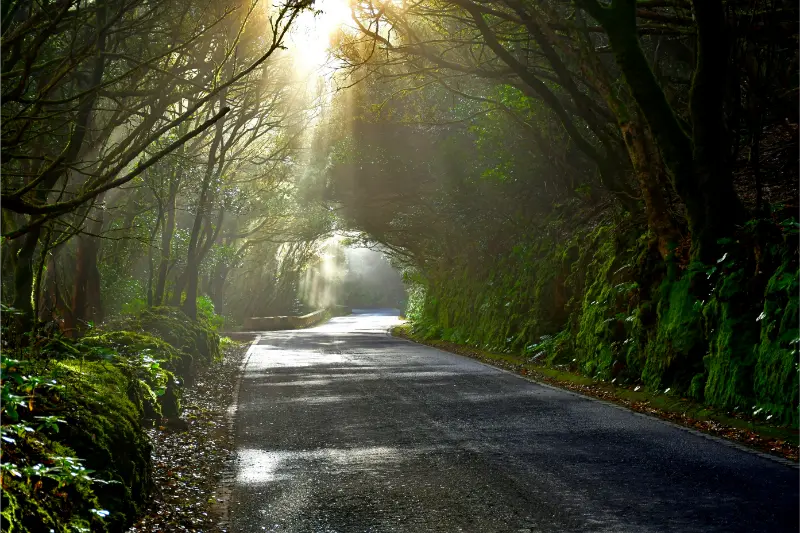
    Anaga Tenerife

    I am especially careful when leaving a parking area. Some viewpoints sit on roads where traffic accelerates immediately after a bend. I look both ways, avoid standing in the carriageway and wait for a safe gap rather than trying to photograph from the road itself.

    Responsible visiting

    I take all rubbish away, keep noise low and avoid trampling vegetation to create a private photo spot. At rural viewpoints I also respect houses, farms and access tracks nearby. A viewpoint may be on a tourist map, but the surrounding area is often part of someone’s everyday working landscape.

    Drone use deserves extra caution because protected areas, airports, wildlife and local restrictions can make a seemingly empty viewpoint unsuitable or illegal for flying. I check current Spanish aviation rules and protected-area restrictions before bringing a drone into the plan.

    Common mistakes I would avoid

    • Driving across the island only for a five-minute stop.
    • Using a coastal weather forecast for a high-elevation viewpoint.
    • Parking on the road when the designated area is full.
    • Assuming a visible beach or trail is automatically safe or accessible.
    • Crossing barriers for an unobstructed photograph.
    • Trying to visit too many viewpoints in one day.

    Is Mirador de El Boquerón worth it?

    For me, yes when it fits the route. The value comes from context: Recent volcanic features such as La Calderita and Valle Molina add a geological layer to what first looks like a purely agricultural panorama. I would not make a long cross-island detour solely to tick it off, but as part of Tegueste, Valle Guerra and the Tacoronte-Acentejo wine area it adds perspective that a beach, town street or hiking trail cannot provide on its own.

    My final rule is to let conditions decide the length of the stop. If the view is clear and the light is changing, I stay. If cloud closes in completely or parking is chaotic, I move on without forcing the experience. Tenerife rewards flexible travel more than rigid checklists.

    Final planning checklist

    Before I leave, I check the road, weather at the correct elevation, daylight, any local closures and the next stop in the route. I carry water, sun protection and a layer, download the map in case coverage drops and keep enough fuel for mountain driving. That small amount of preparation lets me enjoy Mirador de El Boquerón as a landscape experience rather than another logistical problem.

  • Roques de García Hiking Guide: Teide Trail 03 Loop

    Roques de García Hiking Guide: Teide Trail 03 Loop

    Roques de García Trail 03 is a route I choose when I want to experience Tenerife on foot rather than from a sequence of roadside viewpoints. The official trail information gives it a clear technical profile, but the real decision is whether the distance, altitude and logistics fit the day I actually have.

    Turismo de Tenerife currently lists the route at 3.5 km, about 2 hours, with low difficulty. The official profile reaches a maximum altitude of 2,187 m and a minimum of 2,025 m, with approximately about 211 m of accumulated ascent and about 215 m of descent. The current listing states the permit requirement as: No.

    Quick route facts

    RouteRoques de García Trail 03
    StartMirador de La Ruleta
    FinishMirador de La Ruleta
    Distance3.5 km
    Official durationabout 2 hours
    DifficultyLow
    Maximum altitude2,187 m
    Minimum altitude2,025 m
    Accumulated ascentabout 211 m
    Accumulated descentabout 215 m
    AuthorizationNo

    Why this trail is worth doing

    The interest goes beyond exercise. This route is connected with the classic loop around Roque Cinchado and the Roques de García formations. I like it because the landscape changes at walking speed, making volcanic textures, vegetation and relief much easier to understand than they are through a car window.

    Start and finish logistics

    It is circular, but parking and crowd levels still determine my start time.

    I save the official route page and an offline map before losing mobile signal. I never depend on finding a taxi at a remote finish without checking availability first.

    Difficulty in practical terms

    The official rating is low, but I translate that into conditions. Distance, cumulative ascent, altitude and exposure all matter. I would rather finish with energy left than choose a route only because the label sounds easy.

    Altitude and acclimatization

    Even routes that are technically straightforward can feel harder above 2,000 metres. I walk more slowly than at sea level, drink regularly and pay attention to headache, dizziness or unusual breathlessness. Persistent symptoms are a reason to descend.

    Best time of day

    I prefer an early start. Morning usually gives me more parking options, cooler conditions and a larger daylight margin. In Teide National Park I also avoid planning around sunset unless the return route and legal access conditions are completely clear.

    Official source and current status

    Before leaving I check the official Turismo de Tenerife trail page. The technical numbers above come from that listing, but temporary closures and restrictions can change after adverse weather or management work.

    Related guides on this site

    For broader planning I use my Mount Teide guide and Tenerife hiking permits and trail rules guide. Those pages cover the larger decisions that do not belong to one specific path.

    Mount Teide And Volcanic Landscape Tenerife

    How I would plan this route in a real Tenerife itinerary

    I would not treat Roques de García Trail 03 as an isolated line on a hiking map. The route makes most sense when I understand the wider Teide and Tenerife highland landscape, the direction of travel and what happens after the walk. I decide the start time from daylight and weather rather than from how early I can leave the hotel.

    The transport plan matters as much as the walking plan. It is circular, but parking and crowd levels still determine my start time. I save the route map offline, carry enough water for a delay and tell someone where I expect to finish. On Tenerife, a route can feel straightforward until cloud, wind or a closed access road changes the pace.

    What I pack

    • Shoes with reliable grip rather than smooth city trainers.
    • Water carried from the start, even when a visitor centre or cafe is nearby.
    • Sun protection: high-SPF sunscreen, hat and sunglasses.
    • A light warm or windproof layer because altitude can change conditions quickly.
    • Offline map, charged phone and a small power bank.
    • Food that does not depend on finding an open bar at the finish.

    The main risk I keep in mind here is altitude, sun exposure and loose volcanic surfaces. I do not use the official difficulty label as a substitute for judgement. A route classified as low or medium can still be a poor choice in strong wind, heat, fog or after a night of little sleep.

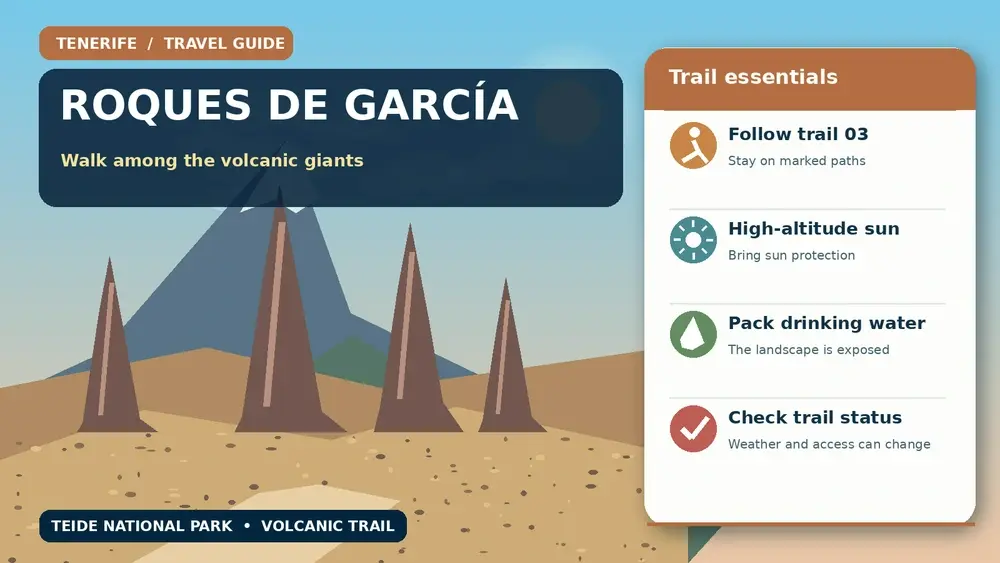
    Illustrated guide: Roques de García Hiking, with practical visitor tips
    Illustrated guide: Roques de García Hiking.

    How I avoid turning a good walk into an overpacked day

    After the route I usually choose one nearby stop rather than three. Cañada Blanca rather than another crowded roadside stop A relaxed meal, a viewpoint or a short museum visit is often a better finish than racing across the island for another major attraction.

    I also leave a buffer before sunset. Mountain roads are slower after dark, and the most exposed stretches can feel very different once the light disappears. If the route takes longer than expected, the buffer is what keeps the return calm.

    Trail etiquette and conservation

    I stay on the marked line, carry every piece of rubbish out and avoid cutting switchbacks. Volcanic soils and high-mountain vegetation recover slowly from trampling. I never collect stones, pumice, flowers or archaeological material, even when an object looks abundant.

    When I meet other walkers on a narrow section, I step aside only where doing so does not damage vegetation or create a fall risk. I keep music off and let the landscape remain the main experience.

    Weather checks I make on the same morning

    I check wind, temperature and cloud at the route altitude rather than relying on the forecast for the coast. Tenerife can be sunny at sea level while the high road is cold, cloudy or temporarily restricted. I also look for official closure notices after snow, wildfire, heavy rain or maintenance.

    If the official manager recommends avoiding the trail, I change the plan. A holiday itinerary is not a reason to override a closure or safety warning.

    Who I think this route suits

    I recommend Roques de García Trail 03 to travellers who enjoy walking as a way of understanding landscape rather than simply collecting viewpoints. The best pace leaves time to notice geology, plants and changes in altitude. I would choose a shorter alternative for anyone uncomfortable with the specific exposure or distance described above.

    My final planning rule

    I make the decision to turn around before I need to. If wind strengthens, visibility disappears, a walker in the group is struggling or water is being used faster than expected, I shorten the day. That judgement is part of good hiking, not a failed itinerary.

    What the landscape teaches me

    One of the best reasons to walk here is to see how quickly Tenerife changes with altitude. Lava flows of different ages, pumice, erosion surfaces and tough high-mountain plants create a landscape that can look empty from the road but becomes detailed on foot.

    I stop for photographs only where the path is wide enough to do so safely. I avoid stepping onto fragile plants or loose slopes for a better angle.

    Common mistakes I avoid

    • Starting too late because the distance looks short.
    • Carrying too little water because temperatures feel cool at the trailhead.
    • Treating a low technical rating as permission to ignore wind or altitude.
    • Assuming mobile signal will solve transport at the finish.
    • Leaving the marked trail to shorten a bend or reach a photo spot.
    • Failing to re-check the route after unusual weather.

    A realistic finish to the day

    After the hike I keep the rest of the schedule light. A visitor centre, meal or scenic drive back to the accommodation is enough. The mountains are more enjoyable when I do not spend the final hour racing the clock.

    Extra planning notes from experience

    I keep the itinerary flexible enough to react to Tenerife’s microclimates. A cloudy morning on one slope does not always mean the entire island is unsuitable, but I do not use that fact to justify ignoring a warning in the exact place I plan to visit. Local conditions always win over a generic forecast.

    I also distinguish between access being physically possible and access being officially open. Gates, signs and management notices take priority over an old blog post, saved map or social-media photo.

    What makes a visit feel less rushed

    I build in time for parking, toilets, a slow lunch and an unexpected viewpoint. These are not wasted minutes. They are what allow the day to remain enjoyable when a bus is late, a car park is full or the weather improves and I decide to stay longer.

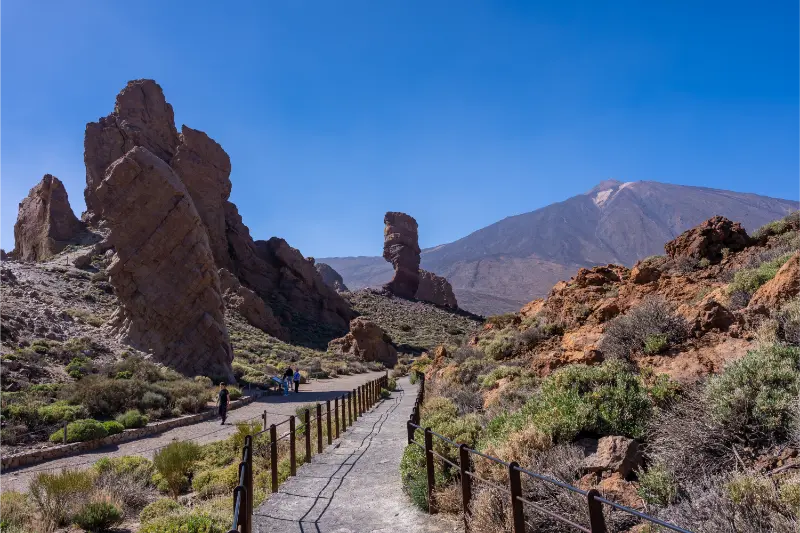
    Roque Cinchado Trail Teide National Park Tenerife

    For families or mixed-ability groups I plan around the least experienced walker rather than the strongest. Splitting a group in unfamiliar terrain creates more problems than it solves.

    Responsible travel

    I use marked paths and public spaces, take litter away, keep noise low and support local businesses when I stop for food or supplies. In protected areas I treat every closure and conservation rule as part of the experience, not as an obstacle to it.

    That approach is one reason I prefer a smaller number of well-planned stops. Tenerife rewards attention. The island is far more memorable when I understand why a place looks and feels different instead of simply adding another pin to a map.

  • Alto de Guajara Tenerife Hiking Guide: 2,715 m Teide Caldera Summit

    Alto de Guajara Tenerife Hiking Guide: 2,715 m Teide Caldera Summit

    Alto de Guajara is the high Teide hike I choose when I want a genuine mountain objective without climbing Pico del Teide itself. At 2,715 metres, Guajara is the highest point of the caldera wall and the third-highest elevation in Teide National Park.

    The official trail 15 segment runs 2.0 km from Degollada de Guajara to the summit, with about 357 metres of ascent and an estimated duration of 1 hour 30 minutes. That number is only the summit segment: I still need to reach Degollada de Guajara and return, so the complete outing is much longer.

    Quick planning facts

    Trail15 Alto de Guajara
    Official segmentDegollada de Guajara to Alto de Guajara
    Segment distance2.0 km one way
    Official segment durationAbout 1 h 30 min
    Maximum elevation2,715 m
    Segment ascentAbout 357 m
    DifficultyMedium
    AuthorisationNot normally required for trail 15

    Why Guajara is a serious step up

    Alto de Guajara reaches 2,715 metres and forms the highest point of the caldera wall. The official trail 15 section begins at Degollada de Guajara and climbs 2.0 km to the summit, with around 357 metres of ascent and an estimated 1 hour 30 minutes for that segment.

    The important planning detail is that most visitors must also reach Degollada de Guajara first and then return, so the full day is substantially longer than the 2 km summit segment. I never quote the official segment distance as if it represents the entire outing from a road-access point.

    Building the full route

    I connect trail 15 with the approach that fits current park access and my ability, commonly via the Siete Cañadas/Degollada area. Before walking I check the current official map because route status and permitted access can change.

    I calculate total distance, ascent and daylight for the exact combination I intend to walk. Guajara is not the place to improvise a route from screenshots after leaving the car.

    Altitude and physical demand

    At 2,715 metres, altitude is part of the challenge. I walk slower than I would at sea level, drink regularly and turn around if I develop significant headache, nausea, unusual dizziness or other concerning symptoms.

    The climb is officially graded medium for the trail segment, but the overall day can feel demanding because of exposure, altitude and the approach distance.

    Weather and visibility

    Guajara can deliver extraordinary views across the Teide caldera and, on clear days, toward other islands. It can also sit in wind, cloud or rapidly changing mountain conditions. I choose the day based on a mountain forecast, not simply a beach forecast from Costa Adeje.

    I carry a warm and windproof layer in every season. My Tenerife packing list covers how I layer for Teide.

    Why sunrise and sunset require extra caution

    Photographers are naturally drawn to high viewpoints at low light, but I only consider sunrise or sunset if I am experienced, equipped with a reliable headlamp and fully understand the route. Temperature drops quickly once the sun disappears.

    For most travellers I prefer a daylight hike and a separate roadside viewpoint for sunset. The safer plan usually produces a better overall day.

    No normal permit, but rules still matter

    The official Alto de Guajara trail page states that authorisation is not required for trail 15. That does not mean every connecting path is always open or that weather closures can be ignored.

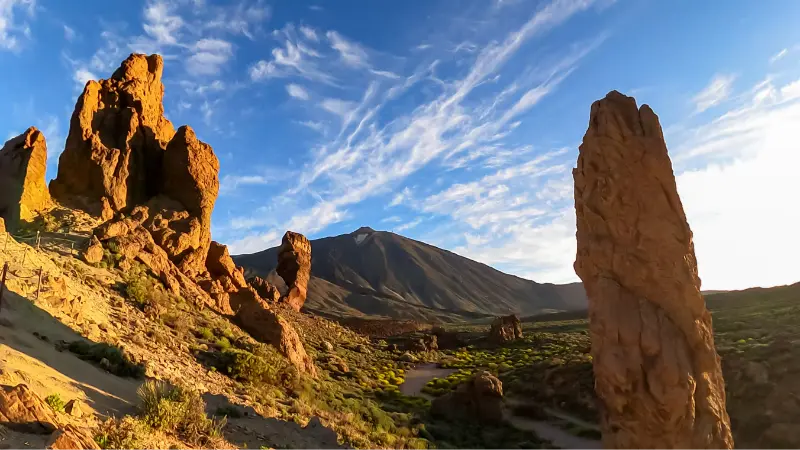
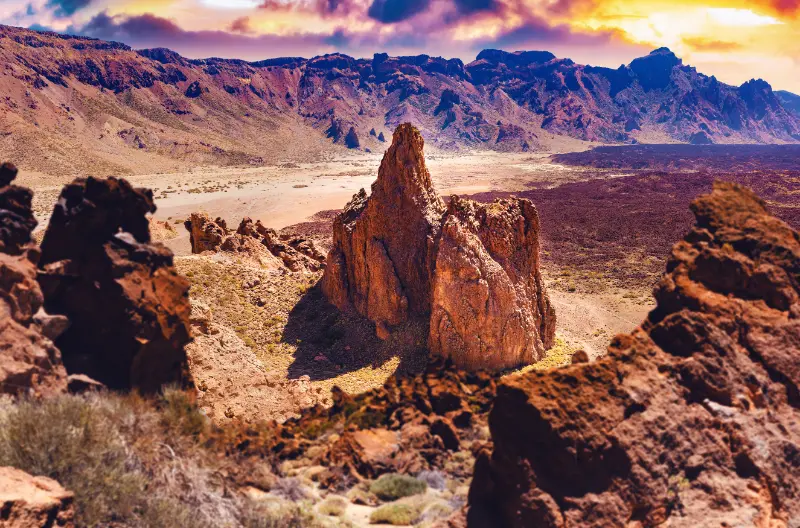
    Volcanic rock formations of Roques de García in Teide National Park

    I check Tenerife ON and Teide National Park information before departure. My Tenerife hiking permits and trail rules guide explains the wider system.

    Who should choose another trail

    I would choose a lower or shorter trail for travellers who are not comfortable with sustained climbing, exposed high-altitude terrain or several hours away from roadside services. Roques de García and Sámara offer excellent volcanic scenery with less commitment.

    Changing route is not a failure. Tenerife has enough hiking options that I can match the day to fitness and weather rather than forcing one summit.

    Official source and route verification

    I use the official Alto de Guajara trail page for the summit-segment facts. I then verify the entire approach route separately because the official 2 km figure begins at Degollada de Guajara, not at my car.

    That distinction is the most important practical detail in this guide and prevents a common planning mistake.

    How I fit it into a realistic Tenerife day

    I treat Alto de Guajara as part of a wider Teide National Park day rather than an isolated pin on the map. Tenerife looks compact, but mountain roads, parking searches and changing weather can turn short distances into slow travel. I decide in advance which stop is the priority and which stops are optional.

    My preferred approach is to pair it with Siete Cañadas, Parador viewpoints or a lower-elevation stop after the hike. That creates a day with contrast without spending most of the time in the car. I also keep one backup plan nearby in case wind, cloud, surf or temporary access restrictions change the experience.

    Weather, clothing and microclimates

    I never use a single Tenerife forecast for the whole island. North-coast cloud, Anaga mist, Teide sunshine and south-coast heat can all occur on the same day. I check the forecast for the exact municipality and, for mountain or coastal activities, I also look at wind and sea conditions.

    Even on warm days I carry sun protection, water and a light layer. At higher elevations I add a windproof layer, while on the coast I bring footwear with grip because volcanic rock, wet steps and black sand can all be slippery or hot.

    Responsible travel habits I use here

    Small beaches, villages, viewpoints and trailheads are shared local spaces. I park only where it is legal, keep access to homes and farm tracks clear, take rubbish away and avoid turning narrow roads into informal photo stops. In protected areas I stay on the marked route and never collect volcanic material, plants or other natural objects.

    I also prefer to support the area in a simple way: a coffee, lunch, market purchase or locally made product is often a better souvenir than something generic. Respectful travel is mostly about ordinary decisions that reduce pressure on places I want to remain enjoyable.

    My backup plan when conditions are wrong

    If the sea is rough, I do not force a swim. If a viewpoint is inside cloud, I move lower or switch to a village, museum or food stop. If parking is full, I continue to the next planned place rather than circling residential streets. This flexibility is especially useful in Tenerife because very different landscapes sit close together.

    I build the day around one must-do experience and several optional stops. That structure produces better trips than trying to complete a rigid checklist, and it makes it easier to respond to closures, weather and local events without feeling that the day has failed.

    Frequently asked questions

    Do I need a permit for Alto de Guajara?

    The official trail page says authorisation is not required for trail 15, but temporary closures and connecting-route rules can still apply.

    Is the hike only 2 km?

    No. The official 2 km figure starts at Degollada de Guajara, which most hikers must first reach by another trail.

    How high is Guajara?

    The summit is 2,715 metres above sea level.

    Is altitude a problem?

    It can be. I slow down, hydrate and take symptoms seriously because the summit is well above 2,500 metres.

    Is Guajara harder than Sámara?

    Yes. Guajara is a more demanding high-altitude objective with a longer overall outing once the approach is included.

    Questions I ask myself before I go

    I check four things before leaving: current access, exact weather, realistic travel time and what I will do if the first plan fails. Tenerife is an easy island to underestimate because distances look short on a map. A mountain road, coastal traffic or a full car park can add far more time than expected.

    Roque Cinchado Roques De Garcia Tenerife

    I also decide whether the destination is the purpose of the day or simply one stop. When it is the main purpose, I leave enough time to experience it slowly. When it is secondary, I set a clear limit so the rest of the itinerary does not become rushed.

    What makes this worth adding to a longer Tenerife trip

    The strongest Tenerife itineraries mix famous landmarks with smaller places and experiences. Teide, Anaga and the main beaches explain the island at a large scale, while a local pool, rural trail, village festival or food tradition explains how people actually use and understand the landscape.

    I therefore do not judge a place only by the number of attractions. A short viewpoint can be valuable if it helps me read the geography; a small village can be memorable if I slow down for lunch; a modest trail can reveal volcanic history better than a long drive through the same area.

    Practical travel habits that improve the day

    I download maps or save the route before entering areas with weaker mobile coverage. I start with a full bottle of water, keep a layer in the car, carry some cash for small local businesses and avoid planning every meal at the most obvious tourist time. These are small habits, but they make rural Tenerife much easier.

    I also leave more space between stops than a navigation app suggests. That time absorbs photo stops, roadworks, wrong turns and simple curiosity. The best travel days on Tenerife often improve when I have enough margin to stop somewhere I had not planned.

    My final take

    Guajara is rewarding because it demands real planning. I treat the official 2 km summit segment as only one piece of the route, prepare for 2,715 metres and choose the day for stable mountain weather rather than trying to force the hike into a fixed itinerary.

  • Sámara Trail Tenerife Guide: Easy Volcanic Loop in Teide National Park

    Sámara Trail Tenerife Guide: Easy Volcanic Loop in Teide National Park

    The Sámara trail is one of the Teide National Park walks I recommend when I want volcanic drama without an all-day mountain objective. The circular route starts at Mirador de Sámara and crosses dark pyroclastic terrain between Canary pines, with broad views toward Teide, Pico Viejo and younger volcanic cones.

    Official Tenerife tourism information lists the loop at 5.1 km, about 2 hours 45 minutes, 308 metres of ascent and a maximum elevation of 2,103 metres. It is graded low difficulty and does not normally require authorisation, but altitude, sun and wind still deserve serious preparation.

    Quick planning facts

    Trail13 Sámara
    Start/finishMirador de Sámara
    Distance5.1 km circular
    Official durationAbout 2 h 45 min
    DifficultyLow
    Maximum elevation2,103 m
    AscentAbout 308 m
    AuthorisationNot normally required

    Why Sámara is one of my favourite short Teide walks

    The Sámara trail gives me three classic Tenerife landscapes in one manageable loop: dark volcanic cones, Canary pine forest and views toward Teide and Pico Viejo. The official trail page lists a 5.1 km circular route with about 308 metres of ascent and a typical duration of 2 hours 45 minutes.

    The difficulty is officially low, but altitude changes how a walk feels. The route runs between roughly 1,873 and 2,103 metres, so sun, wind and thinner air matter more than the modest distance suggests.

    Official route facts and terrain

    Turismo de Tenerife describes the trail as running over dark pyroclastic material, including lapilli and scoria, with small gradients that are generally easy to negotiate. The surface can still be loose, so I prefer hiking shoes over smooth-soled trainers.

    An official detail I like is that no authorisation is required for trail 13 Sámara. That does not remove the need to respect temporary closures, fire restrictions or protected-area rules.

    Starting at Mirador de Sámara

    The route starts and ends at Mirador de Sámara. I arrive early because roadside trailheads can become awkward when many cars appear at the same time, and I never create a new parking space on vegetation or soft volcanic ground.

    I take a few minutes at the viewpoint before walking. Seeing the line of cones and the scale of the western Teide landscape helps me understand what the trail is about.

    Altitude, sun and wind

    At more than 2,000 metres, UV exposure is intense even on cool days. I carry more water than I expect to drink, use sunscreen and bring a windproof layer. In winter I check for cold, ice or snow-related restrictions before driving up.

    My Mount Teide guide explains altitude and weather planning in more detail, while Tenerife weather by month helps with seasonal expectations.

    Photography and volcanic colours

    Sámara is especially photogenic because black and rust-coloured cones contrast with green Canary pines and the pale summit landscape. Morning and late afternoon give the terrain more shape, but I prioritise safe daylight over chasing a perfect image.

    I stay on the route even when a nearby cone looks easy to climb. Fragile volcanic surfaces recover slowly from repeated shortcuts.

    Who I recommend it to

    I recommend Sámara to travellers who want a real Teide National Park walk without committing to a summit-style day. It also works well for active families with older children who are comfortable on uneven ground and at altitude.

    For an even easier introduction I compare it with Roques de García. For a harder high-level hike I look toward Guajara.

    Official trail source

    I plan with the official Sámara trail page, which provides distance, duration, elevation and authorisation status. On the day, I also check Teide National Park alerts and weather.

    Teide National Park Desert Landscape Tenerife

    Protected-area rules can change temporarily because of fire risk, snow, maintenance or conservation. Current signage always outranks an older itinerary.

    A simple half-day plan

    • Drive up early and stop only at legal viewpoints.
    • Walk the Sámara loop at a steady pace with water breaks.
    • Have lunch or a picnic only where permitted.
    • Continue to a different Teide viewpoint rather than adding another long hike.
    • Descend before fatigue turns the mountain road into work.

    This leaves margin for weather and makes the trail the centre of the day rather than one item in a rushed checklist.

    How I fit it into a realistic Tenerife day

    I treat the Sámara trail as part of a wider Teide National Park day rather than an isolated pin on the map. Tenerife looks compact, but mountain roads, parking searches and changing weather can turn short distances into slow travel. I decide in advance which stop is the priority and which stops are optional.

    My preferred approach is to pair it with Roques de García, western Teide viewpoints or Santiago del Teide. That creates a day with contrast without spending most of the time in the car. I also keep one backup plan nearby in case wind, cloud, surf or temporary access restrictions change the experience.

    Weather, clothing and microclimates

    I never use a single Tenerife forecast for the whole island. North-coast cloud, Anaga mist, Teide sunshine and south-coast heat can all occur on the same day. I check the forecast for the exact municipality and, for mountain or coastal activities, I also look at wind and sea conditions.

    Even on warm days I carry sun protection, water and a light layer. At higher elevations I add a windproof layer, while on the coast I bring footwear with grip because volcanic rock, wet steps and black sand can all be slippery or hot.

    Responsible travel habits I use here

    Small beaches, villages, viewpoints and trailheads are shared local spaces. I park only where it is legal, keep access to homes and farm tracks clear, take rubbish away and avoid turning narrow roads into informal photo stops. In protected areas I stay on the marked route and never collect volcanic material, plants or other natural objects.

    I also prefer to support the area in a simple way: a coffee, lunch, market purchase or locally made product is often a better souvenir than something generic. Respectful travel is mostly about ordinary decisions that reduce pressure on places I want to remain enjoyable.

    My backup plan when conditions are wrong

    If the sea is rough, I do not force a swim. If a viewpoint is inside cloud, I move lower or switch to a village, museum or food stop. If parking is full, I continue to the next planned place rather than circling residential streets. This flexibility is especially useful in Tenerife because very different landscapes sit close together.

    I build the day around one must-do experience and several optional stops. That structure produces better trips than trying to complete a rigid checklist, and it makes it easier to respond to closures, weather and local events without feeling that the day has failed.

    Frequently asked questions

    Do I need a permit for the Sámara trail?

    The official trail page states that authorisation is not required, although temporary closures or restrictions can still apply.

    Is Sámara suitable for beginners?

    It is officially graded low difficulty, but beginners should still be comfortable with loose volcanic terrain, sun and altitude.

    How long does it take?

    The official estimate is about 2 hours 45 minutes for the 5.1 km loop.

    Can I see Teide from the trail?

    Yes. The route offers broad views of Teide, Pico Viejo and surrounding volcanic cones.

    What shoes should I wear?

    I use hiking shoes or trail shoes with grip because lapilli and scoria can be loose underfoot.

    Questions I ask myself before I go

    I check four things before leaving: current access, exact weather, realistic travel time and what I will do if the first plan fails. Tenerife is an easy island to underestimate because distances look short on a map. A mountain road, coastal traffic or a full car park can add far more time than expected.

    I also decide whether the destination is the purpose of the day or simply one stop. When it is the main purpose, I leave enough time to experience it slowly. When it is secondary, I set a clear limit so the rest of the itinerary does not become rushed.

    What makes this worth adding to a longer Tenerife trip

    The strongest Tenerife itineraries mix famous landmarks with smaller places and experiences. Teide, Anaga and the main beaches explain the island at a large scale, while a local pool, rural trail, village festival or food tradition explains how people actually use and understand the landscape.

    I therefore do not judge a place only by the number of attractions. A short viewpoint can be valuable if it helps me read the geography; a small village can be memorable if I slow down for lunch; a modest trail can reveal volcanic history better than a long drive through the same area.

    Practical travel habits that improve the day

    I download maps or save the route before entering areas with weaker mobile coverage. I start with a full bottle of water, keep a layer in the car, carry some cash for small local businesses and avoid planning every meal at the most obvious tourist time. These are small habits, but they make rural Tenerife much easier.

    I also leave more space between stops than a navigation app suggests. That time absorbs photo stops, roadworks, wrong turns and simple curiosity. The best travel days on Tenerife often improve when I have enough margin to stop somewhere I had not planned.

    My final take

    Sámara is my kind of Teide walk: short enough to fit a flexible day, but visually strong enough to feel like a genuine mountain experience. I give it respect for altitude and weather, stay on the route and let the volcanic landscape provide the drama.

  • 10 Days in Tenerife: The Best Itinerary for Beaches, Teide, Anaga and Villages

    10 Days in Tenerife: The Best Itinerary for Beaches, Teide, Anaga and Villages

    Ten days in Tenerife is the length of trip where I stop feeling forced to choose between the island’s personalities. I can have resort beach time, spend a full day on Teide, explore Anaga, see historic towns, visit the northwest and still leave room for a weather change or a lazy afternoon.

    My ten-day itinerary is designed for a first visit, but it is deliberately modular. If you love hiking, you can replace a beach day with a trail. If you travel with children, you can substitute a major attraction. If food and villages matter more than nightlife, the same route works from a northern base.

    How I structure ten days

    I divide the trip into three types of day: major landscape days, cultural/coastal days and recovery days. Teide, Anaga and Teno require attention and driving; a beach day does not. Alternating them keeps the holiday enjoyable.

    I also keep one day partially uncommitted. Tenerife weather can be completely different north and south, and a flexible slot lets me move an important mountain plan to the clearest forecast.

    Days 1–2: arrive and understand the south

    Day one is for arrival, the promenade and an early dinner. Day two explores the southern coast more intentionally: Costa Adeje beaches, Los Cristianos harbour, a surf lesson near Playa de las Américas or El Médano depending on interests. The individual guides to Costa Adeje, Los Cristianos and Playa de las Américas help me choose.

    Illustrated guide: 10 Days in Tenerife, with practical visitor tips
    Illustrated guide: 10 Days in Tenerife.

    I resist the urge to begin with a two-hour cross-island drive. The south deserves at least one genuine day rather than being treated only as a hotel zone.

    Day 3: Teide National Park

    I use a clear day for Teide. If I have cable-car or summit plans, I follow the current rules and reservations in my Mount Teide guide. If not, I still spend time at the national park viewpoints and volcanic landscapes rather than simply driving across the caldera.

    I like the southern approach through Vilaflor. On the return I choose either an early descent or a planned stargazing evening; I do not accidentally turn a day trip into a midnight mountain drive.

    Day 4: La Laguna and Anaga forest

    I start in historic La Laguna and continue to the laurel forest of Anaga. A short trail plus selected viewpoints is enough. My Anaga Rural Park guide explains why this region is about atmosphere and landscape rather than collecting stops.

    If the weather is cloudy, I do not automatically cancel. Mist can make the forest beautiful, although visibility and trail conditions still matter. Heavy rain or official closures are different: I respect them and move the plan to the flexible day.

    Mount Teide Landscape Tenerife

    Day 5: Benijo, Taganana and the northeast coast

    With ten days, I can give the Anaga coast its own slower day instead of combining everything with La Laguna. I drive toward Taganana, eat locally and visit Benijo or nearby coastal viewpoints. My Benijo guide emphasises sea safety because this is an exposed Atlantic beach, not a guaranteed swimming spot.

    This day is one reason I like a longer trip. The northeast feels completely different from the resort belt, and its road deserves daylight and patience.

    Day 6: Puerto de la Cruz and La Orotava

    I spend a northern day between Puerto de la Cruz and La Orotava. I walk the old streets, stop for lunch and decide whether Lago Martiánez, a garden or another local attraction fits the group.

    I avoid adding Loro Parque automatically. It can take most of a day, so I treat it as an alternative full-day plan rather than an extra two-hour stop.

    Day 7: Garachico, Icod and the northwest

    Day seven moves west through the north. Garachico offers volcanic history and natural pools; Icod adds the Drago area and, with a separate reservation, the Cueva del Viento. The relevant guides are Garachico, Icod de los Vinos and Cueva del Viento.

    I choose two main experiences, not all three at full length. A cave tour has a fixed time, while a natural pool depends on sea conditions. The schedule should respect both.

    Day 8: Teno, Masca or Los Gigantes

    This is the western landscape day. I might visit the Teno highlands and Masca viewpoints, or take a boat from Los Gigantes. If I have a confirmed Barranco de Masca booking, that becomes the entire day. I follow the current access rules in my Masca guide rather than old blogs.

    Hairpin bends on the winding road through the Masca valley

    For an easier day, I use Los Gigantes as the base, enjoy the cliffs from sea level and perhaps book a responsible cetacean trip.

    Day 9: choose a signature experience

    I keep day nine for the activity that best matches the travellers: Siam Park, Loro Parque, whale watching, diving, a wine visit or a longer hike. This is where a ten-day trip becomes personal rather than generic.

    I also use this day as the weather reserve. If Teide was closed or Anaga had poor conditions earlier, the priority landscape gets this slot instead.

    Day 10: slow coast and departure preparation

    The final day should not feel like punishment for having travelled. I stay near the accommodation, swim if conditions are good, buy local products, organise luggage and prepare for the airport. If the flight is the following morning, I enjoy a final long dinner rather than adding another mountain circuit.

    A relaxed ending also gives a safety buffer if the rental car needs attention or someone realises a souvenir is still in the hotel safe.

    One base or two bases?

    With ten nights, I seriously consider splitting the stay. Five or six nights in the south and four or five in Puerto de la Cruz or La Laguna reduces repeated cross-island drives. You can compare Tenerife accommodation for a two-base itinerary and calculate the road time between the exact properties.

    The disadvantage is packing and check-in. For families with lots of luggage, one base may still be more comfortable. I choose based on how many north-side days are genuinely planned.

    Ten days without a car

    This itinerary can be adapted to public transport, but I simplify the mountain days and use organised excursions selectively. Teide tours, whale watching and La Gomera can be easier without a car, while La Laguna, Santa Cruz, Los Cristianos and Puerto de la Cruz are well connected. My Tenerife without a car guide explains the network.

    Anaga Laurel Forest Path Tenerife

    The key is not to reproduce a car itinerary bus for bus. Public transport works best when I stay in fewer areas and spend longer at each destination.

    How I would adapt it for families

    With children I reduce long drives and replace one cultural or hiking day with a major attraction. I also choose beaches with easier access and calmer conditions. My Tenerife with kids guide helps decide which areas make the best family bases.

    I never assume a child will enjoy a full day of viewpoints because adults do. A playground, pool or simple beach afternoon often creates the best balance.

    How I would adapt it for hikers

    Hikers can replace day two or day nine with a serious trail, but I leave recovery time after demanding elevation. My best hikes in Tenerife guide compares Anaga, Teide, Teno and forest routes.

    I check Tenerife ON and the relevant managing authority for restrictions before every mountain day. A route that was open when an article was written may be closed temporarily for weather, fire risk or maintenance.

    Food strategy for a ten-day trip

    I mix resort convenience with local meals. A guachinche or winery visit makes more sense on a northern or rural day than as a long evening drive after returning to the south. My Tenerife food guide and wine guide give me ideas without turning every meal into research.

    Garachico Historic Town Tenerife

    Ten days is long enough to learn the difference between tourist menus and everyday Canarian cooking. I leave some meals unplanned so local recommendations can change the route.

    Frequently asked questions

    Is ten days too long in Tenerife?

    No. Ten days is an excellent length for combining landscapes, towns, beaches and rest without rushing.

    Should I split the trip between north and south?

    It can be very efficient for ten days, especially if you plan several Anaga, Puerto de la Cruz and northwest days.

    Can I add La Gomera?

    Yes. A La Gomera day trip fits more comfortably into a ten-day schedule, although I would use the flexible day rather than stacking it on top of the plan.

    How many long driving days are there?

    In my version, roughly four to five days involve significant driving, separated by easier days.

    Do I need to book every day in advance?

    No. I pre-book capacity-limited experiences and keep ordinary towns, beaches and scenic drives flexible around weather.

    What I book before a ten-day trip

    I reserve accommodation, any essential Teide access, regulated hikes and must-do tours. I save restaurants, beaches and most towns for spontaneous decisions. This balance gives structure without locking ten consecutive days into prepaid times.

    I keep screenshots of reservations in one folder and note cancellation deadlines. With a longer trip, weather can force me to move activities, so flexible bookings are often worth a modest price difference.

  • Stargazing in Tenerife: Teide Night Sky, Best Spots, Tours and Practical Tips

    Stargazing in Tenerife: Teide Night Sky, Best Spots, Tours and Practical Tips

    Stargazing in Tenerife is one of the experiences that makes the island feel bigger than a beach destination. Drive from the coast into the Teide highlands after sunset and the atmosphere changes completely: the temperature drops, much of the coastal light disappears below you and the volcanic landscape becomes almost abstract. On a clear night, even visitors who know little about astronomy can understand why Tenerife is internationally important for observing the sky.

    I plan a stargazing night with the same care as a mountain hike. I think about weather, moonlight, warm clothing, road fatigue and where I am actually allowed to stop. The goal is not to chase darkness into an unsafe roadside location; it is to enjoy the sky from a sensible place and return comfortably.

    Why Tenerife is so good for astronomy

    Tenerife benefits from altitude, relatively clean high-level air and a location near 28 degrees north. The official tourism information highlights the transparency of the sky and notes that the Teide Observatory sits at around 2,400 metres. The sea of clouds that often forms below the summit area can also help separate the highlands from coastal light.

    The island’s importance is scientific as well as touristic. The Teide Observatory is part of the Canary Islands’ astronomical infrastructure, and research teams from many countries use the archipelago’s observing conditions. For background, I use the official Tenerife astronomy page.

    Volcanic rock formations of Roques de García in Teide National Park

    Best areas for stargazing

    I focus on the Teide highlands rather than searching for darkness beside a resort. The official tourism site specifically mentions areas around the Parador and Montaña de Guajara as notable places for the night sky. I use established parking or observation areas and never leave the car on a blind bend or protected terrain.

    Vilaflor is useful as a base on the southern approach, while La Orotava gives access from the north. If I am staying in Costa Adeje, I allow enough time to climb gradually, enjoy sunset if conditions are right and stay after full darkness without rushing back. The mountain road is part of the plan, not dead time.

    Should you book a stargazing tour?

    A guided tour is worthwhile if you want telescopes, interpretation and less responsibility for choosing the observation point. A good guide can identify constellations, planets and deep-sky objects that a beginner might miss. Some tours combine sunset, astronomy and transport from the south, which can be especially useful if you do not want to drive mountain roads at night.

    Self-guided stargazing is also possible. The official Tenerife tourism site notes that visitors can observe on their own, but that does not mean every location is appropriate. I still check protected-area rules, weather and access. If I want a structured experience, I book with a reputable astronomy provider rather than someone promising unrealistic sightings.

    Illustrated guide: Stargazing in Tenerife, with practical visitor tips
    Illustrated guide: Stargazing in Tenerife.

    What you can see

    The visible sky changes through the year and from hour to hour. Planets move, the Moon changes phase and seasonal constellations rotate through the night. From Tenerife’s latitude, observers can see a broad range of northern and some southern celestial objects. The official tourism material even highlights Omega Centauri as one of the notable objects visible from the island under suitable conditions.

    I avoid writing a fixed list such as “you will see the Milky Way at 10 pm” because visibility depends on date, moonlight, clouds and direction. Before the trip I check an astronomy app or sky chart for the exact night.

    Moon phase matters

    A bright full Moon can be beautiful, especially over the volcanic landscape, but it washes out many faint stars. If my main goal is the Milky Way or deep-sky objects, I prefer a darker lunar phase. If my goal is simply a memorable night in Teide, I do not cancel because the Moon is bright; I change expectations.

    This distinction is important for photographers too. A moonlit volcanic landscape can be easier to photograph than an extremely dark foreground. The “best” night depends on whether you want stars, landscape detail or a guided telescope session.

    Weather and cloud

    Tenerife’s microclimates are famous, and they matter at night. The coast can be cloudy while the highlands are clear above the cloud layer, or mountain cloud can spoil an evening that looked perfect from the beach. I check high-altitude forecasts rather than only the weather icon for Costa Adeje.

    Wind matters as much as cloud. A clear but windy night can feel extremely cold and make long observation uncomfortable. I bring more insulation than I think I need and keep a flexible backup evening in the itinerary when stargazing is a high priority.

    What to wear

    I dress for mountains, not for a Tenerife beach holiday. Long trousers, closed shoes, a warm layer and a wind-resistant jacket are sensible year-round at altitude after dark. In colder periods I add hat and gloves. A thermos can be useful if you are staying out for hours.

    I also bring a red-light mode or dim light instead of shining a bright phone torch at everyone. Your eyes need time to adapt to darkness, and one strong white light can ruin that adaptation for the whole group.

    Driving at night

    Night driving is the part I take most seriously. The roads are paved and manageable for many visitors, but darkness, bends, altitude and fatigue change the task. I avoid alcohol entirely, drive more slowly than in daylight and never stop suddenly because I see a good photograph.

    If the driver is uncomfortable, an organised tour is a better choice. My Tenerife by car guide covers mountain-road habits, while Tenerife without a car explains why organised excursions can fill transport gaps.

    Teide Observatory visits

    The scientific observatory is not the same thing as a casual roadside stargazing stop. Visits, when available, operate through specific programmes and schedules. I book in advance and read the exact instructions rather than assuming I can arrive at the telescopes independently. Daytime observatory visits can complement a night-sky experience because they explain the science behind the location.

    Teide Observatory And Mount Teide Tenerife

    I also distinguish the observatory from the Teide cable car. They are separate experiences with separate logistics. For cable-car and summit planning, use my Mount Teide guide.

    Astrophotography basics

    For simple night-sky photography, stability matters more than expensive equipment. A tripod, manual control and a wide lens can produce excellent results. I focus carefully, use a timer or remote trigger and avoid walking with bright lights through another photographer’s frame.

    Phone cameras have improved dramatically, but I still prioritise the experience over endless attempts to reproduce professional astrophotography. The best memory can be the moment your eyes adjust and the sky becomes visibly richer.

    A good evening itinerary

    If I am starting in the south, I might have an early dinner in Vilaflor, continue toward Teide before sunset, stop only at legal viewpoints and remain in one observation area after dark. I keep the return route simple. If I am staying in Puerto de la Cruz, I approach from the north and avoid crossing the whole island twice in one evening.

    My Vilaflor guide is useful if you want a village stop before the night session. I do not combine a strenuous summit hike and a very late stargazing session unless the group is experienced and rested.

    Respecting the night environment

    Darkness is part of the resource you came to enjoy. I keep noise low, use minimal light, take rubbish away and stay on authorised surfaces. Protected landscapes are not empty spaces waiting for cars to spread out. If an area is closed, I choose another viewpoint.

    For the latest general information about astronomical tourism, I check the official Tenerife stargazing page before the trip.

    Where to stay

    Vilaflor is the obvious rural choice for serious stargazing, but you do not need to sleep in the mountains. Costa Adeje, Los Cristianos, Puerto de la Cruz and La Orotava can all work if you plan transport. I choose the base for the whole holiday, then dedicate one evening to the sky.

    You can compare accommodation across Tenerife and use the map to judge the drive to your preferred Teide approach.

    Frequently asked questions

    Can I stargaze in Teide without a tour?

    Yes, in suitable publicly accessible areas, but I still follow road and protected-area rules and choose established viewpoints rather than improvising.

    Is stargazing good every night?

    No. Cloud, wind, haze and moonlight change the experience. A flexible itinerary gives you the best chance.

    Is it cold at night?

    It can be much colder than the coast, especially with wind. I always bring warm layers even in summer.

    Do I need a telescope?

    No. The naked-eye sky can be spectacular. A telescope or guided session adds detail and interpretation.

    What is the biggest planning mistake?

    Underestimating the return drive. A safe, comfortable journey back to the hotel is part of a successful stargazing night.

    My simple checklist before leaving the hotel

    Before a stargazing evening I check four things: high-altitude cloud, wind, moon phase and the return driving time. If two of those look poor, I move the experience to another night rather than forcing it. I also download the route and any sky map before climbing because mobile coverage can be inconsistent in mountain areas.

    Tenerife Mountain Landscape And Moon

    I carry water, a warm drink, spare layers and a small torch with a red setting. If I am joining a tour, I still dress independently for the cold because operators cannot control personal temperature tolerance. Finally, I tell someone in the group exactly when we plan to leave the observation area. Night photography and telescopes can make time disappear, and fatigue is the hidden risk at the end of an otherwise beautiful experience. The best stargazing night is one you remember for the sky, not for an exhausting drive home.