Category: Nature & Hiking

Practical guides to Mount Teide, Anaga, Teno and Tenerife hiking, landscapes and protected natural areas.

  • Mirador de El Boquerón Guide: Valle Guerra, Tegueste and Anaga Views

    Mirador de El Boquerón Guide: Valle Guerra, Tegueste and Anaga Views

    Mirador de El Boquerón is a viewpoint I would include when I want to understand this part of Tenerife rather than simply collect another photo stop. It sits in San Cristóbal de La Laguna municipality, on or close to TF-156 around kilometre 2, and the official or municipal tourism information highlights Valle Guerra, Mesa de Tejina, Tejina, Tegueste, the Anaga massif, Punta del Hidalgo and its lighthouse.

    Recent volcanic features such as La Calderita and Valle Molina add a geological layer to what first looks like a purely agricultural panorama. I plan the stop as part of Tegueste, Valle Guerra and the Tacoronte-Acentejo wine area, not as a reason to cross the whole island for ten minutes. That keeps the day realistic and leaves time to respond to cloud, traffic and changing light.

    Quick planning facts

    ViewpointMirador de El Boquerón
    AreaSan Cristóbal de La Laguna municipality
    Road / positionTF-156 around kilometre 2
    Landscapethe agricultural northeast above Valle Guerra
    Main viewsValle Guerra, Mesa de Tejina, Tejina, Tegueste, the Anaga massif, Punta del Hidalgo and its lighthouse
    Parkingparking is available
    Busofficial tourism information does not list a bus stop at the viewpoint
    Accessibilityofficial tourism information lists adapted access

    Why I would stop here

    The best Tenerife viewpoints do more than provide a wide angle. They explain the island. At Mirador de El Boquerón, I can compare elevation, vegetation, roads, towns and volcanic shapes in one frame. That makes the stop useful before visiting the places below because I arrive with a clearer mental map rather than following turn-by-turn navigation without understanding the landscape.

    I normally stay longer than the few minutes suggested by a quick road itinerary. Ten minutes is enough to photograph the view, but twenty to forty minutes gives cloud and light time to change. On Tenerife, a ridge hidden at arrival can appear suddenly, while a clear panorama can disappear behind cloud just as quickly.

    What I can see

    The main panorama includes Valle Guerra, Mesa de Tejina, Tejina, Tegueste, the Anaga massif, Punta del Hidalgo and its lighthouse. I look for layers instead of trying to identify every landmark immediately: foreground vegetation or rock, middle-distance towns and ridges, then the highest peaks or distant coast. This approach makes the view easier to understand and usually creates better photographs than zooming straight toward the most famous feature.

    Anaga Laurel Forest Tenerife

    Visibility is never guaranteed. Trade-wind cloud can cover the north and northeast, haze can soften the south, and calima can reduce long-distance contrast across the island. I treat a cloudy visit as a different landscape rather than automatically a failed one, but if the entire purpose of the stop is photography I check current weather, webcams where available and mountain conditions before driving up.

    Getting there

    Mirador de El Boquerón is associated with TF-156 around kilometre 2. Tenerife road distances can be misleading because bends, elevation and slower local traffic matter more than kilometres. I add margin to the navigation estimate and avoid scheduling a fixed attraction immediately after the viewpoint. On narrow or mountain roads I keep attention on driving and let passengers enjoy the scenery until I am safely parked.

    Parking is available. Even when parking is provided, I do not stop outside marked or obviously legal areas if the car park is full. Blocking a mountain road, farm entrance or bus movement for a photograph creates unnecessary risk. If the stop is busy, I either wait briefly or continue to another planned viewpoint.

    Public transport and no-car planning

    Official tourism information does not list a bus stop at the viewpoint. Where a bus stop exists, I still check the current TITSA timetable and the direction of the stop before relying on it. Mountain and rural services can be much less frequent than resort routes, and a missed connection can turn a short stop into a long wait.

    If there is no convenient stop, I do not improvise by walking along a road without a pavement. For a no-car trip, I would rather choose viewpoints connected to established trails or frequent bus corridors. The goal is not to prove that every place is possible without a car; it is to build a safe route around the places that genuinely work.

    Accessibility

    Official tourism information lists adapted access. I treat this as a starting point, not a guarantee for every traveller. Gradients, kerbs, the distance from parking to the rail, toilet availability and the surface itself can determine whether a viewpoint is comfortable for someone using a wheelchair, walker or cane.

    Before travelling specifically for accessibility, I verify current conditions with the official site or local authority. Temporary works, parked vehicles or a closed terrace can change a visit even when the permanent infrastructure is described as adapted.

    Look beyond the scenery to the working landscape

    I do not treat the fields below as decorative background. The northeast has long been shaped by agriculture, and the mosaic of plots, villages and roads is part of the reason the panorama is interesting. I look for differences in elevation, crop patterns and settlement density. If I continue toward a market or winery, the viewpoint gives context to the produce I see later in the day.

    Best time of day

    I choose timing according to the direction of the view rather than repeating a generic “sunset is best” rule. Morning can bring cleaner air and quieter roads; afternoon can warm colours on ridges; sunset may be dramatic but can also put key features into silhouette. For valley and mountain viewpoints, cloud development is often more important than the clock.

    If photography matters, I would rather visit twice on a longer stay than wait hours for perfect light on a single day. Tenerife has strong microclimates. A disappointing first stop does not mean the viewpoint is overrated; it may simply mean the air mass and cloud level were wrong at that moment.

    Photography tips that actually help

    I start with a wide composition to show scale, then use a moderate zoom for layers of ridges, towns or volcanic cones. A polarising filter can sometimes help with glare, but it can also create uneven skies with very wide lenses, so I use it carefully. On a phone, I avoid excessive digital zoom and instead make several clean compositions that I can crop later.

    I keep the camera strap secure in strong wind and never cross a barrier to remove a foreground object. A railing or pine branch can become part of the composition. The best photograph is not worth standing on an unstable edge, stepping into the road or damaging vegetation.

    Weather, wind and cloud

    Conditions at the agricultural northeast above Valle Guerra can differ sharply from the coast. I carry a light layer even when the beach is warm, and in winter I add something more substantial if the route climbs high. Wind is often the most noticeable factor because a temperature that seems mild can feel cold after several minutes in an exposed position.

    Cloud is equally important. Northern slopes frequently interact with the trade-wind layer, producing the famous sea of clouds at some elevations while covering lower valleys at others. In the south and east, haze or calima can be the bigger issue. I check the forecast for the actual elevation rather than using only a resort forecast.

    How long I would stay

    For a simple road stop I allow twenty to forty minutes. That is enough to park without rushing, read any interpretation, take photographs and actually look at the landscape. If there is a café, short trail or historical element, I extend the stop to an hour or more.

    Anaga Laurel Forest Trail Tenerife

    I do not build a day around visiting ten viewpoints. After the third or fourth, the landscapes begin to blur together. My preference is two or three contrasting stops linked to towns, a walk, a meal or a museum. That produces stronger memories and much less driving.

    How I combine it with the rest of the day

    I would pair Mirador de El Boquerón with Tegueste, Valle Guerra and the Tacoronte-Acentejo wine area. The important thing is geographical logic: I continue in the same area instead of zigzagging across Tenerife because another attraction looked close on a map.

    If the weather changes, the viewpoint becomes the flexible part of the itinerary. I can shorten it, move it later or replace it with a town stop. This is one reason I like viewpoints: they add a high-value experience without requiring a fixed entrance slot.

    Food, toilets and practical stops

    I never assume a viewpoint has toilets, drinking water or an open café unless current information specifically confirms it. I use facilities in the nearest town before a long mountain section and carry water in the car. If a café is part of the site, I still check opening hours rather than treating it as guaranteed.

    For food, I prefer to connect the stop with a local town or market rather than eating only at roadside places. This turns the view into part of a broader regional day and spreads visitor spending more naturally across the communities I pass through.

    Safety at viewpoints

    Barriers, marked paths and parking rules are part of the experience, not obstacles to a photograph. I stay behind rails, keep children close near drops, and do not sit on walls above cliffs. Strong wind can affect balance and can also pull hats, phones or loose objects from my hands.
    Anaga Tenerife

    I am especially careful when leaving a parking area. Some viewpoints sit on roads where traffic accelerates immediately after a bend. I look both ways, avoid standing in the carriageway and wait for a safe gap rather than trying to photograph from the road itself.

    Responsible visiting

    I take all rubbish away, keep noise low and avoid trampling vegetation to create a private photo spot. At rural viewpoints I also respect houses, farms and access tracks nearby. A viewpoint may be on a tourist map, but the surrounding area is often part of someone’s everyday working landscape.

    Drone use deserves extra caution because protected areas, airports, wildlife and local restrictions can make a seemingly empty viewpoint unsuitable or illegal for flying. I check current Spanish aviation rules and protected-area restrictions before bringing a drone into the plan.

    Common mistakes I would avoid

    • Driving across the island only for a five-minute stop.
    • Using a coastal weather forecast for a high-elevation viewpoint.
    • Parking on the road when the designated area is full.
    • Assuming a visible beach or trail is automatically safe or accessible.
    • Crossing barriers for an unobstructed photograph.
    • Trying to visit too many viewpoints in one day.

    Is Mirador de El Boquerón worth it?

    For me, yes when it fits the route. The value comes from context: Recent volcanic features such as La Calderita and Valle Molina add a geological layer to what first looks like a purely agricultural panorama. I would not make a long cross-island detour solely to tick it off, but as part of Tegueste, Valle Guerra and the Tacoronte-Acentejo wine area it adds perspective that a beach, town street or hiking trail cannot provide on its own.

    My final rule is to let conditions decide the length of the stop. If the view is clear and the light is changing, I stay. If cloud closes in completely or parking is chaotic, I move on without forcing the experience. Tenerife rewards flexible travel more than rigid checklists.

    Final planning checklist

    Before I leave, I check the road, weather at the correct elevation, daylight, any local closures and the next stop in the route. I carry water, sun protection and a layer, download the map in case coverage drops and keep enough fuel for mountain driving. That small amount of preparation lets me enjoy Mirador de El Boquerón as a landscape experience rather than another logistical problem.
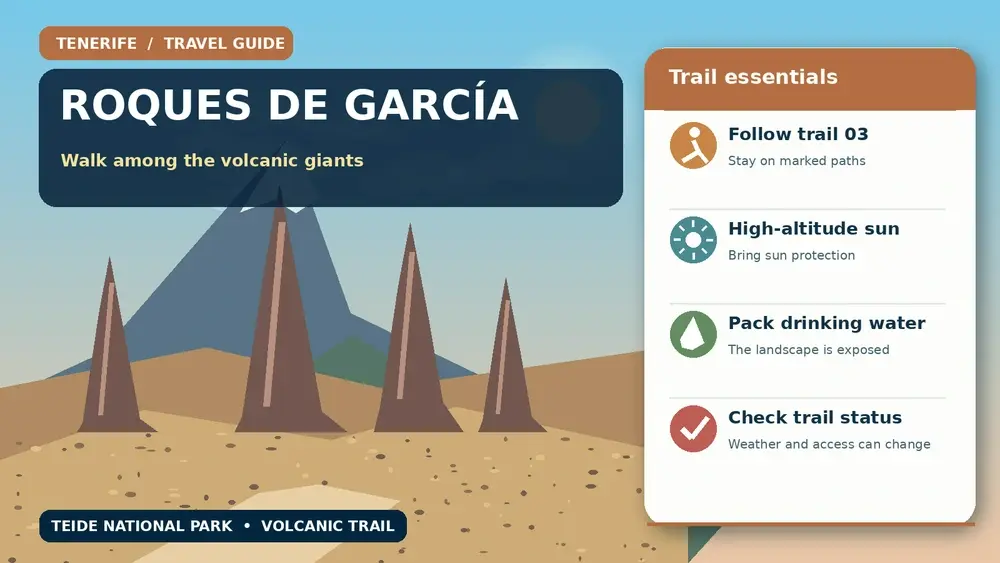
  • Roques de García Hiking Guide: Teide Trail 03 Loop

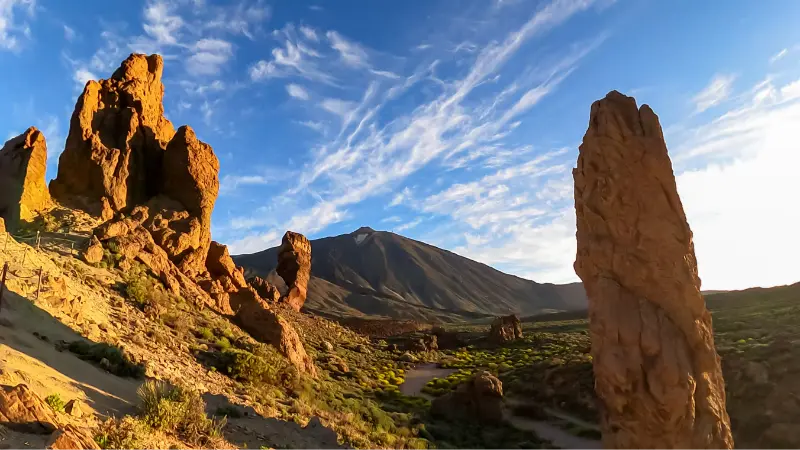
    Roques de García Hiking Guide: Teide Trail 03 Loop

    Roques de García Trail 03 is a route I choose when I want to experience Tenerife on foot rather than from a sequence of roadside viewpoints. The official trail information gives it a clear technical profile, but the real decision is whether the distance, altitude and logistics fit the day I actually have.

    Turismo de Tenerife currently lists the route at 3.5 km, about 2 hours, with low difficulty. The official profile reaches a maximum altitude of 2,187 m and a minimum of 2,025 m, with approximately about 211 m of accumulated ascent and about 215 m of descent. The current listing states the permit requirement as: No.

    Quick route facts

    RouteRoques de García Trail 03
    StartMirador de La Ruleta
    FinishMirador de La Ruleta
    Distance3.5 km
    Official durationabout 2 hours
    DifficultyLow
    Maximum altitude2,187 m
    Minimum altitude2,025 m
    Accumulated ascentabout 211 m
    Accumulated descentabout 215 m
    AuthorizationNo

    Why this trail is worth doing

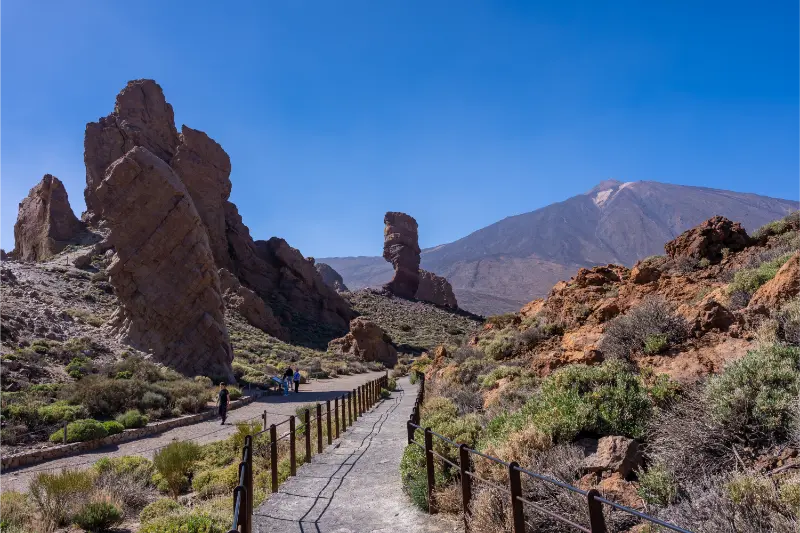
    The interest goes beyond exercise. This route is connected with the classic loop around Roque Cinchado and the Roques de García formations. I like it because the landscape changes at walking speed, making volcanic textures, vegetation and relief much easier to understand than they are through a car window.

    Start and finish logistics

    It is circular, but parking and crowd levels still determine my start time.

    I save the official route page and an offline map before losing mobile signal. I never depend on finding a taxi at a remote finish without checking availability first.

    Difficulty in practical terms

    The official rating is low, but I translate that into conditions. Distance, cumulative ascent, altitude and exposure all matter. I would rather finish with energy left than choose a route only because the label sounds easy.

    Altitude and acclimatization

    Even routes that are technically straightforward can feel harder above 2,000 metres. I walk more slowly than at sea level, drink regularly and pay attention to headache, dizziness or unusual breathlessness. Persistent symptoms are a reason to descend.

    Best time of day

    I prefer an early start. Morning usually gives me more parking options, cooler conditions and a larger daylight margin. In Teide National Park I also avoid planning around sunset unless the return route and legal access conditions are completely clear.

    Official source and current status

    Before leaving I check the official Turismo de Tenerife trail page. The technical numbers above come from that listing, but temporary closures and restrictions can change after adverse weather or management work.

    Related guides on this site

    For broader planning I use my Mount Teide guide and Tenerife hiking permits and trail rules guide. Those pages cover the larger decisions that do not belong to one specific path.

    Mount Teide And Volcanic Landscape Tenerife

    How I would plan this route in a real Tenerife itinerary

    I would not treat Roques de García Trail 03 as an isolated line on a hiking map. The route makes most sense when I understand the wider Teide and Tenerife highland landscape, the direction of travel and what happens after the walk. I decide the start time from daylight and weather rather than from how early I can leave the hotel.

    The transport plan matters as much as the walking plan. It is circular, but parking and crowd levels still determine my start time. I save the route map offline, carry enough water for a delay and tell someone where I expect to finish. On Tenerife, a route can feel straightforward until cloud, wind or a closed access road changes the pace.

    What I pack

    • Shoes with reliable grip rather than smooth city trainers.
    • Water carried from the start, even when a visitor centre or cafe is nearby.
    • Sun protection: high-SPF sunscreen, hat and sunglasses.
    • A light warm or windproof layer because altitude can change conditions quickly.
    • Offline map, charged phone and a small power bank.
    • Food that does not depend on finding an open bar at the finish.

    The main risk I keep in mind here is altitude, sun exposure and loose volcanic surfaces. I do not use the official difficulty label as a substitute for judgement. A route classified as low or medium can still be a poor choice in strong wind, heat, fog or after a night of little sleep.

    Illustrated guide: Roques de García Hiking, with practical visitor tips
    Illustrated guide: Roques de García Hiking.

    How I avoid turning a good walk into an overpacked day

    After the route I usually choose one nearby stop rather than three. Cañada Blanca rather than another crowded roadside stop A relaxed meal, a viewpoint or a short museum visit is often a better finish than racing across the island for another major attraction.

    I also leave a buffer before sunset. Mountain roads are slower after dark, and the most exposed stretches can feel very different once the light disappears. If the route takes longer than expected, the buffer is what keeps the return calm.

    Trail etiquette and conservation

    I stay on the marked line, carry every piece of rubbish out and avoid cutting switchbacks. Volcanic soils and high-mountain vegetation recover slowly from trampling. I never collect stones, pumice, flowers or archaeological material, even when an object looks abundant.

    When I meet other walkers on a narrow section, I step aside only where doing so does not damage vegetation or create a fall risk. I keep music off and let the landscape remain the main experience.

    Weather checks I make on the same morning

    I check wind, temperature and cloud at the route altitude rather than relying on the forecast for the coast. Tenerife can be sunny at sea level while the high road is cold, cloudy or temporarily restricted. I also look for official closure notices after snow, wildfire, heavy rain or maintenance.

    If the official manager recommends avoiding the trail, I change the plan. A holiday itinerary is not a reason to override a closure or safety warning.

    Who I think this route suits

    I recommend Roques de García Trail 03 to travellers who enjoy walking as a way of understanding landscape rather than simply collecting viewpoints. The best pace leaves time to notice geology, plants and changes in altitude. I would choose a shorter alternative for anyone uncomfortable with the specific exposure or distance described above.

    My final planning rule

    I make the decision to turn around before I need to. If wind strengthens, visibility disappears, a walker in the group is struggling or water is being used faster than expected, I shorten the day. That judgement is part of good hiking, not a failed itinerary.

    What the landscape teaches me

    One of the best reasons to walk here is to see how quickly Tenerife changes with altitude. Lava flows of different ages, pumice, erosion surfaces and tough high-mountain plants create a landscape that can look empty from the road but becomes detailed on foot.

    I stop for photographs only where the path is wide enough to do so safely. I avoid stepping onto fragile plants or loose slopes for a better angle.

    Common mistakes I avoid

    • Starting too late because the distance looks short.
    • Carrying too little water because temperatures feel cool at the trailhead.
    • Treating a low technical rating as permission to ignore wind or altitude.
    • Assuming mobile signal will solve transport at the finish.
    • Leaving the marked trail to shorten a bend or reach a photo spot.
    • Failing to re-check the route after unusual weather.

    A realistic finish to the day

    After the hike I keep the rest of the schedule light. A visitor centre, meal or scenic drive back to the accommodation is enough. The mountains are more enjoyable when I do not spend the final hour racing the clock.

    Extra planning notes from experience

    I keep the itinerary flexible enough to react to Tenerife’s microclimates. A cloudy morning on one slope does not always mean the entire island is unsuitable, but I do not use that fact to justify ignoring a warning in the exact place I plan to visit. Local conditions always win over a generic forecast.

    I also distinguish between access being physically possible and access being officially open. Gates, signs and management notices take priority over an old blog post, saved map or social-media photo.

    What makes a visit feel less rushed

    I build in time for parking, toilets, a slow lunch and an unexpected viewpoint. These are not wasted minutes. They are what allow the day to remain enjoyable when a bus is late, a car park is full or the weather improves and I decide to stay longer.

    Roque Cinchado Trail Teide National Park Tenerife

    For families or mixed-ability groups I plan around the least experienced walker rather than the strongest. Splitting a group in unfamiliar terrain creates more problems than it solves.

    Responsible travel

    I use marked paths and public spaces, take litter away, keep noise low and support local businesses when I stop for food or supplies. In protected areas I treat every closure and conservation rule as part of the experience, not as an obstacle to it.

    That approach is one reason I prefer a smaller number of well-planned stops. Tenerife rewards attention. The island is far more memorable when I understand why a place looks and feels different instead of simply adding another pin to a map.

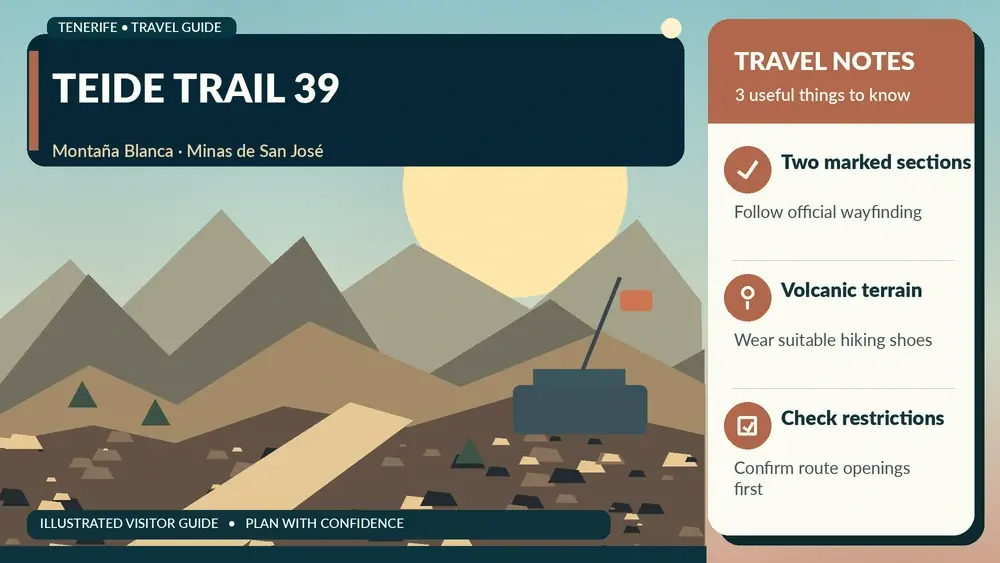
  • Teide Trail 39 Guide: Cable Car Base, Montaña Blanca and Minas de San José

    Teide Trail 39 Guide: Cable Car Base, Montaña Blanca and Minas de San José

    Teide Trail 39 Guide is a useful example of why I do not judge a Teide hike by distance alone. The official route is 7.05 km total (3.91 km + 3.14 km), but its real character comes from where it starts, what it connects to and the kind of volcanic ground it crosses.

    The feature that makes this trail worth a separate guide is a practical east–west connector that avoids walking on the TF-21 between the cable-car sector, Montaña Blanca and Minas de San José. I use the current information from the Parque Nacional del Teide managing authority as the technical baseline, then check it again close to the hiking date because access rules and temporary closures can change.

    Quick route facts

    Official routePNT 39 A + PNT 39 B
    StartMajúa opposite the Teide cable-car base
    FinishMinas de San José
    TypeLinear, two official sections
    Distance7.05 km total (3.91 km + 3.14 km)
    Official timeAbout 1 hr 40 min official section times combined
    DifficultyLow
    Maximum altitude2,365 m across the two sections
    Minimum altitudeabout 2,213 m across the two sections
    Accumulated ascentNot published as a combined figure on the current official sheets
    Accumulated descentNot published as a combined figure on the current official sheets
    Reservation / permitNo reservation for PNT 39 A or B

    Why this route deserves its own guide

    Section A crosses the Montaña Blanca lava landscape from Majúa, while section B continues around the base of the dome toward the former pumice-mining area at Minas de San José. Together they make more sense than either section viewed in isolation.

    This is also why I would not treat the route as “just another Teide trail”. Each numbered path answers a different practical question. Some give access to a viewpoint, some join two major routes, and others preserve an old island crossing that makes much more sense when you understand where people were travelling before the modern road network.

    For planning a wider day, useful related guides are Montaña Blanca Trail 07 guide; Sanatorio Trail 16 guide; Majúa Trail 19 guide; Los Valles Trail 30 guide. I prefer linking one main walk with a small number of compatible stops rather than stacking several trails simply because they appear close together on the map.

    The route step by step

    1. Majúa opposite the cable-car base

    At Majúa opposite the cable-car base, I would first confirm that the physical trail number matches the route saved offline. The Teide network has many junctions that are obvious on a map but visually subtle on open volcanic ground. I use the first ten minutes to settle into a deliberately easy pace, check wind exposure and make sure the surface matches what I expected.

    2. PNT 39 A across the lava toward Montaña Blanca

    The section around PNT 39 A across the lava toward Montaña Blanca is where the route begins to show its specific identity: a practical east–west connector that avoids walking on the TF-21 between the cable-car sector, Montaña Blanca and Minas de San José. I keep looking backwards as well as forwards because reverse views are useful for orientation, especially if the same line will form part of the return. I stay on the official tread even where footprints appear to cut across the volcanic surface.

    3. the Montaña Blanca junction zone

    By the Montaña Blanca junction zone, I make a second logistics check: remaining water, daylight and the exact exit plan. This is more useful than comparing my pace with an app. On short connector trails, it is easy to forget that most of the day may lie on the approach or the trail used after the official endpoint.

    4. PNT 39 B to Minas de San José

    Near PNT 39 B to Minas de San José, I slow down rather than rushing the finish. Junctions deserve full attention because the next trail can have very different difficulty or access rules. I confirm the route number before continuing and keep enough energy for whatever connection, return walk or road transfer is still needed.

    The single planning detail I would solve first

    PNT 39 itself is free-access, but connecting onto PNT 07 toward La Rambleta is a separate route with its own current access rules. Do not assume PNT 39 permission covers the upper mountain.

    I turn that point into a concrete plan before driving into the park. I save the start and finish as separate locations, note every connecting trail number and decide exactly how I will return to the vehicle or reach public transport. If the official endpoint is another trail rather than a road, the connection is part of the day even though it is not included in the distance in the table above.

    How difficult is it in practice?

    The managing authority rates this route Low. I read that grade together with altitude, exposure and surface. A low-rated trail at roughly 2,000–2,400 metres is still very different from an easy promenade at sea level: ultraviolet radiation is stronger, shade is scarce and a dry wind can make dehydration surprisingly fast.

    Roque Cinchado Roques De Garcia Tenerife

    The typical surface here is broad volcanic path, lava fields and pale pumice around Montaña Blanca. Loose picón and pumice can make a gentle slope more tiring, while rough lava demands attention even when the statistics look modest. I use trail footwear with grip, slow down on unstable sections and avoid creating a shortcut when the official path bends around fragile ground.

    Altitude, sun and wind

    I treat the highlands as mountain terrain even on the shortest trails. Before leaving the car I already have water in me, not only in the backpack. I carry a hat, sunglasses, sunscreen, a windproof layer and an insulating layer because conditions can change quickly once a cloud edge or stronger wind arrives.

    Headache, unusual breathlessness, dizziness, nausea or loss of coordination are not symptoms I would ignore just because the route is short. If someone feels progressively worse, I stop and reassess rather than trying to “finish the last kilometre”. Distance on the map does not cancel the effect of altitude.

    Weather: use a mountain forecast

    I never use the weather in Costa Adeje, Los Cristianos or Puerto de la Cruz as the forecast for this hike. The national park can sit above a sea of clouds, or it can be cold and windy while the coast is warm. Snow, ice, calima, heat and strong wind can all change the appropriate plan.

    Visibility matters as much as temperature. Some of these trails cross very open ground where landmarks normally make navigation obvious; cloud or blowing dust removes that advantage. If the official authority posts a closure or restriction, that overrides an old GPX track, review or social-media post.

    Access and permits

    Current access: No reservation for PNT 39 A or B. I still check the managing authority immediately before setting out. A free-access trail can close temporarily because of weather, wildfire risk, conservation work or other management measures, and a connecting trail can have different rules.

    I separate three questions: whether this numbered trail needs a reservation, whether the road or forest track used to reach it is open, and whether a connecting trail has its own controls. That distinction is especially important around Montaña Blanca, La Rambleta and summit routes, where adjacent paths can have different access systems.

    Getting there and finishing the walk

    Parking is one of the easiest parts of a Teide plan to underestimate. I use legal spaces only and avoid building a schedule that requires a specific roadside bay to be free. On linear routes I prefer a two-car plan, a confirmed bus/taxi arrangement where practical, or a route combination that naturally returns to the vehicle.

    If an early mountain start is important, I sometimes compare places to stay in Tenerife based on the road I need the next morning rather than simply choosing the nearest beach. A base on the wrong side of the island can add a long pre-dawn drive to an otherwise short hike.

    What to notice in the landscape

    Teide becomes much more interesting when I stop treating every dark rock as “lava”. Pumice fields, oxidised cones, scoria, compact flows and younger black volcanic materials tell different parts of the eruptive story. The colour and texture underfoot often explain why vegetation density changes within a few hundred metres.

    Mount Teide And Volcanic Landscape Tenerife

    I also look at scale. The same cone can appear small from the road and enormous once the route passes its base. Teide and Pico Viejo shift position through the day, and the caldera wall can feel like a continuous barrier until a trail reveals one of the old passes used by people moving between valleys.

    Conservation: the path is part of the protection

    I stay on the marked tread even when an informal line looks shorter. High-mountain plants grow slowly and footprints can remain visible for a long time in pumice or ash. I leave rocks, obsidian-like fragments, plants and volcanic material where they are and carry out every piece of food waste.

    Caves and lava tubes deserve extra care. If an official description says access is restricted, I treat that as a firm boundary rather than an invitation to look for another entrance. Protected subterranean habitats can be damaged by very little disturbance.

    What I pack for a short Teide trail

    • Water for the complete outing, not only the numbered section.
    • Sun hat, sunglasses and high-protection sunscreen.
    • Windproof shell and a warm layer.
    • Trail or hiking shoes with good grip.
    • Offline map and a screenshot of the official route information.
    • Charged phone and a small power bank on longer combinations.
    • Food and a reserve snack, with all packaging carried back out.

    Best time of day

    I generally prefer morning. It gives a larger daylight reserve, usually makes parking easier and provides cooler conditions on exposed volcanic ground. It also leaves time to change the plan if a road, trail or weather condition is not what I expected.

    Late afternoon can be excellent for low-angle light, especially on cones and the caldera wall, but I only choose it when the finish is simple and I know the legal parking or transport arrangement will still work. I do not chase sunset at the cost of returning in darkness on unfamiliar volcanic terrain.

    Can this work for families?

    The official grade is only one part of the answer. I think about altitude tolerance, experience on loose terrain, wind and whether the route is a simple out-and-back or one piece of a larger traverse. For a family’s first day at Teide, I would rather choose a short route with an easy exit and add a viewpoint than commit to a complicated linear itinerary.

    With children I plan more drink stops and carry extra warm clothing. I also keep the group especially close near roads and trail junctions, where the risk is often traffic or taking the wrong connection rather than a dramatic mountain obstacle.

    How I would combine it with other Teide sights

    One real hike plus one or two easy interpretive stops usually makes a better day than a checklist. El Portillo, Cañada Blanca, Roques de García, Minas de San José and selected roadside viewpoints can add context without requiring another full route. Which one fits depends on the side of the park where this trail finishes.

    Driving distances inside the national park are deceptive because traffic, viewpoint stops and slow vehicles can stretch the schedule. After a substantial trail I leave a generous margin for the descent from the mountains instead of booking a tightly timed attraction on the coast.

    Photography without leaving the route

    The best images often come from the official path because scale is the story. A person walking through a pumice field or beneath a cone communicates the size of the landscape better than stepping onto untouched ground for a cleaner foreground. A moderate telephoto lens is useful for isolating crater rims, lava fronts and layers of the caldera.

    I do not assume drone use is allowed simply because an area looks empty. Protected-area aviation and filming rules are separate from pedestrian trail access, so I would check them independently before carrying equipment for that purpose.

    Common mistakes to avoid

    • Reading the official distance but forgetting the approach and exit trails.
    • Using a beach forecast for a 2,000-metre hike.
    • Assuming “low difficulty” means no mountain preparation is needed.
    • Walking along a busy road because a linear route was not planned properly.
    • Following an old GPX track after official access rules have changed.
    • Parking outside marked areas when the preferred trailhead is full.
    • Taking pumice, lava or plants as souvenirs.
    • Entering restricted caves or leaving the marked path for photographs.

    Official sources to check before you go

    The technical data in this guide are based on the current managing-authority pages: Government of the Canary Islands – PNT 39 A; Government of the Canary Islands – PNT 39 B. Those pages are the first place I would check again for closures, access changes or updated technical figures immediately before a hike.

    Frequently asked questions

    Do I need a permit?

    No reservation for PNT 39 A or B. That answer applies to this trail itself; a connected route can have different rules.

    Is the official time a target?

    No. I use the official About 1 hr 40 min official section times combined as a planning reference, then add pauses, route checks and any approach or exit distance. Photography, wind and unfamiliar loose terrain can all lengthen the outing.

    Can I do it in trainers?

    Trail shoes are my preference. Even a short official path can contain pumice, loose scoria or sharp lava where smooth city shoes are uncomfortable and less secure.

    Is mobile coverage guaranteed?

    No. I download the route information and keep the phone charged rather than relying on live mapping. On a longer combination I also tell someone the planned start, finish and approximate return time.

    Final thoughts

    PNT 39 A + PNT 39 B is useful precisely because it shows a part of the park that the road alone cannot explain. The route becomes much more rewarding when its geology, historical connections and logistics are understood before setting out. I would keep the plan simple, respect the official network and leave enough time to look at the landscape rather than spending the day solving preventable transport or navigation problems.

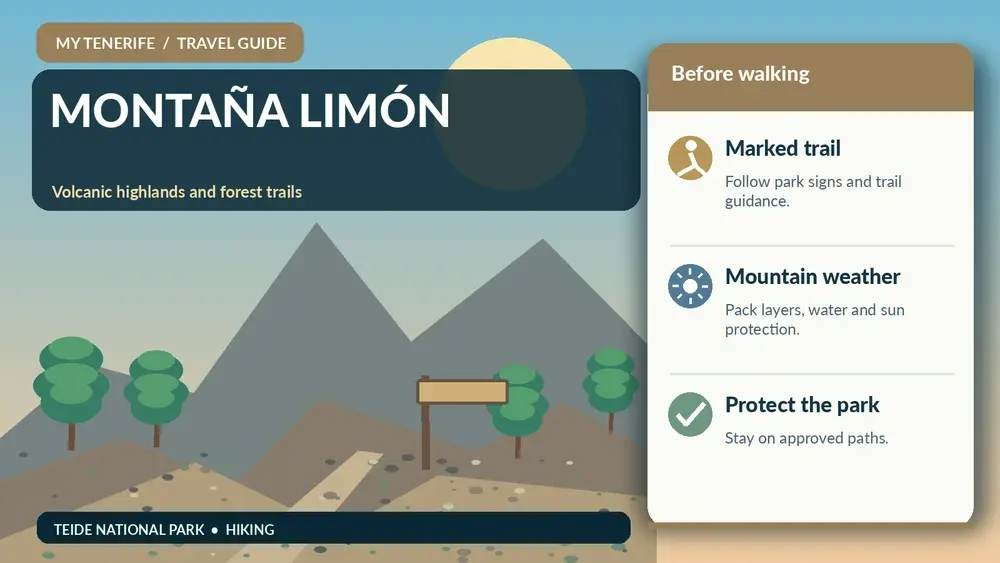
  • Montaña Limón Hiking Guide: Teide Trail 34 Above La Orotava

    Montaña Limón Hiking Guide: Teide Trail 34 Above La Orotava

    Montaña Limón Hiking Guide is a useful example of why I do not judge a Teide hike by distance alone. The official route is 1.23 km, but its real character comes from where it starts, what it connects to and the kind of volcanic ground it crosses.

    The feature that makes this trail worth a separate guide is a short historical connector at the northeastern edge of the park, linking forest tracks with the Corral del Niño–Yegua Blanca route. I use the current information from the Parque Nacional del Teide managing authority as the technical baseline, then check it again close to the hiking date because access rules and temporary closures can change.

    Quick route facts

    Official route PNT 34 Montaña Limón
    Start Montaña Limón / upper La Orotava side at the park boundary
    Finish PNT 21 near Choza de José Ruiz de Izaña
    Type Linear
    Distance 1.23 km
    Official time 30 min
    Difficulty Low
    Maximum altitude 2,096 m
    Minimum altitude 2,002 m
    Accumulated ascent 1 m
    Accumulated descent 98 m
    Reservation / permit No reservation

    Why this route deserves its own guide

    The path forms part of an old communication route between the Güímar and La Orotava valleys. Its value is therefore less about a single viewpoint and more about understanding how people crossed Tenerife’s highlands before modern roads.

    This is also why I would not treat the route as “just another Teide trail”. Each numbered path answers a different practical question. Some give access to a viewpoint, some join two major routes, and others preserve an old island crossing that makes much more sense when you understand where people were travelling before the modern road network.

    For planning a wider day, useful related guides are Corral del Niño–Yegua Blanca guide; Igueque guide; TF-24 scenic drive guide; Orotava Valley guide. I prefer linking one main walk with a small number of compatible stops rather than stacking several trails simply because they appear close together on the map.

    The route step by step

    1. the Montaña Limón access side

    At the Montaña Limón access side, I would first confirm that the physical trail number matches the route saved offline. The Teide network has many junctions that are obvious on a map but visually subtle on open volcanic ground. I use the first ten minutes to settle into a deliberately easy pace, check wind exposure and make sure the surface matches what I expected.

    2. the historic valley-to-valley path

    The section around the historic valley-to-valley path is where the route begins to show its specific identity: a short historical connector at the northeastern edge of the park, linking forest tracks with the Corral del Niño–Yegua Blanca route. I keep looking backwards as well as forwards because reverse views are useful for orientation, especially if the same line will form part of the return. I stay on the official tread even where footprints appear to cut across the volcanic surface.

    3. the south flank of Montaña Limón

    By the south flank of Montaña Limón, I make a second logistics check: remaining water, daylight and the exact exit plan. This is more useful than comparing my pace with an app. On short connector trails, it is easy to forget that most of the day may lie on the approach or the trail used after the official endpoint.

    4. the PNT 21 connection near the old hut

    Near the PNT 21 connection near the old hut, I slow down rather than rushing the finish. Junctions deserve full attention because the next trail can have very different difficulty or access rules. I confirm the route number before continuing and keep enough energy for whatever connection, return walk or road transfer is still needed.

    The single planning detail I would solve first

    The route is short, but its access is not a conventional tourist car park. I treat it as a connector from the Montaña Limón forest-track system rather than a 30-minute attraction to drive to blindly.

    I turn that point into a concrete plan before driving into the park. I save the start and finish as separate locations, note every connecting trail number and decide exactly how I will return to the vehicle or reach public transport. If the official endpoint is another trail rather than a road, the connection is part of the day even though it is not included in the distance in the table above.

    How difficult is it in practice?

    The managing authority rates this route Low. I read that grade together with altitude, exposure and surface. A low-rated trail at roughly 2,000–2,400 metres is still very different from an easy promenade at sea level: ultraviolet radiation is stronger, shade is scarce and a dry wind can make dehydration surprisingly fast.

    The typical surface here is old mountain path, forest-edge ground and exposed scrub near 2,000 metres. Loose picón and pumice can make a gentle slope more tiring, while rough lava demands attention even when the statistics look modest. I use trail footwear with grip, slow down on unstable sections and avoid creating a shortcut when the official path bends around fragile ground.

    Altitude, sun and wind

    I treat the highlands as mountain terrain even on the shortest trails. Before leaving the car I already have water in me, not only in the backpack. I carry a hat, sunglasses, sunscreen, a windproof layer and an insulating layer because conditions can change quickly once a cloud edge or stronger wind arrives.

    Headache, unusual breathlessness, dizziness, nausea or loss of coordination are not symptoms I would ignore just because the route is short. If someone feels progressively worse, I stop and reassess rather than trying to “finish the last kilometre”. Distance on the map does not cancel the effect of altitude.

    Weather: use a mountain forecast

    I never use the weather in Costa Adeje, Los Cristianos or Puerto de la Cruz as the forecast for this hike. The national park can sit above a sea of clouds, or it can be cold and windy while the coast is warm. Snow, ice, calima, heat and strong wind can all change the appropriate plan.

    Visibility matters as much as temperature. Some of these trails cross very open ground where landmarks normally make navigation obvious; cloud or blowing dust removes that advantage. If the official authority posts a closure or restriction, that overrides an old GPX track, review or social-media post.

    Access and permits

    Current access: No reservation. I still check the managing authority immediately before setting out. A free-access trail can close temporarily because of weather, wildfire risk, conservation work or other management measures, and a connecting trail can have different rules.

    I separate three questions: whether this numbered trail needs a reservation, whether the road or forest track used to reach it is open, and whether a connecting trail has its own controls. That distinction is especially important around Montaña Blanca, La Rambleta and summit routes, where adjacent paths can have different access systems.

    Getting there and finishing the walk

    Parking is one of the easiest parts of a Teide plan to underestimate. I use legal spaces only and avoid building a schedule that requires a specific roadside bay to be free. On linear routes I prefer a two-car plan, a confirmed bus/taxi arrangement where practical, or a route combination that naturally returns to the vehicle.

    If an early mountain start is important, I sometimes compare places to stay in Tenerife based on the road I need the next morning rather than simply choosing the nearest beach. A base on the wrong side of the island can add a long pre-dawn drive to an otherwise short hike.

    What to notice in the landscape

    Teide becomes much more interesting when I stop treating every dark rock as “lava”. Pumice fields, oxidised cones, scoria, compact flows and younger black volcanic materials tell different parts of the eruptive story. The colour and texture underfoot often explain why vegetation density changes within a few hundred metres.

    I also look at scale. The same cone can appear small from the road and enormous once the route passes its base. Teide and Pico Viejo shift position through the day, and the caldera wall can feel like a continuous barrier until a trail reveals one of the old passes used by people moving between valleys.

    Conservation: the path is part of the protection

    I stay on the marked tread even when an informal line looks shorter. High-mountain plants grow slowly and footprints can remain visible for a long time in pumice or ash. I leave rocks, obsidian-like fragments, plants and volcanic material where they are and carry out every piece of food waste.

    Caves and lava tubes deserve extra care. If an official description says access is restricted, I treat that as a firm boundary rather than an invitation to look for another entrance. Protected subterranean habitats can be damaged by very little disturbance.

    What I pack for a short Teide trail

    • Water for the complete outing, not only the numbered section.
    • Sun hat, sunglasses and high-protection sunscreen.
    • Windproof shell and a warm layer.
    • Trail or hiking shoes with good grip.
    • Offline map and a screenshot of the official route information.
    • Charged phone and a small power bank on longer combinations.
    • Food and a reserve snack, with all packaging carried back out.

    Best time of day

    I generally prefer morning. It gives a larger daylight reserve, usually makes parking easier and provides cooler conditions on exposed volcanic ground. It also leaves time to change the plan if a road, trail or weather condition is not what I expected.

    Late afternoon can be excellent for low-angle light, especially on cones and the caldera wall, but I only choose it when the finish is simple and I know the legal parking or transport arrangement will still work. I do not chase sunset at the cost of returning in darkness on unfamiliar volcanic terrain.

    Can this work for families?

    The official grade is only one part of the answer. I think about altitude tolerance, experience on loose terrain, wind and whether the route is a simple out-and-back or one piece of a larger traverse. For a family’s first day at Teide, I would rather choose a short route with an easy exit and add a viewpoint than commit to a complicated linear itinerary.

    With children I plan more drink stops and carry extra warm clothing. I also keep the group especially close near roads and trail junctions, where the risk is often traffic or taking the wrong connection rather than a dramatic mountain obstacle.

    How I would combine it with other Teide sights

    One real hike plus one or two easy interpretive stops usually makes a better day than a checklist. El Portillo, Cañada Blanca, Roques de García, Minas de San José and selected roadside viewpoints can add context without requiring another full route. Which one fits depends on the side of the park where this trail finishes.

    Driving distances inside the national park are deceptive because traffic, viewpoint stops and slow vehicles can stretch the schedule. After a substantial trail I leave a generous margin for the descent from the mountains instead of booking a tightly timed attraction on the coast.

    Photography without leaving the route

    The best images often come from the official path because scale is the story. A person walking through a pumice field or beneath a cone communicates the size of the landscape better than stepping onto untouched ground for a cleaner foreground. A moderate telephoto lens is useful for isolating crater rims, lava fronts and layers of the caldera.

    I do not assume drone use is allowed simply because an area looks empty. Protected-area aviation and filming rules are separate from pedestrian trail access, so I would check them independently before carrying equipment for that purpose.

    Common mistakes to avoid

    • Reading the official distance but forgetting the approach and exit trails.
    • Using a beach forecast for a 2,000-metre hike.
    • Assuming “low difficulty” means no mountain preparation is needed.
    • Walking along a busy road because a linear route was not planned properly.
    • Following an old GPX track after official access rules have changed.
    • Parking outside marked areas when the preferred trailhead is full.
    • Taking pumice, lava or plants as souvenirs.
    • Entering restricted caves or leaving the marked path for photographs.

    Official sources to check before you go

    The technical data in this guide are based on the current managing-authority pages: Government of the Canary Islands – PNT 34. Those pages are the first place I would check again for closures, access changes or updated technical figures immediately before a hike.

    Frequently asked questions

    Do I need a permit?

    No reservation. That answer applies to this trail itself; a connected route can have different rules.

    Is the official time a target?

    No. I use the official 30 min as a planning reference, then add pauses, route checks and any approach or exit distance. Photography, wind and unfamiliar loose terrain can all lengthen the outing.

    Can I do it in trainers?

    Trail shoes are my preference. Even a short official path can contain pumice, loose scoria or sharp lava where smooth city shoes are uncomfortable and less secure.

    Is mobile coverage guaranteed?

    No. I download the route information and keep the phone charged rather than relying on live mapping. On a longer combination I also tell someone the planned start, finish and approximate return time.

    Final thoughts

    PNT 34 Montaña Limón is useful precisely because it shows a part of the park that the road alone cannot explain. The route becomes much more rewarding when its geology, historical connections and logistics are understood before setting out. I would keep the plan simple, respect the official network and leave enough time to look at the landscape rather than spending the day solving preventable transport or navigation problems.

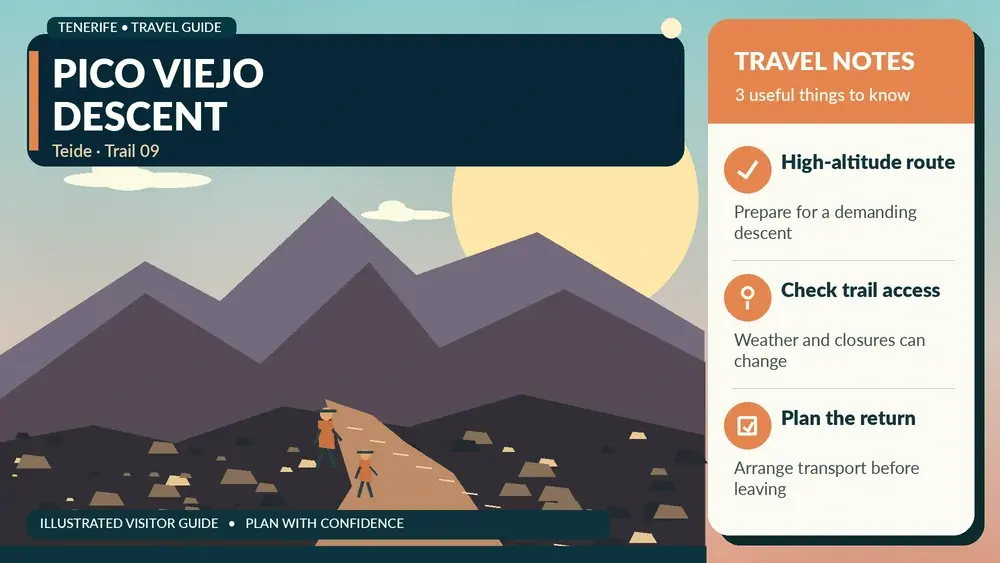
  • Teide–Pico Viejo–TF-38 Hiking Guide: Trail 09 High-Altitude Descent

    Teide–Pico Viejo–TF-38 Hiking Guide: Trail 09 High-Altitude Descent

    Teide–Pico Viejo–TF-38 Hiking Guide is one of those Teide routes where the map statistics only tell part of the story. The official line is 9.3 km with 109 m of accumulated ascent, yet the real planning question is how the trail fits into the national park, the altitude and the start-to-finish logistics.

    What makes this route distinctive is a dramatic descent from the upper Teide station area across dark lava toward Pico Viejo and the western volcanic landscape. I use the current Turismo de Tenerife trail sheet as the technical baseline and I check it again immediately before walking. High-mountain conditions, maintenance, snow, ice, wildfire measures or park-management decisions can change access with little relevance to what an old blog post or saved GPX file says.

    Quick route facts

    Official trailTeide – Pico Viejo – TF 38
    StartLa Rambleta / Mirador de Pico Viejo
    FinishMirador de Las Narices del Teide
    Route typeLinear
    Distance9.3 km
    Official duration5 hr
    DifficultyHigh
    Maximum altitude3,498 m
    Minimum altitude2,048 m
    Accumulated ascent109 m
    Accumulated descent1,521 m
    PermitNo for Trail 09 itself

    Why I would choose this trail

    I would choose this route for its particular view of Teide rather than simply because it adds another trail number to a trip. The route crosses the young volcanic landscape associated with Pico Viejo and the western eruptions, giving it a very different character from the pale pumice around Montaña Blanca. That context changes the walk: I pay attention to how geology, vegetation and old access routes explain the shape of the path instead of treating the landscape as a backdrop.

    Useful related guides on this site are Mirador de Pico Viejo guide; Los Regatones Negros guide; Chavao guide; Tenerife weather by month. I use them to build a realistic day around one main walk, not to squeeze several substantial hikes into the same schedule.

    The route, step by step

    1. La Rambleta and the link with Mirador de Pico Viejo

    I begin at La Rambleta and the link with Mirador de Pico Viejo by checking that the physical sign and my offline map agree. Early route errors in Teide are easy to make because open volcanic ground can make several lines look equally obvious. I settle into a conservative pace and use the first section to judge wind, breathing and how the surface feels underfoot.

    Mount Teide And Volcanic Landscape Tenerife

    2. the rough descent toward the Pico Viejo crater sector

    At the rough descent toward the Pico Viejo crater sector, the route starts to show its own character. I look back as well as forward because the changing angle often makes junctions easier to recognise on the return or helps me understand how the caldera, cones and road network fit together. I do not shortcut switchbacks or follow informal footprints across fragile ground.

    3. the long volcanic traverse below Pico Viejo

    The section around the long volcanic traverse below Pico Viejo is where I reassess the plan rather than walking automatically. I compare remaining daylight and water with the official distance, then decide whether the original itinerary still makes sense. This is especially important on linear trails where the endpoint may still require another connection before reaching transport.

    4. the final descent toward Las Narices del Teide and TF-38

    Near the final descent toward Las Narices del Teide and TF-38, I keep enough concentration for the finish. Fatigue often appears after the scenic objective has already been reached, and loose volcanic ground can punish careless steps. I confirm the next signed connection before leaving the official endpoint and avoid turning a successful walk into an improvised extension.

    How hard is it really?

    The official difficulty is High. I read that grade together with the numbers: 9.3 km, 109 m of ascent, 1,521 m of descent and a maximum altitude of 3,498 m. A low or medium rating inside Teide National Park does not mean the same thing as an urban walk at sea level. Thin air, intense sun, wind, loose pumice and the lack of shade can make a modest distance feel more serious.

    I also separate cardiovascular effort from technical difficulty. Some Teide routes are easy to follow but physically demanding; others are short but sit so high that the body responds differently. I set the pace according to the slowest person in the group, take short pauses before fatigue becomes obvious and leave enough reserve for the final kilometre rather than spending all my energy early.

    The most important planning issue

    the route starts at very high altitude and ends far below on the western side, so access to La Rambleta and the return from the TF-38 area must be solved before setting out. I solve that issue before driving into the national park. Linear routes are especially easy to underestimate because the walking statistics do not include the time needed to reach the start, recover a vehicle or continue to a road, visitor centre or bus stop after the official endpoint.

    I save the start and finish separately on an offline map, check the road approach in daylight and note the trail numbers of every planned connection. If the route relies on another trail to reach transport, that connecting distance is part of my day even if it is not included in the official figure above.

    Altitude changes the rules

    Teide is not a beach excursion with a colder temperature. At these elevations the air is drier, ultraviolet exposure is strong and a breeze can remove heat quickly when I stop. I arrive hydrated, eat before the walk and carry both sun protection and an insulating layer. I do not wait to feel thirsty before drinking.

    Headache, unusual breathlessness, nausea, dizziness or a sudden loss of coordination deserve attention at altitude. I do not diagnose symptoms on the trail or try to prove fitness by pushing through them. If someone is deteriorating, the practical response is to stop, reassess and descend or seek help as appropriate. The short length of some upper trails is not a reason to ignore the altitude.

    Weather: check the mountain, not the resort

    I check the forecast for the Teide highlands rather than using the temperature in Costa Adeje, Los Cristianos or Puerto de la Cruz. The park can be clear above a sea of clouds while the north coast is grey, and it can also be cold, windy or icy while the beaches are warm. Winter snow and ice, strong wind, calima and intense summer sun all change how a route feels.

    My weather decision is conservative. If visibility, wind or surface conditions are worse than expected, I shorten the walk or switch to a lower alternative. I never walk past a closure barrier because the route looked fine from a car park. In volcanic terrain, hazards can be concentrated in a section that is invisible from the road.

    What I carry

    • Enough water for the full route plus a reserve; I do not assume there will be drinking water on the trail.
    • Sun hat, high-protection sunscreen and sunglasses.
    • A windproof shell and an insulating layer, even when the coast is warm.
    • Closed hiking or trail shoes with useful grip on pumice, scoria and rough lava.
    • Offline route information, a charged phone and a small power bank on longer days.
    • Food that is simple to eat without leaving packaging or organic waste behind.
    • Any required permit or reservation, plus identification where the system requires it.

    Permit and access rules

    The current official route sheet does not list a permit for this trail itself. That does not automatically cover connected summit paths, cable-car access, parking controls or temporary closures, so I still verify the complete itinerary before leaving.

    I distinguish three separate questions: whether the trail itself needs authorisation, whether I can legally reach its starting point, and whether my connecting route has its own restrictions. That distinction is particularly important around La Rambleta and the Teide summit, where a short unregulated viewpoint trail can sit next to a regulated summit path.

    Teide Cable Car Tenerife

    Getting to the trailhead and dealing with the finish

    I avoid building a mountain day around optimistic parking assumptions. Roadside spaces in Teide are limited and stopping outside marked areas can be unsafe or prohibited. On a linear route I decide who is driving, where the vehicle will be, and how everyone will return before the first boot hits the path.

    If I want to reduce an early cross-island drive, I sometimes compare accommodation around Tenerife and choose a base that fits the road I actually need. I do not select a hotel only by beach distance if the next morning starts high on the TF-21, TF-24 or TF-38.

    Landscape and geology to notice

    The best way to understand Teide is to notice transitions rather than search only for one famous rock. Colour changes can reveal different eruptive materials; broad pale pumice fields feel completely different underfoot from dark ʻaʻā-like lava or loose scoria. The caldera wall, subsidiary cones and the immense mass of Teide and Pico Viejo constantly change scale as I move.

    I keep to the marked trail. High-mountain plants grow slowly, apparently barren ground can be ecologically sensitive and shortcuts create erosion that remains visible for years. I photograph geological features where they are and leave rocks, obsidian fragments and plants in place.

    Flora, wildlife and seasonal details

    Retama del Teide and other high-mountain species are not decoration around the path; they are part of a specialised ecosystem adapted to frost, drought, strong radiation and poor volcanic soils. Flowering changes the appearance of the park dramatically in spring and early summer, but I do not step off the trail for a closer photograph.

    Wildlife encounters are often subtle: insects, small birds and lizards are easier to notice when the route is quiet. I avoid feeding animals and I carry out every scrap of food. Even biodegradable waste changes behaviour and can attract species that do not belong around busy trailheads.

    Best time of day

    I generally prefer an early start because parking is easier, the light is softer and I preserve a large daylight margin. On exposed routes the morning can also reduce heat stress. A late-afternoon walk can be beautiful, but only when I know exactly how I will finish before darkness and I am not relying on a facility or transport service that may close earlier.

    For photography, side light often reveals volcanic texture better than flat midday light. I still prioritise safe timing over ideal light. A cloud bank, strong wind or delayed start is a reason to simplify the plan, not to rush through the route to catch a photograph.

    Can families do this route?

    I decide by hiking experience, altitude tolerance and route logistics rather than by a child’s age alone. A family that regularly walks mountain trails may find a short official route straightforward, while a child who has just arrived from sea level may struggle even on a path described as easy. I build the first Teide outing around a short route and a visitor-centre or viewpoint stop before committing to a long traverse.

    With children I carry more water and warm clothing than the minimum, plan more pauses and choose a clear turnaround time. I also keep everyone away from unstable lava edges and from roads at trailheads where traffic can move quickly.

    How I combine it with the rest of a Teide day

    I usually combine one proper hike with one or two low-effort stops. El Portillo, Cañada Blanca, Roques de García and selected roadside viewpoints can add context without turning the day into a race. If the trail itself is long or difficult, I remove extra stops rather than squeezing them into the evening.

    Driving inside the park also takes time. I leave room for slow vehicles, viewpoint traffic and weather. After a demanding high-altitude walk, I prefer a simple meal and an uncomplicated descent rather than another ambitious attraction on the opposite side of the island.

    Photography without harming the place

    Wide frames work particularly well in Teide because the human figure helps communicate scale. I often wait for another walker to move naturally along the marked path rather than stepping across vegetation to create a cleaner composition. Telephoto images can isolate cones, lava fronts and layers of the caldera without leaving the trail.

    I keep tripods, backpacks and poles out of the path when other people need to pass. Drone rules are separate from hiking rules and protected areas are not places where I assume recreational flying is allowed. I check the current regulations instead of treating an empty sky as permission.

    Common mistakes I avoid

    • Using a beach forecast as the mountain forecast.
    • Reading distance without looking at ascent, descent and altitude.
    • Starting a linear route without a confirmed finish plan.
    • Assuming an online GPX proves that a trail is open today.
    • Parking partly on the road because the nearest legal space is full.
    • Carrying exactly the expected amount of water and no reserve.
    • Adding a summit or connecting trail without checking its separate rules.
    • Cutting corners across pumice or vegetation to save a few minutes.

    Official information to check before setting out

    The technical figures in this article come from the official Turismo de Tenerife page for Teide – Pico Viejo – TF 38. I use that page as a starting point, then check any live park notices, weather warnings and reservation requirements that apply to the complete itinerary. I prefer an official closure notice over a recent social-media report from someone who happened to walk the route on a different day.

    Frequently asked questions

    Do I need a permit?

    The current official route sheet does not list a permit for this trail itself. That does not automatically cover connected summit paths, cable-car access, parking controls or temporary closures, so I still verify the complete itinerary before leaving.

    Is the official duration a target?

    No. The official 5 hr is a useful comparison figure, not a deadline. I add time for route checks, photographs, food, altitude and the pace of the slowest walker. On a linear trail I also add whatever time is needed beyond the official endpoint.

    Are normal trainers enough?

    I prefer trail or hiking shoes. Even routes with a low technical grade can include loose volcanic material that is tiring and slippery under smooth urban soles. After snow, frost or rain, conditions may change enough that I abandon the route rather than trying to compensate with unsuitable footwear.

    Can I rely on mobile coverage?

    I do not build the safety plan around it. Coverage can be good in exposed places and poor in folds of terrain. I download the route information, keep the phone charged and tell someone the planned start and finish when I am doing a longer or more remote trail.

    Teide National Park Desert Landscape Tenerife

    Final thoughts

    Teide – Pico Viejo – TF 38 is worthwhile because it reveals a specific part of the Teide landscape instead of reducing the national park to the cable car and summit. I get the most from it when I treat the numbers, altitude and logistics with the same respect as the scenery. A well-planned route leaves time to notice the geology, vegetation and scale of Las Cañadas rather than spending the day solving problems that could have been settled before departure.

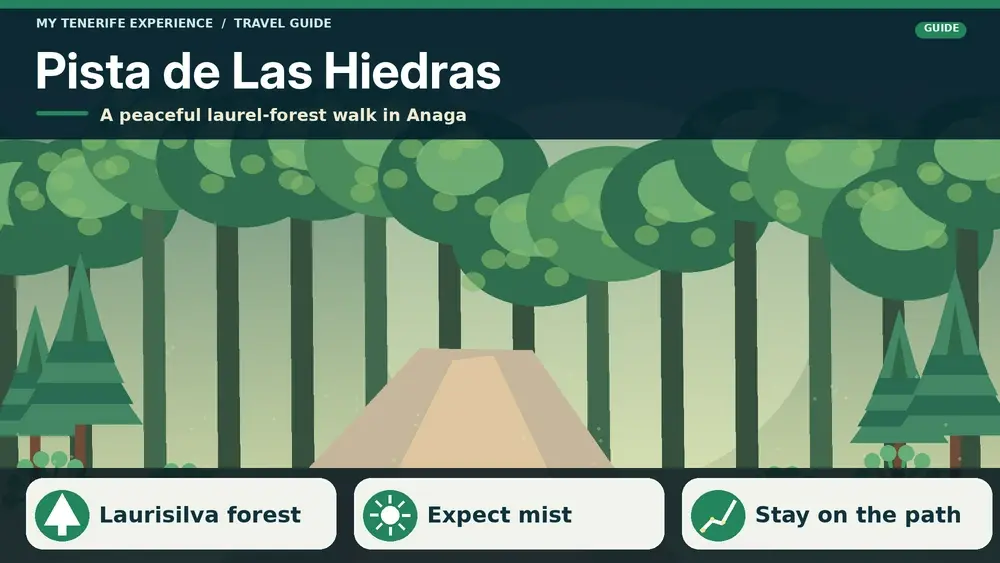
  • Pista de Las Hiedras Hiking Guide: Easy Laurisilva Walk in Anaga

    Pista de Las Hiedras Hiking Guide: Easy Laurisilva Walk in Anaga

    Pista de Las Hiedras Hiking Guide is a forest-first walk rather than a summit objective, with laurisilva, ferns, mosses and cloud often providing more atmosphere than distant panoramas. The altitude range is small, but accumulated ascent and descent are not zero. The track rolls gently, so I still wear proper shoes and expect damp ground when cloud is sitting on Anaga.

    Anaga rewards slower planning. Roads are narrow, cloud can sit on the ridge while the coast stays bright, and a short distance on the map can hide a large amount of vertical movement. For this guide I use the current Turismo de Tenerife route sheet as the technical baseline. Trail status can change after fire risk, storms, maintenance or rockfall, so I check the official page again shortly before walking rather than relying on an old GPX file or a saved screenshot.

    Quick route facts

    Official routePista de Las Hiedras
    StartTF-143 El Batán road, km 0.7
    FinishTF-145 Casas de El Río, km 1
    Route typeLinear
    Distance4.48 km
    Official duration1 hr 30 min
    DifficultyLow
    Maximum altitude856 m
    Minimum altitude814 m
    Accumulated ascent267 m
    Accumulated descent280 m
    Protected areaAnaga Rural Park
    PermitNo
    Homologation statusNot listed as homologated

    Why this route deserves its own guide

    The route is only one line on Tenerife’s trail map, but it solves a specific travel question: how to experience Anaga Rural Park on foot without pretending that every path has the same character. Here, the numbers matter. A route of 4.48 km with 267 m of accumulated ascent and 280 m of descent asks for a different day plan from a coastal promenade or a viewpoint stop.

    I also like to place it inside a wider cluster rather than treating it as an isolated hike. Useful planning pages on this site are Anaga Rural Park guide; Cruz del Carmen guide; Sendero de los Sentidos guide; La Laguna guide. Reading those together gives a much better picture of roads, buses, nearby villages, alternative trails and what to do if weather makes the original plan unattractive.

    How the route unfolds

    1. the TF-143 access near the El Batán road

    I use the TF-143 access near the El Batán road as a deliberate orientation point. Before moving, I confirm the first waymark, the direction of travel and whether the terrain matches the official description. Starting correctly saves far more time than correcting a mistake later.

    2. the broad forest track under laurisilva

    Around the broad forest track under laurisilva, the route changes character enough that I use it as a mental checkpoint. I compare progress with the planned time and decide whether the pace still leaves a comfortable margin.

    3. small rises and dips through fayal-brezal vegetation

    At small rises and dips through fayal-brezal vegetation, I pay more attention to surfaces and junctions than to speed. Old paths can meet farm tracks or roads here, and the correct line is not always the widest one.

    4. the TF-145 side near Casas de El Río

    The final approach reaches the TF-145 side near Casas de El Río. I keep enough water and concentration for this part rather than treating the last kilometre as automatic. On linear routes, I already know how I am leaving the finish before I start walking.

    How difficult does it feel in practice?

    The official grade is low. The figures—4.48 km, 267 m ascent and 280 m descent—suggest a manageable outing for prepared walkers, but wet ground, heat or poor visibility can raise the effort quickly.

    I separate technical difficulty from physical effort. A well-made path can still be tiring when it climbs continuously; a short route can feel serious when it is steep; and a long descent can be harder on knees than the climb was on lungs. I therefore use the official grade as one input, not as a guarantee that the route will feel easy for every visitor.

    Navigation and waymarking

    I download an offline map before leaving and keep the route name in Spanish. At junctions I look for the painted trail marks and signs before checking the phone, because GPS can drift beside cliffs, in ravines and under dense forest. I never follow another hiking group simply because they appear confident; they may be taking a different branch or returning to a different vehicle.

    When a junction is unclear, I stop immediately. Walking ten uncertain minutes downhill can create a long climb back. This habit is especially useful in Anaga and Teno, where historic paths cross agricultural tracks and local access roads, and in Corona Forestal where forestry tracks can look deceptively similar.

    Weather: the forecast I actually check

    For Anaga I check the ridge forecast as well as the coast. Moist trade-wind cloud can reduce visibility and make stone or roots slippery while Santa Cruz or Bajamar remains bright. I carry a light shell even on a warm day and avoid assuming that a coastal temperature represents the forest.

    Anaga Forest Tenerife

    I also check wind and any civil-protection or wildfire restrictions. Calima can reduce visibility and raise heat stress; heavy rain can polish stone and destabilise steep ground; strong trade-wind cloud can make a ridge feel cold even when the coast is comfortable. If an official closure is active, I change the plan. A hiking article is never a substitute for the live status of the trail.

    Water, food and clothing

    • Carry water with a reserve; I do not assume fountains are available or safe unless the current route information explicitly says so.
    • Use closed shoes with real grip. Wet laurisilva, polished stone and loose volcanic material all punish smooth urban soles.
    • Take a light windproof or waterproof layer even when the coast looks sunny.
    • Pack sun protection: UV exposure remains strong above cloud and on open ridges.
    • Bring compact food that can be eaten in small portions without a long stop.
    • Keep a charged phone, offline map and a small power bank on longer or remote routes.

    Transport and the linear-route problem

    This is a linear route from TF-143 El Batán road, km 0.7 to TF-145 Casas de El Río, km 1, so I solve the return journey before I leave. Rural bus frequency can be limited, and the first or last service may not fit hiking hours. I check current TITSA timetables on the day, save taxi numbers when appropriate and never assume that a bus shown on an old blog still runs at the same time.

    If I want to reduce early driving, I sometimes compare accommodation around La Laguna. I choose the base for the trail network I plan to use rather than simply booking the cheapest room on the opposite side of the island.

    A route plan that leaves margin

    My day plan has three times, not one: intended start, latest sensible turnaround or decision point, and an absolute finish target. I add margin for photographs, wrong turns, slower companions and bus delays. The official duration is useful for comparison, but it is not a reservation slot.

    On longer routes I avoid stacking another timed attraction immediately afterwards. A hike that finishes later than expected should not create pressure to rush the final descent or drive tired across the island. On short routes I may combine the walk with a nearby village, but I still leave enough daylight to handle a navigation mistake or a change in weather.

    What I pay attention to in the landscape

    In Anaga I look for the transition between laurisilva, fayal-brezal, cultivated terraces and drier coastal vegetation. The old paths are cultural infrastructure as much as hiking routes: they connected hamlets long before modern roads made the mountains easier to cross.

    I stay on the signed route, avoid shortcuts and leave terraces, walls, plants and abandoned structures untouched. Stone cairns added by visitors can be misleading, so I do not build them. In protected areas I also avoid loud music: hearing wind, birds and village sounds is part of what makes these routes different from a resort walk.

    Photography without creating extra risk

    I plan photographs at safe pauses rather than stopping in the middle of a descent or road section. A wide image often works better when the trail itself leads into the frame, and forest photographs benefit from texture and layers rather than a single distant landmark. I never cross a barrier, step onto an unstable edge or trample vegetation to remove an obstruction from a photo.

    Anaga Laurel Forest Path Tenerife

    Who I would recommend this route to

    I recommend it to travellers who are comfortable walking on natural surfaces and who want a specific piece of the island rather than a checklist attraction. The short distance can work well as part of a broader day, provided the transport and weather are straightforward.

    How I would combine it with nearby places

    I keep the rest of the day light: a nearby hamlet, a viewpoint or a meal is enough. Anaga roads are slow and winding, so pairing two ambitious hikes usually creates more driving and less enjoyment. If cloud closes in on the ridge, I switch to a lower coastal stop rather than chasing clear sky across several mountain roads.

    Official information to check before setting out

    The technical source for this guide is the official Turismo de Tenerife route page. I check it shortly before departure for status notices, management advice and any change to access. I also check the current weather and the daylight available for the date of the hike.

    Common mistakes I avoid

    • Using a beach-resort forecast for a mountain or forest route.
    • Starting without an offline map because mobile signal looked strong at the road.
    • Following another group at a junction instead of checking the route markings.
    • Assuming “no permit” means “always open.” Temporary closures are a separate issue.
    • Carrying exactly the expected amount of water with no reserve.
    • Leaving the return transport of a linear hike to the finish.

    Frequently asked questions

    Do I need a permit?

    The current official route sheet lists the permit requirement as No. That does not mean the trail can never close temporarily, so I still verify the live status before leaving.

    Is the official hiking time realistic?

    The official reference is 1 hr 30 min. I treat that as a comparison figure, then add my own margin for breaks, photography, navigation and the pace of the slowest person in the group.

    Can I do it in ordinary trainers?

    I prefer trail or hiking shoes with useful grip. The cost of carrying slightly more suitable footwear is small compared with the loss of confidence that comes from slippery soles on wet stone or loose volcanic ground.

    What if the cloud comes in?

    I slow down, check the route more often and reassess whether the next section still makes sense. If visibility, rain or wind removes my safety margin, I turn back or use the backup plan. Tenerife’s microclimates are part of the island, not an exception to the itinerary.

    Anaga Laurel Forest Tenerife

    Is it suitable for children?

    For active children who are comfortable on natural paths, it can be a realistic option with close supervision, good weather and plenty of time. I would still avoid exposed edges, wet conditions and any pressure to finish on a timetable.

    Final thoughts

    Pista de Las Hiedras works best when I treat the numbers and the landscape with equal seriousness. The route gives a focused way to experience Anaga Rural Park, but the useful preparation is simple: verify the live status, start with enough daylight, carry a small reserve of food and water, and solve the return journey before walking. That approach leaves more attention for the path itself—and less for avoidable problems.

  • Agua García Forest Guide: Ancient Laurisilva and Easy Walks in Tacoronte

    Agua García Forest Guide: Ancient Laurisilva and Easy Walks in Tacoronte

    Agua García is one of the easiest places in north Tenerife to experience monteverde without committing to a long mountain hike. The forest lies in Tacoronte, within the protected Las Lagunetas landscape, and combines laurel-forest vegetation, short interpreted paths, old water infrastructure and the unusual Cuevas de Toledo. It is a very different experience from the dramatic ridges of Anaga: quieter, softer and more focused on the relationship between forest and water.

    Turismo de Tenerife describes Agua García as one of the important surviving areas of laurisilva in the Canary Islands and notes its Heritage Information Centre. Tacoronte’s tourism site adds two especially useful routes: an accessible 500-metre trail and the circular Route of the Centennial Guardians, with short and long options of 1 km and 2 km.

    Quick planning facts

    Municipality Tacoronte
    Protected landscape Las Lagunetas
    Main habitat Monteverde / laurisilva
    Accessible trail 500 m on the current Tacoronte tourism page
    Centennial Guardians route 1 km short option / 2 km long option
    Difficulty Low on the municipal route descriptions
    Interesting feature Cuevas de Toledo and ancient viñátigo trees
    Best for Families, easy walking, forest atmosphere, natural history

    Why the forest matters

    Monteverde is an evergreen cloud-forest system that depends on humid trade winds. The forest catches moisture from passing cloud and creates a cool environment of laurels, viñátigos, ferns, mosses and other species adapted to relatively stable moisture. In practical terms, this means Agua García can feel damp and fresh when the coast is bright and warm.

    The forest is also culturally important because water shaped settlement and agriculture in the north. The Madre del Agua and old galleries remind me that the landscape is not only “natural”; it has been used, managed and negotiated by communities for centuries.

    The Route of the Centennial Guardians

    Tacoronte’s official tourism site lists a short 1 km and long 2 km version, both circular and low difficulty. The name refers to old viñátigo trees along the route. One of the best-known specimens is the Viñátigo de la Cuna, which the municipal site says may be between 800 and 1,000 years old.

    I take the age estimate as a reason to slow down, not as an invitation to touch roots or climb around the tree. Ancient trees survive because people give them space. The route also reaches the Cuevas de Toledo, excavated from the sixteenth century for trachyte extraction associated with glass production.

    The accessible path

    The current Tacoronte Travel page describes the accessible Agua García trail as 500 metres long with four interpreted stops. That makes it useful for travellers who want a short forest experience without the climbs found in many Tenerife walks. “Accessible” still does not mean every mobility need is identical, so I verify surface conditions and facilities if travelling with a wheelchair or mobility device.

    For a broader island overview, my accessible Tenerife guide helps compare beaches, attractions and transport as well as trails.

    Cuevas de Toledo: history inside the forest

    The Cuevas de Toledo, sometimes called glass caves, add an unexpected historical layer. The municipal tourism site explains that they were excavated in the sixteenth century to obtain trachyte. I would not enter any unapproved cavity or leave the signed route; the interest is in understanding how extraction and water management once shaped this forest.

    Best conditions for a visit

    I actually like Agua García when there is light cloud because the forest looks more atmospheric and the vegetation benefits from that humidity. Heavy rain is different: paths can become slippery and visibility on the approach can worsen. I check local conditions, not the forecast for Costa Adeje, before leaving.

    Morning is my preferred time if I want quiet paths. The forest can also be a good backup when higher mountains are windy or the coast is too hot, provided there are no weather warnings affecting the north.

    How to combine Agua García with Tacoronte

    The easiest pairing is with Tacoronte’s historic centre, agricultural market or the Tacoronte-Acentejo wine landscape. This creates a day that connects forest, farming and food without long drives. My Tacoronte and El Sauzal guide gives the wider context.

    I would not combine Agua García with a full Anaga hike on the same day unless hiking is the main objective. The forest deserves enough time to walk slowly and notice details rather than being treated as a 20-minute roadside stop.

    Official information I check

    For the protected forest overview I use Turismo de Tenerife’s Agua García page. For the Centennial Guardians and accessible routes, Tacoronte Travel provides the current municipal descriptions. I recheck them because trail maintenance can change short-route access.

    How I fit it into a Tenerife itinerary

    I would not cross the island just to collect a quick photograph of Agua García. I place it inside a coherent north Tenerife day, give it enough time to understand the setting and then add only one or two nearby stops. This approach matters in Tenerife because mountain roads, parking and microclimates can turn a short distance into a slow journey. It also makes small villages and local neighbourhoods feel less like attractions and more like places with their own rhythm.

    A sensible cluster is Tacoronte historic centre, the farmers’ market and El Sauzal. I check the route before leaving, save the main parking or bus information offline and keep one optional stop that can be removed. For the wider area, I use my Tacoronte and El Sauzal guide so the day has a clear geographic logic instead of zig-zagging across the island.

    Driving, buses and parking strategy

    On rural roads I assume the final kilometres will take longer than navigation apps suggest. I keep to my lane, use safe pull-outs only, and never stop on a bend simply because a viewpoint looks attractive. If the destination has limited parking, arriving earlier is usually more useful than trying to find a “secret” space. I also avoid blocking house entrances, agricultural tracks, bus stops and emergency access.

    Public transport can be a good option for some north Tenerife days, but I verify the current TITSA timetable rather than relying on an old screenshot or blog. I identify the final practical return service before starting a walk. My Tenerife bus guide explains the ten+ system and the planning habits I use when I travel without a car.

    Weather and what I carry

    I pack for the exact environment rather than for the temperature at my hotel. In the north and in Anaga, cloud, wind and light rain can appear even when the south is sunny. On the coast, the Atlantic can be rough despite warm air temperatures. My basic kit is water, sun protection, a charged phone, a light layer and footwear appropriate to the surface. For rural walks I add a thin waterproof layer and a little more water than I think I will need.

    The island-wide forecast is only a starting point. I compare the coast, the hills and higher elevations separately and use my Tenerife weather by month guide to understand why the same day can feel very different across the island.

    Responsible travel in a lived-in place

    Agua García is not a theme park. I keep noise low near homes, stay on marked paths, take rubbish away and ask before photographing people at close range. In agricultural areas I never enter terraces or fields to improve a photograph. Small decisions like buying a coffee, lunch or local product from an open business can also make the visit more connected to the community without turning local life into a performance for visitors.

    I also treat closures and temporary restrictions as part of the destination, not an inconvenience to bypass. Fire risk, storm damage, rockfall or maintenance can change access. If a road, beach or trail is closed, I use the backup plan and move on.

    Frequently asked questions

    Is Agua García suitable for children?

    For families comfortable on forest paths, the short interpreted routes can be an excellent choice. I still supervise children around slopes, roots and any historic cavities.

    Is it the same as Anaga?

    No. Both contain monteverde vegetation, but Agua García is in Tacoronte within the Las Lagunetas protected landscape. It offers a quieter, compact forest experience compared with Anaga’s larger mountain network.

    How long should I stay?

    For the short route and a relaxed look around, I would allow 60–90 minutes. A longer visit can include both loops, the information centre and time in Tacoronte.

    Final thoughts

    Agua García is one of my favourite types of Tenerife stop: small in distance but rich in context. A few kilometres of forest reveal ancient trees, water history, old extraction sites and the cloud-dependent ecology of the north. I would come for the cool air and easy walking, then stay long enough to understand why the forest exists at all.

    A slower way to experience the area

    I leave room for unplanned time because the best part of rural Tenerife is often not the named attraction. A cloud opening over a ridge, a short conversation in a bar, a view from a legal pull-out or the smell of wet forest can become the memory of the day. If every fifteen minutes is assigned to a stop, I end up watching the clock instead of the place.

    I also avoid building two demanding mountain objectives into the same day. Even if each route looks short, the combination of driving, elevation, parking and changing weather creates fatigue. One main walk plus one village or viewpoint is usually my preferred balance.

    Navigation and phone coverage

    I download the route and essential map area before leaving accommodation. Mountain valleys can have patchy mobile coverage, and battery drains faster when a phone searches constantly for signal. I carry a power bank on longer days and keep the official trail name or destination written down so I can ask for help clearly if needed.

    For hikes, I use official signed routes as the primary reference and treat community GPX tracks as secondary information. A line on a mapping app may cross private land, an old path or a closed section. If signage and the downloaded track disagree, I stop and reassess rather than force the digital route.

    Food, water and toilets

    Small villages are not guaranteed service stations. I carry enough water to complete the main activity even if the local bar is closed, and I use toilets when I have a legitimate opportunity rather than assuming the next viewpoint will have facilities. I also bring a small rubbish bag because bins are limited on many rural routes.

    When a village restaurant is open, I prefer to eat there rather than carry an elaborate picnic into a fragile landscape. It supports a local business and gives the day a natural pause. I still carry emergency snacks so a closed kitchen never becomes a safety problem.

  • PR-TF 5 Chamorga to Igueste de San Andrés Hiking Guide: Remote Anaga Traverse

    PR-TF 5 Chamorga to Igueste de San Andrés Hiking Guide: Remote Anaga Traverse

    PR-TF 5 Chamorga to Igueste de San Andrés Hiking Guide is one of the more remote point-to-point days in Anaga, moving from a road-end village through humid high ground and exposed ravine country before dropping almost to sea level. This route is not difficult because of one technical obstacle; it is demanding because it combines remoteness, repeated climbing and a long descent with transport at opposite ends.

    Anaga rewards slower planning. Roads are narrow, cloud can sit on the ridge while the coast stays bright, and a short distance on the map can hide a large amount of vertical movement. For this guide I use the current Turismo de Tenerife route sheet as the technical baseline. Trail status can change after fire risk, storms, maintenance or rockfall, so I check the official page again shortly before walking rather than relying on an old GPX file or a saved screenshot.

    Quick route facts

    Official routePR-TF 5 Chamorga Igueste
    StartChamorga
    FinishIgueste de San Andrés
    Route typeLinear
    Distance10.3 km
    Official duration5 hr
    DifficultyMedium
    Maximum altitude644 m
    Minimum altitude17 m
    Accumulated ascent616.43 m
    Accumulated descent1,074.61 m
    Protected areaAnaga Rural Park
    PermitNo
    Homologation statusIn process

    Why this route deserves its own guide

    The route is only one line on Tenerife’s trail map, but it solves a specific travel question: how to experience Anaga Rural Park on foot without pretending that every path has the same character. Here, the numbers matter. A route of 10.3 km with 616.43 m of accumulated ascent and 1,074.61 m of descent asks for a different day plan from a coastal promenade or a viewpoint stop.

    I also like to place it inside a wider cluster rather than treating it as an isolated hike. Useful planning pages on this site are Chamorga guide; Igueste de San Andrés guide; Anaga Rural Park guide; Tenerife bus guide. Reading those together gives a much better picture of roads, buses, nearby villages, alternative trails and what to do if weather makes the original plan unattractive.

    How the route unfolds

    1. Chamorga

    I use Chamorga as a deliberate orientation point. Before moving, I confirm the first waymark, the direction of travel and whether the terrain matches the official description. Starting correctly saves far more time than correcting a mistake later.

    2. the monteverde climb toward La Cumbrilla

    Around the monteverde climb toward La Cumbrilla, the route changes character enough that I use it as a mental checkpoint. I compare progress with the planned time and decide whether the pace still leaves a comfortable margin.

    3. Lomo de Las Bodegas

    At Lomo de Las Bodegas, I pay more attention to surfaces and junctions than to speed. Old paths can meet farm tracks or roads here, and the correct line is not always the widest one.

    4. the ridges above the Anosma and Ijuana ravines

    The section around the ridges above the Anosma and Ijuana ravines is where I pause briefly for water and to look back. Seeing the ground already covered often makes the route profile easier to understand than staring at a phone chart.

    5. Las Casillas

    Around Las Casillas, the route changes character enough that I use it as a mental checkpoint. I compare progress with the planned time and decide whether the pace still leaves a comfortable margin.

    6. the zigzag descent to Igueste de San Andrés

    The final approach reaches the zigzag descent to Igueste de San Andrés. I keep enough water and concentration for this part rather than treating the last kilometre as automatic. On linear routes, I already know how I am leaving the finish before I start walking.

    How difficult does it feel in practice?

    The official grade is medium, but the vertical profile deserves respect: 616.43 m of climbing and 1,074.61 m of descent. I expect legs to tire on the downward sections and I do not save all food or water for the summit or midpoint.

    I separate technical difficulty from physical effort. A well-made path can still be tiring when it climbs continuously; a short route can feel serious when it is steep; and a long descent can be harder on knees than the climb was on lungs. I therefore use the official grade as one input, not as a guarantee that the route will feel easy for every visitor.

    Navigation and waymarking

    I download an offline map before leaving and keep the route name in Spanish. At junctions I look for the painted trail marks and signs before checking the phone, because GPS can drift beside cliffs, in ravines and under dense forest. I never follow another hiking group simply because they appear confident; they may be taking a different branch or returning to a different vehicle.

    Anaga Laurel Forest Trail Tenerife

    When a junction is unclear, I stop immediately. Walking ten uncertain minutes downhill can create a long climb back. This habit is especially useful in Anaga and Teno, where historic paths cross agricultural tracks and local access roads, and in Corona Forestal where forestry tracks can look deceptively similar.

    Weather: the forecast I actually check

    For Anaga I check the ridge forecast as well as the coast. Moist trade-wind cloud can reduce visibility and make stone or roots slippery while Santa Cruz or Bajamar remains bright. I carry a light shell even on a warm day and avoid assuming that a coastal temperature represents the forest.

    I also check wind and any civil-protection or wildfire restrictions. Calima can reduce visibility and raise heat stress; heavy rain can polish stone and destabilise steep ground; strong trade-wind cloud can make a ridge feel cold even when the coast is comfortable. If an official closure is active, I change the plan. A hiking article is never a substitute for the live status of the trail.

    Water, food and clothing

    • Carry water with a reserve; I do not assume fountains are available or safe unless the current route information explicitly says so.
    • Use closed shoes with real grip. Wet laurisilva, polished stone and loose volcanic material all punish smooth urban soles.
    • Take a light windproof or waterproof layer even when the coast looks sunny.
    • Pack sun protection: UV exposure remains strong above cloud and on open ridges.
    • Bring compact food that can be eaten in small portions without a long stop.
    • Keep a charged phone, offline map and a small power bank on longer or remote routes.

    Transport and the linear-route problem

    This is a linear route from Chamorga to Igueste de San Andrés, so I solve the return journey before I leave. Rural bus frequency can be limited, and the first or last service may not fit hiking hours. I check current TITSA timetables on the day, save taxi numbers when appropriate and never assume that a bus shown on an old blog still runs at the same time.

    If I want to reduce early driving, I sometimes compare accommodation around Santa Cruz de Tenerife. I choose the base for the trail network I plan to use rather than simply booking the cheapest room on the opposite side of the island.

    A route plan that leaves margin

    My day plan has three times, not one: intended start, latest sensible turnaround or decision point, and an absolute finish target. I add margin for photographs, wrong turns, slower companions and bus delays. The official duration is useful for comparison, but it is not a reservation slot.

    On longer routes I avoid stacking another timed attraction immediately afterwards. A hike that finishes later than expected should not create pressure to rush the final descent or drive tired across the island. On short routes I may combine the walk with a nearby village, but I still leave enough daylight to handle a navigation mistake or a change in weather.

    What I pay attention to in the landscape

    In Anaga I look for the transition between laurisilva, fayal-brezal, cultivated terraces and drier coastal vegetation. The old paths are cultural infrastructure as much as hiking routes: they connected hamlets long before modern roads made the mountains easier to cross.

    Anaga Tenerife

    I stay on the signed route, avoid shortcuts and leave terraces, walls, plants and abandoned structures untouched. Stone cairns added by visitors can be misleading, so I do not build them. In protected areas I also avoid loud music: hearing wind, birds and village sounds is part of what makes these routes different from a resort walk.

    Photography without creating extra risk

    I plan photographs at safe pauses rather than stopping in the middle of a descent or road section. A wide image often works better when the trail itself leads into the frame, and forest photographs benefit from texture and layers rather than a single distant landmark. I never cross a barrier, step onto an unstable edge or trample vegetation to remove an obstruction from a photo.

    Who I would recommend this route to

    I recommend it to walkers with reasonable fitness and some experience on mountain paths. Beginners can enjoy the landscape through shorter nearby routes first, then decide whether the longer descent and transport logistics suit them.

    How I would combine it with nearby places

    I keep the rest of the day light: a nearby hamlet, a viewpoint or a meal is enough. Anaga roads are slow and winding, so pairing two ambitious hikes usually creates more driving and less enjoyment. If cloud closes in on the ridge, I switch to a lower coastal stop rather than chasing clear sky across several mountain roads.

    Anaga Forest Tenerife

    Official information to check before setting out

    The technical source for this guide is the official Turismo de Tenerife route page. I check it shortly before departure for status notices, management advice and any change to access. I also check the current weather and the daylight available for the date of the hike.

    Common mistakes I avoid

    • Using a beach-resort forecast for a mountain or forest route.
    • Starting without an offline map because mobile signal looked strong at the road.
    • Following another group at a junction instead of checking the route markings.
    • Assuming “no permit” means “always open.” Temporary closures are a separate issue.
    • Carrying exactly the expected amount of water with no reserve.
    • Leaving the return transport of a linear hike to the finish.
    • Underestimating how much a long descent can fatigue knees and reduce concentration.

    Frequently asked questions

    Do I need a permit?

    The current official route sheet lists the permit requirement as No. That does not mean the trail can never close temporarily, so I still verify the live status before leaving.

    Is the official hiking time realistic?

    The official reference is 5 hr. I treat that as a comparison figure, then add my own margin for breaks, photography, navigation and the pace of the slowest person in the group.

    Can I do it in ordinary trainers?

    I prefer trail or hiking shoes with useful grip. The cost of carrying slightly more suitable footwear is small compared with the loss of confidence that comes from slippery soles on wet stone or loose volcanic ground.

    What if the cloud comes in?

    I slow down, check the route more often and reassess whether the next section still makes sense. If visibility, rain or wind removes my safety margin, I turn back or use the backup plan. Tenerife’s microclimates are part of the island, not an exception to the itinerary.

    Is it suitable for children?

    I would not choose this as a default family hike with young children. The length or vertical load makes it better suited to experienced older children or teenagers who already enjoy mountain walking. Families have many shorter alternatives on Tenerife.

    Final thoughts

    PR-TF 5 Chamorga Igueste works best when I treat the numbers and the landscape with equal seriousness. The route gives a focused way to experience Anaga Rural Park, but the useful preparation is simple: verify the live status, start with enough daylight, carry a small reserve of food and water, and solve the return journey before walking. That approach leaves more attention for the path itself—and less for avoidable problems.

  • PR-TF 10 Hiking Guide: Cruz del Carmen to Punta del Hidalgo

    PR-TF 10 Hiking Guide: Cruz del Carmen to Punta del Hidalgo

    PR-TF 10 is one of the most satisfying ways to understand the vertical geography of Anaga. Instead of driving from viewpoint to viewpoint, the trail drops from the laurel forest around Cruz del Carmen through Las Carboneras and Chinamada to the Atlantic at Punta del Hidalgo. The scenery changes continuously: humid forest, rural hamlets, exposed ridges, rock-cut paths and finally a dramatic coastal descent.

    According to Turismo de Tenerife, the full linear route is 10.4 km, takes about four hours, is graded medium difficulty and descends from a maximum elevation of 949 m to around 10 m. The official profile lists roughly 420.64 m of accumulated ascent and 1,300.38 m of descent, and no authorization is required. The numbers make the key challenge clear: this is not a flat 10 km walk. The long descent is what many legs feel the next day.

    PR-TF 10 at a glance

    StartCruz del Carmen
    FinishPunta del Hidalgo
    Distance10.4 km
    Official durationAbout 4 hours
    DifficultyMedium
    TypeLinear
    Maximum elevation949 m
    Minimum elevation10 m
    Accumulated ascent420.64 m
    Accumulated descent1,300.38 m
    PermitNot required on the official listing

    Why I prefer walking it downhill

    The official direction from Cruz del Carmen to Punta del Hidalgo makes logistical and physical sense. I begin in cool monteverde and finish by the sea, with most of the route trending downhill. Downhill does not mean easy: long descents load knees and quadriceps, and the final exposed sections can feel tiring after several hours. Trekking poles can be useful if I am comfortable using them.

    Walking the opposite way is possible for strong hikers, but it turns the route into a major climb from near sea level toward almost 1,000 metres. For a first attempt, I would follow the standard direction unless I had a specific training goal and a very clear transport plan.

    Stage 1: Cruz del Carmen and the laurel forest

    Cruz del Carmen is an ideal start because it has the Anaga visitor centre, a viewpoint and immediate access to dense laurisilva. The first part of the route descends through faya-brezal and other monteverde vegetation. Roots, damp soil and stone steps can be slippery even when the coast is dry, so I start in hiking shoes rather than casual trainers.

    Anaga Laurel Forest Trail Tenerife

    If I have never visited the area, I arrive early enough to spend a few minutes at the visitor centre. My Cruz del Carmen guide explains the facilities and short walks around the trailhead.

    Stage 2: Las Carboneras

    The route gradually leaves the enclosed forest and reaches the rural landscape around Las Carboneras. This is where I feel the cultural side of Anaga most strongly: homes, terraces, small roads and restaurants appear among steep slopes. I do not treat the village as a refuelling guarantee; I carry my own water and food because rural opening hours can change.

    If the full hike is too much, the village is also connected to PR-TF 10.1. My Las Carboneras guide is useful for turning this section into a shorter day.

    Stage 3: Chinamada and the cave-house landscape

    Chinamada is one of the most distinctive stops on the route. Traditional cave houses are integrated into the rock and the settlement sits high above the north coast. I move quietly, because these are lived-in homes rather than an open-air museum. The village is also a natural place to reassess weather, water and daylight before the final descent.

    For background on the settlement and its cave-house tradition, I use my Chinamada guide. If visibility is poor or the trail has become slippery, this is also where I would be willing to change plans instead of forcing the coastal descent.

    Illustrated guide: PR-TF 10 Hiking, with practical visitor tips
    Illustrated guide: PR-TF 10 Hiking.

    Stage 4: the descent to Punta del Hidalgo

    The final section is visually dramatic. The path cuts through rocky slopes with wide views of the Atlantic and the north coast. Exposure to sun and wind increases as the forest disappears. I keep water in reserve for this stage and do not assume the sea breeze means the sun is weak.

    Punta del Hidalgo is a satisfying finish because there are services, buses and the possibility of a meal or swim if conditions are appropriate. I never plan the swim as guaranteed; after a long hike I check the flags and sea state rather than entering the water simply because I am hot.

    Transport logistics: the part I plan first

    Because PR-TF 10 is linear, transport is not a detail. I normally plan the return connection before deciding the start time. A common strategy is to use public transport so I do not have to retrieve a car from the mountains. Exact bus routes and frequencies can change, so I verify TITSA on the day and build margin around the final service I am willing to take.

    My Tenerife bus guide explains ten+ cards, transfers and why I save the return timetable offline. With two cars, a shuttle is possible, but I avoid leaving vehicles in informal roadside spaces at either end.

    Weather, footwear and water

    PR-TF 10 crosses several microclimates in one walk. Cruz del Carmen can be cool, damp and foggy while Punta del Hidalgo is sunny and warm. I carry a light waterproof or windproof layer, sun protection, enough water for the full route and food that is easy to eat on the move. I also keep one dry layer inside the pack because sweat and cloud can make the upper section surprisingly chilly.

    I check trail status after any period of heavy rain or strong wind. Fallen branches, slippery sections and maintenance closures matter more than a perfect weather icon.

    Official source and live status

    The core technical data in this guide comes from Turismo de Tenerife’s official PR-TF 10 listing. I also check Tenerife ON immediately before hiking for closures, restrictions or alerts. The official listing explicitly reminds hikers to respect signs, check weather and carry suitable equipment.

    Who I would recommend this hike to

    I recommend PR-TF 10 to walkers comfortable with several hours on uneven mountain paths and a sustained descent. It is not the route I would choose for someone testing hiking shoes for the first time, for travellers with unstable knees, or for a group that wants to stop repeatedly for long lunches. For easier forest walking, the Sendero de los Sentidos is a much gentler introduction to Anaga.

    Anaga Tenerife

    My pacing strategy

    I divide the route mentally into four sections and avoid rushing the first forest kilometres. I take a proper break around Las Carboneras or Chinamada, then keep enough energy for the exposed descent. Photographing every bend can quietly add a surprising amount of time, so I compare progress with daylight rather than with the official four-hour estimate.

    Frequently asked questions

    Do I need a permit?

    The official Turismo de Tenerife listing says no authorization is required for PR-TF 10. I still check the current status because temporary closures can apply.

    Can I do only part of the route?

    Yes. Cruz del Carmen to Las Carboneras and the PR-TF 10.1 connection around Las Carboneras and Chinamada allow shorter plans, but transport still needs thought.

    Is it suitable after rain?

    I am cautious after rain because roots, stone and clay-like sections can become slippery. If authorities advise against walking or a section is closed, I choose another day.

    Final thoughts

    PR-TF 10 is more than a viewpoint hike. It shows how forest, village and coast fit together in Anaga. I think the route is at its best when I treat logistics as seriously as scenery: start early, plan the bus, carry proper gear and leave enough time to enjoy Las Carboneras and Chinamada rather than racing downhill to the sea.

    Anaga Forest Tenerife

    A slower way to experience the area

    I leave room for unplanned time because the best part of rural Tenerife is often not the named attraction. A cloud opening over a ridge, a short conversation in a bar, a view from a legal pull-out or the smell of wet forest can become the memory of the day. If every fifteen minutes is assigned to a stop, I end up watching the clock instead of the place.

    I also avoid building two demanding mountain objectives into the same day. Even if each route looks short, the combination of driving, elevation, parking and changing weather creates fatigue. One main walk plus one village or viewpoint is usually my preferred balance.

    Navigation and phone coverage

    I download the route and essential map area before leaving accommodation. Mountain valleys can have patchy mobile coverage, and battery drains faster when a phone searches constantly for signal. I carry a power bank on longer days and keep the official trail name or destination written down so I can ask for help clearly if needed.

    For hikes, I use official signed routes as the primary reference and treat community GPX tracks as secondary information. A line on a mapping app may cross private land, an old path or a closed section. If signage and the downloaded track disagree, I stop and reassess rather than force the digital route.

    Food, water and toilets

    Small villages are not guaranteed service stations. I carry enough water to complete the main activity even if the local bar is closed, and I use toilets when I have a legitimate opportunity rather than assuming the next viewpoint will have facilities. I also bring a small rubbish bag because bins are limited on many rural routes.

    When a village restaurant is open, I prefer to eat there rather than carry an elaborate picnic into a fragile landscape. It supports a local business and gives the day a natural pause. I still carry emergency snacks so a closed kitchen never becomes a safety problem.

  • PR-TF 2 Taborno to Valleseco Hiking Guide: Pico del Inglés and Anaga Descent

    PR-TF 2 Taborno to Valleseco Hiking Guide: Pico del Inglés and Anaga Descent

    PR-TF 2 Taborno to Valleseco Hiking Guide is a high-to-low traverse that links a tiny Anaga hamlet, one of the massif’s best-known viewpoints and the deep eastern side of the mountains. The unusual feature is the amount of descent: the route loses far more height than it gains. I plan it as a serious descent day rather than calling it easy simply because the finish is near sea level.

    Anaga rewards slower planning. Roads are narrow, cloud can sit on the ridge while the coast stays bright, and a short distance on the map can hide a large amount of vertical movement. For this guide I use the current Turismo de Tenerife route sheet as the technical baseline. Trail status can change after fire risk, storms, maintenance or rockfall, so I check the official page again shortly before walking rather than relying on an old GPX file or a saved screenshot.

    Quick route facts

    Official routePR-TF 2 Taborno Valleseco
    StartTaborno
    FinishValleseco
    Route typeLinear
    Distance10 km
    Official duration4 hr 30 min
    DifficultyMedium
    Maximum altitude1,006 m
    Minimum altitude110 m
    Accumulated ascent630.58 m
    Accumulated descent1,152.87 m
    Protected areaAnaga Rural Park
    PermitNo
    Homologation statusIn process

    Why this route deserves its own guide

    The route is only one line on Tenerife’s trail map, but it solves a specific travel question: how to experience Anaga Rural Park on foot without pretending that every path has the same character. Here, the numbers matter. A route of 10 km with 630.58 m of accumulated ascent and 1,152.87 m of descent asks for a different day plan from a coastal promenade or a viewpoint stop.

    I also like to place it inside a wider cluster rather than treating it as an isolated hike. Useful planning pages on this site are Taborno guide; Pico del Inglés guide; Anaga Rural Park guide; Santa Cruz guide. Reading those together gives a much better picture of roads, buses, nearby villages, alternative trails and what to do if weather makes the original plan unattractive.

    How the route unfolds

    1. Taborno village and its bus stop

    I use Taborno village and its bus stop as a deliberate orientation point. Before moving, I confirm the first waymark, the direction of travel and whether the terrain matches the official description. Starting correctly saves far more time than correcting a mistake later.

    2. the climb from the hamlet toward the Anaga ridge

    Around the climb from the hamlet toward the Anaga ridge, the route changes character enough that I use it as a mental checkpoint. I compare progress with the planned time and decide whether the pace still leaves a comfortable margin.

    3. the road section around Pico del Inglés

    At the road section around Pico del Inglés, I pay more attention to surfaces and junctions than to speed. Old paths can meet farm tracks or roads here, and the correct line is not always the widest one.

    4. the descent past Casa de los Berros and Casas de la Fortaleza

    The section around the descent past Casa de los Berros and Casas de la Fortaleza is where I pause briefly for water and to look back. Seeing the ground already covered often makes the route profile easier to understand than staring at a phone chart.

    5. the final approach to Valleseco

    The final approach reaches the final approach to Valleseco. I keep enough water and concentration for this part rather than treating the last kilometre as automatic. On linear routes, I already know how I am leaving the finish before I start walking.

    How difficult does it feel in practice?

    The official grade is medium, but the vertical profile deserves respect: 630.58 m of climbing and 1,152.87 m of descent. I expect legs to tire on the downward sections and I do not save all food or water for the summit or midpoint.

    I separate technical difficulty from physical effort. A well-made path can still be tiring when it climbs continuously; a short route can feel serious when it is steep; and a long descent can be harder on knees than the climb was on lungs. I therefore use the official grade as one input, not as a guarantee that the route will feel easy for every visitor.

    Navigation and waymarking

    I download an offline map before leaving and keep the route name in Spanish. At junctions I look for the painted trail marks and signs before checking the phone, because GPS can drift beside cliffs, in ravines and under dense forest. I never follow another hiking group simply because they appear confident; they may be taking a different branch or returning to a different vehicle.

    When a junction is unclear, I stop immediately. Walking ten uncertain minutes downhill can create a long climb back. This habit is especially useful in Anaga and Teno, where historic paths cross agricultural tracks and local access roads, and in Corona Forestal where forestry tracks can look deceptively similar.

    Weather: the forecast I actually check

    For Anaga I check the ridge forecast as well as the coast. Moist trade-wind cloud can reduce visibility and make stone or roots slippery while Santa Cruz or Bajamar remains bright. I carry a light shell even on a warm day and avoid assuming that a coastal temperature represents the forest.

    Anaga Laurel Forest Tenerife

    I also check wind and any civil-protection or wildfire restrictions. Calima can reduce visibility and raise heat stress; heavy rain can polish stone and destabilise steep ground; strong trade-wind cloud can make a ridge feel cold even when the coast is comfortable. If an official closure is active, I change the plan. A hiking article is never a substitute for the live status of the trail.

    Water, food and clothing

    • Carry water with a reserve; I do not assume fountains are available or safe unless the current route information explicitly says so.
    • Use closed shoes with real grip. Wet laurisilva, polished stone and loose volcanic material all punish smooth urban soles.
    • Take a light windproof or waterproof layer even when the coast looks sunny.
    • Pack sun protection: UV exposure remains strong above cloud and on open ridges.
    • Bring compact food that can be eaten in small portions without a long stop.
    • Keep a charged phone, offline map and a small power bank on longer or remote routes.

    Transport and the linear-route problem

    This is a linear route from Taborno to Valleseco, so I solve the return journey before I leave. Rural bus frequency can be limited, and the first or last service may not fit hiking hours. I check current TITSA timetables on the day, save taxi numbers when appropriate and never assume that a bus shown on an old blog still runs at the same time.

    If I want to reduce early driving, I sometimes compare accommodation around Santa Cruz de Tenerife. I choose the base for the trail network I plan to use rather than simply booking the cheapest room on the opposite side of the island.

    A route plan that leaves margin

    My day plan has three times, not one: intended start, latest sensible turnaround or decision point, and an absolute finish target. I add margin for photographs, wrong turns, slower companions and bus delays. The official duration is useful for comparison, but it is not a reservation slot.

    On longer routes I avoid stacking another timed attraction immediately afterwards. A hike that finishes later than expected should not create pressure to rush the final descent or drive tired across the island. On short routes I may combine the walk with a nearby village, but I still leave enough daylight to handle a navigation mistake or a change in weather.

    What I pay attention to in the landscape

    In Anaga I look for the transition between laurisilva, fayal-brezal, cultivated terraces and drier coastal vegetation. The old paths are cultural infrastructure as much as hiking routes: they connected hamlets long before modern roads made the mountains easier to cross.

    I stay on the signed route, avoid shortcuts and leave terraces, walls, plants and abandoned structures untouched. Stone cairns added by visitors can be misleading, so I do not build them. In protected areas I also avoid loud music: hearing wind, birds and village sounds is part of what makes these routes different from a resort walk.

    Photography without creating extra risk

    I plan photographs at safe pauses rather than stopping in the middle of a descent or road section. A wide image often works better when the trail itself leads into the frame, and forest photographs benefit from texture and layers rather than a single distant landmark. I never cross a barrier, step onto an unstable edge or trample vegetation to remove an obstruction from a photo.

    Anaga Laurel Forest Trail Tenerife

    Who I would recommend this route to

    I recommend it to walkers with reasonable fitness and some experience on mountain paths. Beginners can enjoy the landscape through shorter nearby routes first, then decide whether the longer descent and transport logistics suit them.

    How I would combine it with nearby places

    I keep the rest of the day light: a nearby hamlet, a viewpoint or a meal is enough. Anaga roads are slow and winding, so pairing two ambitious hikes usually creates more driving and less enjoyment. If cloud closes in on the ridge, I switch to a lower coastal stop rather than chasing clear sky across several mountain roads.

    Official information to check before setting out

    The technical source for this guide is the official Turismo de Tenerife route page. I check it shortly before departure for status notices, management advice and any change to access. I also check the current weather and the daylight available for the date of the hike.

    Common mistakes I avoid

    • Using a beach-resort forecast for a mountain or forest route.
    • Starting without an offline map because mobile signal looked strong at the road.
    • Following another group at a junction instead of checking the route markings.
    • Assuming “no permit” means “always open.” Temporary closures are a separate issue.
    • Carrying exactly the expected amount of water with no reserve.
    • Leaving the return transport of a linear hike to the finish.
    • Underestimating how much a long descent can fatigue knees and reduce concentration.

    Frequently asked questions

    Do I need a permit?

    The current official route sheet lists the permit requirement as No. That does not mean the trail can never close temporarily, so I still verify the live status before leaving.

    Is the official hiking time realistic?

    The official reference is 4 hr 30 min. I treat that as a comparison figure, then add my own margin for breaks, photography, navigation and the pace of the slowest person in the group.

    Can I do it in ordinary trainers?

    I prefer trail or hiking shoes with useful grip. The cost of carrying slightly more suitable footwear is small compared with the loss of confidence that comes from slippery soles on wet stone or loose volcanic ground.

    What if the cloud comes in?

    I slow down, check the route more often and reassess whether the next section still makes sense. If visibility, rain or wind removes my safety margin, I turn back or use the backup plan. Tenerife’s microclimates are part of the island, not an exception to the itinerary.

    Anaga Tenerife

    Is it suitable for children?

    I would not choose this as a default family hike with young children. The length or vertical load makes it better suited to experienced older children or teenagers who already enjoy mountain walking. Families have many shorter alternatives on Tenerife.

    Final thoughts

    PR-TF 2 Taborno Valleseco works best when I treat the numbers and the landscape with equal seriousness. The route gives a focused way to experience Anaga Rural Park, but the useful preparation is simple: verify the live status, start with enough daylight, carry a small reserve of food and water, and solve the return journey before walking. That approach leaves more attention for the path itself—and less for avoidable problems.