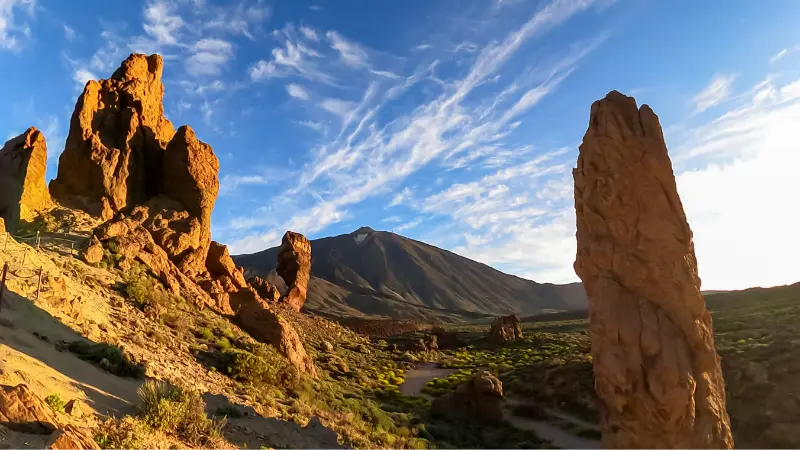
Teide–Pico Viejo–TF-38 Hiking Guide is one of those Teide routes where the map statistics only tell part of the story. The official line is 9.3 km with 109 m of accumulated ascent, yet the real planning question is how the trail fits into the national park, the altitude and the start-to-finish logistics.
What makes this route distinctive is a dramatic descent from the upper Teide station area across dark lava toward Pico Viejo and the western volcanic landscape. I use the current Turismo de Tenerife trail sheet as the technical baseline and I check it again immediately before walking. High-mountain conditions, maintenance, snow, ice, wildfire measures or park-management decisions can change access with little relevance to what an old blog post or saved GPX file says.
Quick route facts
| Official trail | Teide – Pico Viejo – TF 38 |
|---|---|
| Start | La Rambleta / Mirador de Pico Viejo |
| Finish | Mirador de Las Narices del Teide |
| Route type | Linear |
| Distance | 9.3 km |
| Official duration | 5 hr |
| Difficulty | High |
| Maximum altitude | 3,498 m |
| Minimum altitude | 2,048 m |
| Accumulated ascent | 109 m |
| Accumulated descent | 1,521 m |
| Permit | No for Trail 09 itself |
Why I would choose this trail
I would choose this route for its particular view of Teide rather than simply because it adds another trail number to a trip. The route crosses the young volcanic landscape associated with Pico Viejo and the western eruptions, giving it a very different character from the pale pumice around Montaña Blanca. That context changes the walk: I pay attention to how geology, vegetation and old access routes explain the shape of the path instead of treating the landscape as a backdrop.

Useful related guides on this site are Mirador de Pico Viejo guide; Los Regatones Negros guide; Chavao guide; Tenerife weather by month. I use them to build a realistic day around one main walk, not to squeeze several substantial hikes into the same schedule.
The route, step by step
1. La Rambleta and the link with Mirador de Pico Viejo
I begin at La Rambleta and the link with Mirador de Pico Viejo by checking that the physical sign and my offline map agree. Early route errors in Teide are easy to make because open volcanic ground can make several lines look equally obvious. I settle into a conservative pace and use the first section to judge wind, breathing and how the surface feels underfoot.
2. the rough descent toward the Pico Viejo crater sector
At the rough descent toward the Pico Viejo crater sector, the route starts to show its own character. I look back as well as forward because the changing angle often makes junctions easier to recognise on the return or helps me understand how the caldera, cones and road network fit together. I do not shortcut switchbacks or follow informal footprints across fragile ground.
3. the long volcanic traverse below Pico Viejo
The section around the long volcanic traverse below Pico Viejo is where I reassess the plan rather than walking automatically. I compare remaining daylight and water with the official distance, then decide whether the original itinerary still makes sense. This is especially important on linear trails where the endpoint may still require another connection before reaching transport.
4. the final descent toward Las Narices del Teide and TF-38
Near the final descent toward Las Narices del Teide and TF-38, I keep enough concentration for the finish. Fatigue often appears after the scenic objective has already been reached, and loose volcanic ground can punish careless steps. I confirm the next signed connection before leaving the official endpoint and avoid turning a successful walk into an improvised extension.
How hard is it really?
The official difficulty is High. I read that grade together with the numbers: 9.3 km, 109 m of ascent, 1,521 m of descent and a maximum altitude of 3,498 m. A low or medium rating inside Teide National Park does not mean the same thing as an urban walk at sea level. Thin air, intense sun, wind, loose pumice and the lack of shade can make a modest distance feel more serious.
I also separate cardiovascular effort from technical difficulty. Some Teide routes are easy to follow but physically demanding; others are short but sit so high that the body responds differently. I set the pace according to the slowest person in the group, take short pauses before fatigue becomes obvious and leave enough reserve for the final kilometre rather than spending all my energy early.
The most important planning issue
the route starts at very high altitude and ends far below on the western side, so access to La Rambleta and the return from the TF-38 area must be solved before setting out. I solve that issue before driving into the national park. Linear routes are especially easy to underestimate because the walking statistics do not include the time needed to reach the start, recover a vehicle or continue to a road, visitor centre or bus stop after the official endpoint.
I save the start and finish separately on an offline map, check the road approach in daylight and note the trail numbers of every planned connection. If the route relies on another trail to reach transport, that connecting distance is part of my day even if it is not included in the official figure above.
Altitude changes the rules
Teide is not a beach excursion with a colder temperature. At these elevations the air is drier, ultraviolet exposure is strong and a breeze can remove heat quickly when I stop. I arrive hydrated, eat before the walk and carry both sun protection and an insulating layer. I do not wait to feel thirsty before drinking.
Headache, unusual breathlessness, nausea, dizziness or a sudden loss of coordination deserve attention at altitude. I do not diagnose symptoms on the trail or try to prove fitness by pushing through them. If someone is deteriorating, the practical response is to stop, reassess and descend or seek help as appropriate. The short length of some upper trails is not a reason to ignore the altitude.
Weather: check the mountain, not the resort
I check the forecast for the Teide highlands rather than using the temperature in Costa Adeje, Los Cristianos or Puerto de la Cruz. The park can be clear above a sea of clouds while the north coast is grey, and it can also be cold, windy or icy while the beaches are warm. Winter snow and ice, strong wind, calima and intense summer sun all change how a route feels.
My weather decision is conservative. If visibility, wind or surface conditions are worse than expected, I shorten the walk or switch to a lower alternative. I never walk past a closure barrier because the route looked fine from a car park. In volcanic terrain, hazards can be concentrated in a section that is invisible from the road.
What I carry
- Enough water for the full route plus a reserve; I do not assume there will be drinking water on the trail.
- Sun hat, high-protection sunscreen and sunglasses.
- A windproof shell and an insulating layer, even when the coast is warm.
- Closed hiking or trail shoes with useful grip on pumice, scoria and rough lava.
- Offline route information, a charged phone and a small power bank on longer days.
- Food that is simple to eat without leaving packaging or organic waste behind.
- Any required permit or reservation, plus identification where the system requires it.
Permit and access rules
The current official route sheet does not list a permit for this trail itself. That does not automatically cover connected summit paths, cable-car access, parking controls or temporary closures, so I still verify the complete itinerary before leaving.

I distinguish three separate questions: whether the trail itself needs authorisation, whether I can legally reach its starting point, and whether my connecting route has its own restrictions. That distinction is particularly important around La Rambleta and the Teide summit, where a short unregulated viewpoint trail can sit next to a regulated summit path.
Getting to the trailhead and dealing with the finish
I avoid building a mountain day around optimistic parking assumptions. Roadside spaces in Teide are limited and stopping outside marked areas can be unsafe or prohibited. On a linear route I decide who is driving, where the vehicle will be, and how everyone will return before the first boot hits the path.
If I want to reduce an early cross-island drive, I sometimes compare accommodation around Tenerife and choose a base that fits the road I actually need. I do not select a hotel only by beach distance if the next morning starts high on the TF-21, TF-24 or TF-38.
Landscape and geology to notice
The best way to understand Teide is to notice transitions rather than search only for one famous rock. Colour changes can reveal different eruptive materials; broad pale pumice fields feel completely different underfoot from dark ʻaʻā-like lava or loose scoria. The caldera wall, subsidiary cones and the immense mass of Teide and Pico Viejo constantly change scale as I move.
I keep to the marked trail. High-mountain plants grow slowly, apparently barren ground can be ecologically sensitive and shortcuts create erosion that remains visible for years. I photograph geological features where they are and leave rocks, obsidian fragments and plants in place.
Flora, wildlife and seasonal details
Retama del Teide and other high-mountain species are not decoration around the path; they are part of a specialised ecosystem adapted to frost, drought, strong radiation and poor volcanic soils. Flowering changes the appearance of the park dramatically in spring and early summer, but I do not step off the trail for a closer photograph.
Wildlife encounters are often subtle: insects, small birds and lizards are easier to notice when the route is quiet. I avoid feeding animals and I carry out every scrap of food. Even biodegradable waste changes behaviour and can attract species that do not belong around busy trailheads.
Best time of day
I generally prefer an early start because parking is easier, the light is softer and I preserve a large daylight margin. On exposed routes the morning can also reduce heat stress. A late-afternoon walk can be beautiful, but only when I know exactly how I will finish before darkness and I am not relying on a facility or transport service that may close earlier.
For photography, side light often reveals volcanic texture better than flat midday light. I still prioritise safe timing over ideal light. A cloud bank, strong wind or delayed start is a reason to simplify the plan, not to rush through the route to catch a photograph.
Can families do this route?
I decide by hiking experience, altitude tolerance and route logistics rather than by a child’s age alone. A family that regularly walks mountain trails may find a short official route straightforward, while a child who has just arrived from sea level may struggle even on a path described as easy. I build the first Teide outing around a short route and a visitor-centre or viewpoint stop before committing to a long traverse.
With children I carry more water and warm clothing than the minimum, plan more pauses and choose a clear turnaround time. I also keep everyone away from unstable lava edges and from roads at trailheads where traffic can move quickly.
How I combine it with the rest of a Teide day
I usually combine one proper hike with one or two low-effort stops. El Portillo, Cañada Blanca, Roques de García and selected roadside viewpoints can add context without turning the day into a race. If the trail itself is long or difficult, I remove extra stops rather than squeezing them into the evening.
Driving inside the park also takes time. I leave room for slow vehicles, viewpoint traffic and weather. After a demanding high-altitude walk, I prefer a simple meal and an uncomplicated descent rather than another ambitious attraction on the opposite side of the island.
Photography without harming the place
Wide frames work particularly well in Teide because the human figure helps communicate scale. I often wait for another walker to move naturally along the marked path rather than stepping across vegetation to create a cleaner composition. Telephoto images can isolate cones, lava fronts and layers of the caldera without leaving the trail.
I keep tripods, backpacks and poles out of the path when other people need to pass. Drone rules are separate from hiking rules and protected areas are not places where I assume recreational flying is allowed. I check the current regulations instead of treating an empty sky as permission.
Common mistakes I avoid
- Using a beach forecast as the mountain forecast.
- Reading distance without looking at ascent, descent and altitude.
- Starting a linear route without a confirmed finish plan.
- Assuming an online GPX proves that a trail is open today.
- Parking partly on the road because the nearest legal space is full.
- Carrying exactly the expected amount of water and no reserve.
- Adding a summit or connecting trail without checking its separate rules.
- Cutting corners across pumice or vegetation to save a few minutes.
Official information to check before setting out
The technical figures in this article come from the official Turismo de Tenerife page for Teide – Pico Viejo – TF 38. I use that page as a starting point, then check any live park notices, weather warnings and reservation requirements that apply to the complete itinerary. I prefer an official closure notice over a recent social-media report from someone who happened to walk the route on a different day.
Frequently asked questions
Do I need a permit?
The current official route sheet does not list a permit for this trail itself. That does not automatically cover connected summit paths, cable-car access, parking controls or temporary closures, so I still verify the complete itinerary before leaving.
Is the official duration a target?
No. The official 5 hr is a useful comparison figure, not a deadline. I add time for route checks, photographs, food, altitude and the pace of the slowest walker. On a linear trail I also add whatever time is needed beyond the official endpoint.
Are normal trainers enough?
I prefer trail or hiking shoes. Even routes with a low technical grade can include loose volcanic material that is tiring and slippery under smooth urban soles. After snow, frost or rain, conditions may change enough that I abandon the route rather than trying to compensate with unsuitable footwear.
Can I rely on mobile coverage?
I do not build the safety plan around it. Coverage can be good in exposed places and poor in folds of terrain. I download the route information, keep the phone charged and tell someone the planned start and finish when I am doing a longer or more remote trail.
Final thoughts
Teide – Pico Viejo – TF 38 is worthwhile because it reveals a specific part of the Teide landscape instead of reducing the national park to the cable car and summit. I get the most from it when I treat the numbers, altitude and logistics with the same respect as the scenery. A well-planned route leaves time to notice the geology, vegetation and scale of Las Cañadas rather than spending the day solving problems that could have been settled before departure.
